Sunday, April 16, 2017

Robe a la Francaise, A Modern Twist.

Jean-François de Troy, The Declaration of Love, 1731
One of my favorite things to do in my own designing (when I'm not obsessed with historical
reacreation) is to use historical garments as the foundation for wearable modern clothes. Whether it be a house robe or a formal gown, there's something enticing and fascinating about blending classical forms with modern sensibilities. Most of the time for my own fashion choices (at least the ones I wear out of the house!) I stick to a very 1940's and early 50's new look vibe. It's suitable for my figure, and I love the look. But for special occasion dresses, it's a lot of fun to just go a little wild, and the girls are the perfect models!

From the collection of the Metripolitan 
I admit to having a weakness for the robe a la francaise, or sack back gown. Even though there's very little about the rococo period that I like (most of it's just too much for me. Music, Interior decorating... even the art) there's something about the fitted tapered front, and elegant sleeves of the robe a la francaise, contrasted against the flowing, voluminous Watteau pleats that I just love. These gowns also showcase some of the most phenomenal use of large prints and particularly striped prints, that I've ever seen. I may be a little obsessed.

I've done one sack backed project before. I have a dressing gown that's a empire waist with a sack back which is both comfortable and elegant. It's been one of my favorites for years, but I've yearned to do a closer approximation of the style. This has been simmering on the back burner for a long time in the "nowhere to wear it and it's not practical for at home" pot. But as I was looking at fabrics for my daughter's Easter dresses inspiration struck. I could do a gown, constructed in the period manner, complete with elbow flounces, with the entire top layer made out of terminally sparkly organze, making a whole modern twist out of a beautiful historical gown. I drew ups some designs and showed them to Ladybug, and she was in love. so away I went.

The original sack back I experimented with for my dressing gown had the pleats gathered into the neckline direct, which had some difficulties inherent to it: all that bulk, the pleats didn't want to turn under into neck seam easily, it wanted to pull at the neckline, etc etc. So for this gown I decided to select the other construction option, which uses a yoke. That way you don't have to turn down all those layers of pleated fabric, but instead just flip the yoke up over them. In some ways the line isn't as clean as pleats falling from the back neckline direct, but the construction is simpler. The yoke also gives you an easy flat space to attache trim, which with planned ruffled ribbon trim, was another plus.

I drafted the gown off of another roccoco inspired gown I had made last year, this one had a faux stomacher and a pollanaise style skirt. It took a standard sleeve pattern that I also have in stock, which made it easier than re-drafting from a block. Super secret: I hate drafting sleeves. If I have something similar I've already drafted I will frequently bastardize the pattern rather than go back and re do sleeve and armscythe drafting. With a few minor alterations, the pattern was a go.

I had a yard and half of super sparkle organza, and about the same of a purple satin. The plan was to use the organza for the entire exterior gown, and the satin for the interior gown and stomacher and then add ruffled trim. The first hurdle showed up as I began laying out pattern pieces This gown uses a LOT of fabric. Yes, those capitals are necessary.  To illustrate the stupid amount of fabric this gown takes: Kitten is 16 months old now and wears 24 month sizes. Her gown used all but scraps of an entire yard of 60" wide organza.  So, when I laid out Ladybug's, it was instantly obvious that I wasn't going to be able to get sleeves, ruffles, and the gown pieces out of the organza unless the back was pitifully narrow.

So back to the stash I went and came out with some embroidered chiffon and an old white silk shirt. There was enough there for the sleeve ruffle and a matching stomacher, and it was a nice compliment. of course it was terrible and slithery to work with, but in for a penny, in for a pound! The only downside was you could see the seam allowances through the chiffon where I made the ruffles. this bothers me but is basically invisible on the finished gown. I may still go back and try to put some trim over it.


The dean of the fashion dept when I was in school, Mrs. Hannan, always said that working with synthetic organza was like trying to sew live spiders together. She's not wrong, but I still do use it occasionally, particularly for little girl dresses. This fabric though? I don't care HOW sparkly it is, I will never EVER use it again. You can't iron it without a pressing cloth. Iron the front? The little plastic jewels melt on the iron. Iron the back? The glue from the jewels seeps through the cloth and onto the iron. It was also a nightmare to sew evenly, you can see how completely crooked my top stitching on these sleeve ruffles is. Every time you hit some of the jewels the fabric jigged, and you might not even see the ones you hit, because they could be in one of the bottom layers. The fabric made what should have been a fun project into rather a nightmare.

Whenever I'm making a gown with a sleeve treatment I like to apply the treatments to the sleeve before I attach the sleeve. This saves wrangling the whole gown around while trying to evenly apply ruffles. I also like to try and cleverly hide all the raw edges. In this case you want to trim the organza as little as possible. because it's evil and ravelly and will slither out of the seams if given half a chance. I flipped the seam allowances to the outside here, and then sewed ribbon trim down over it.

I used a heavy linen underlining to give the bodice some weight. then stay stitched all the satin to it to keep that from slithering off. Then I pinned the pleats, and sewed the yoke down over them. This was a really great way to do the sack back. I wished I'd had more fabric in the back, but it made fairly full pleats.

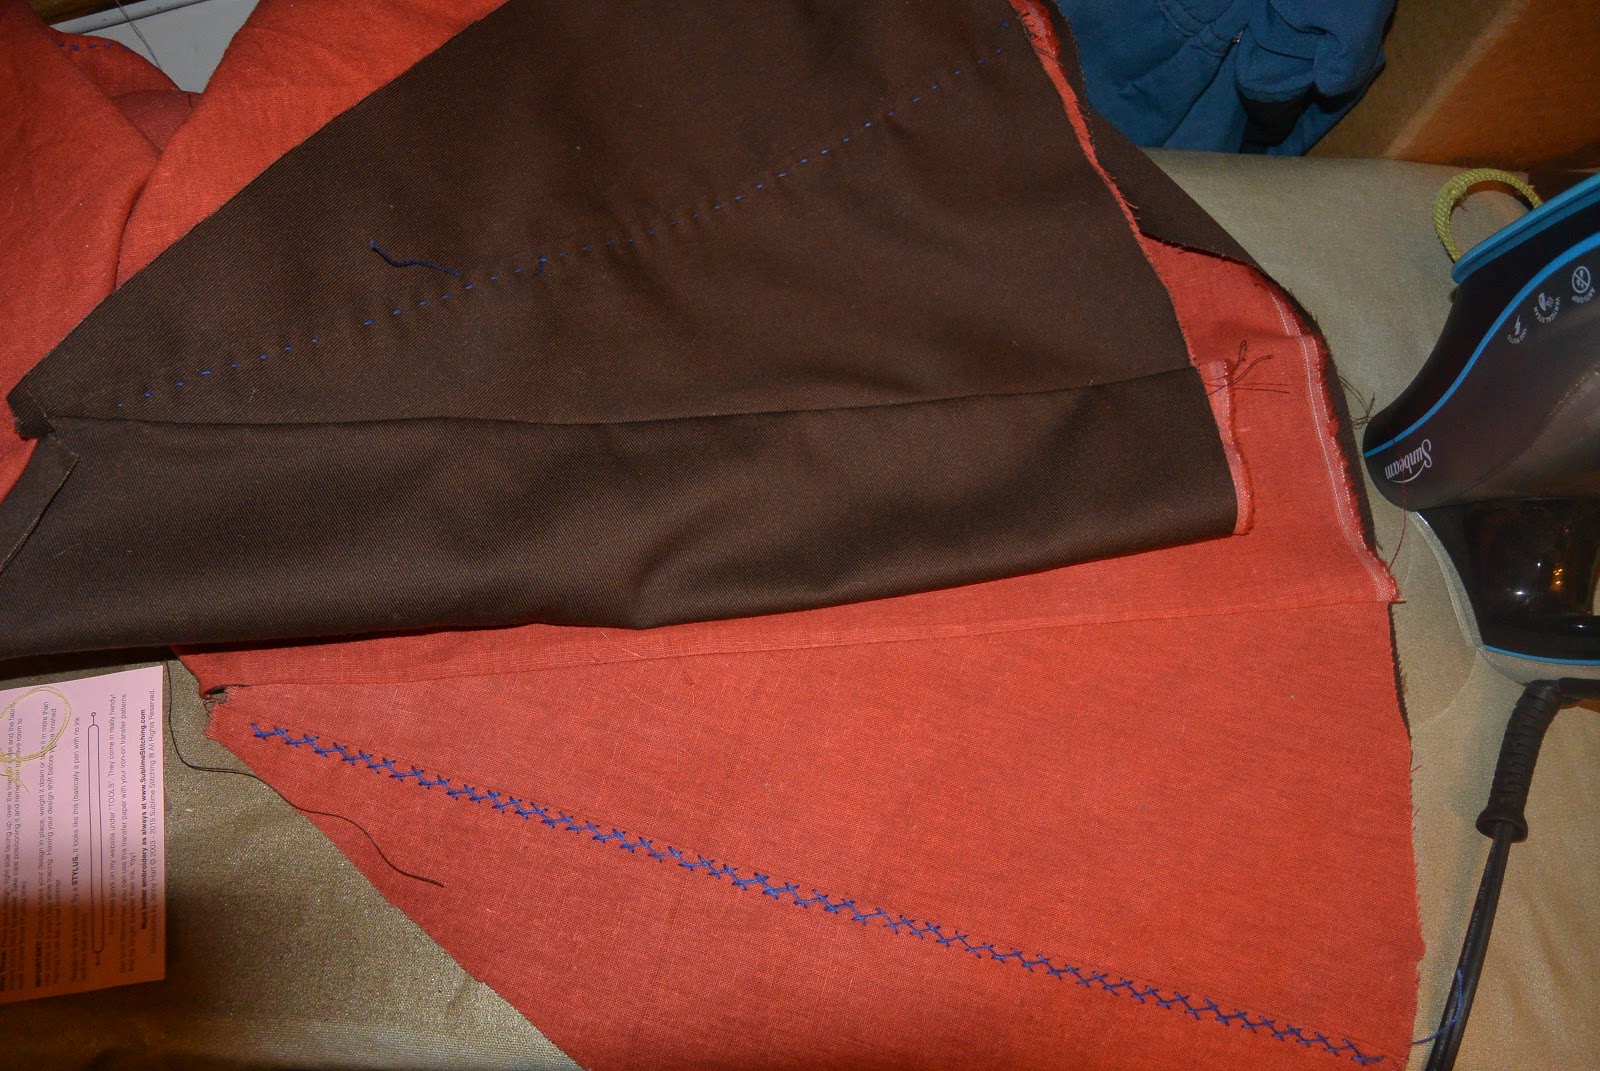
The bodice came together fairly quickly. The trickiest part of the whole gown was pleating in the side pleats. I was able to cheat a little bit because I was using an attached under skirt instead of the historically accurate petticoat so I just caught the pleats in the waist seam and was done with it. Putting in the sleeves and the lining was a nightmare because of the fabric. Instead of just giving all the seam allowances a good heavy steam pressing to make the edges crisp and keep everything in place while I was sewing in the lining, I had to hand baste all the edges of the sleeve and the neckline to the underlining, which, while it seems like a small thing, added another few hours of labor to the job.

Then I added the under skirt. I pleated it onto the bodice, but gathered a large loop of it directly under the side pleats. This gave it a shadow of the silhouette that would have been given by panniers in the original gowns.


With that sorted and the lining sewed down I put on ruffled organza ribbon trim. Yards. and Yards, and Yards of ruffled organza ribbon trim. Because go big or go home right?


Then the stomacher, which I sewed down to the lining at one side, and applied hook and loop tape to the other of for closure. Again, a historical fudge. Stomachers tended to be pinned into place, but that's just not practical for tiny people. The stomacher has one plastic cable tie down the center to help it keep it's shape and two layers of underlining.

Finished and on to Kitten's dress!

I picked cow print for Kitten's dress. Because of a hilarious family story started by my Aunt, my Cousin, and a ridiculous cow print romper one easter long ago cow print baby clothes have become a thing in my family. I decided to keep it going with my youngest this year, so she got her very own cow print gown.

I love drafting for babies: the pieces are barely shaped so it's super easy to change a pattern you know fits to new lines. I started from her little wool kirtle, and moved stuff around some.

The construction process was exactly the same except I could IRON this fabric. Therefore I managed to make her whole gown in about the same time it took me to make Ladybug's sleeves. Seriously, that's the difference fabric makes. (also it's tiny so it goes faster, but not that much faster!) I did do kitten's watteau pleats straight from the neckline and then hand stitch them down into shape. Partially just because I wanted to try both methods back to back, and partially because the gown is so small, more seams in a small space like that just add bulk.

My Model got tired waiting for me to finish....

I had my major oops for the project with Kitten's gown. Somehow, although I checked it twice both when I put the ruffle on the sleeve and when I put the sleeve on the gown, I managed to put the sleeve ruffles on backwards, so the long part is to the front. Thankfully it wasn't super noticeable. I'll take it off and turn it around later when I have more time!
My sparkle princess! 


I added vintage glass buttons to the bows on Kitten's stomacher for a little extra sparkle

note the backwards sleeve ruffle.... 

The first time Ladybug saw Kitten in her gown, she said "Look mom, she's a tiny cow fairy!"
The sack back does look a little like wings when she runs around! 

Crash and Bang didn't get left out. They got Dapper Dude Vests. 

Tuesday, April 4, 2017

Cheater dags! (the story of a 14th century ensemble)

I don't normally write posts about the things I do on commission: I guess I feel a little squiffy writing about something that isn't for anyone in my family without permission, and there is the fact that I don't usually have the model handy to take pictures of. A lot of times too, the work I do for others isn't all that interesting, tunics, pants, basic gowns, nothing really out of the ordinary. But this project I think is interesting all on it's own for being particularly beautiful, and also because I came up with a nifty way to cheat on the dags, which are the super painful part of much 14th century wear that isn't made of wool (fulled wool is a beautiful thing). So I thought I'd do a short write up with some pictures of the cheater dags. (I'm sure I'm not the only person to think of doing them this way, but I haven't seen anyone else do it, so I figure I may as well share!)
The winning design, although he chose
colors.

Last fall a SCA friend contacted me about making him a good cotehardie to wear to fancy events, court, and the like. He wanted the full deal: a custom pattern with hand dyed silk, fancy buttons, and trim. I was enthusiastic about the prospect but told him he had to wait until I'd survived Feast of St. Nicks and Christmas. With those obstacles past, we got in touch and designed an outfit together, woolen hose, with a silk hood and cotehardie, all custom dyed to match. Parti colored, and with dags and trim and buttons galore.


In the 14th century dagged edges became all the rage. Hoods, sleeves, hems: you name it, if it was the edge of a garment it could be cut in any number of different kinds of fancy scallops. Square, rounded, long, short, even fancy compound shapes like oak leaves can be found in period images. It was a fashion craze, and it's a real pain to do. Unless you work in fulled wool, which is fray resistant, the best way to make dags is by lining and turning. While this method works, the the points between the dags tend to be fragile, and it's hard to get it totally flat after you turn it. It's far from impossible, but it is fiddly and bothersome.

 I got to thinking about it while I was drawing up the designs, and it occurred to me, why not do them just like the tabs on a doublet: make them separately, line and turn them, sew them onto the edge, then just hide the seam with trim? it would be significantly easier than finishing a scalloped edge. So, that's what I did, and it worked out really well.

Dags in progress. 
I did some math to figure out how big the dags should be, then cut the correct number in both colors. This is silk satin, over 4.7 oz linen, lined with tissue weight silk habatoi (the silk is hand dyed, everything is from Dharma Trading as usual). I sewed the dags, clipped and graded them, turned and ironed them, then top stitched around the edge. Then I just sewed them
onto the edge, and flipped the seam towards the body of the garment. I sewed the trim so it overlapped the seam, then sewed the edge of the lining down to the edge of the dags. Voila. you could do any of the simple dags this way, square, curved, even some of the simpler compound shapes, although not the really crazy compound shapes (I've seen beautiful wool hoods with oak leaf shaped dags around the edge.) Those should probably be reserved for fulled wool. Doing the dags was still time consuming and fussy, but on balance, much easier.  A side benefit of doing it this way is that you don't have to worry about the tips of the slits, where the seams allowances are very small, and quite capable of working their way out of the seams. Fray check is your friend there, but traditional lined dags are still a little fragile. these are not.

It was a little more tricky to apply the dags to the curved edge of the hood. if you sew a straight edge to a curved edge, it cups, like the bottom of a basket, Obviously that's not a great look for a hood, so instead I turned the edge of the hood, including the lining towards the outside of the hood, and laid the dags over it.

Then I top stitched along the edge of the lining from the reverse to attach the dags.

I then applied trim over the exposed edges. Trim on a curved edge like this is tricky. you can see how if I make it tight to the larger circumference of the outside edge, it bubbles along the inside edge. Where the curve is gentle, many brocaded synthetic trims like this, if steamed thoroughly (careful about the heat of the iron, they will melt) can be eased into the shape of the curve. However, where the curve is sharp, this is not enough: you can see how much excess there is on the left picture of the hood edge. Then you have to find a way to take tucks in the edge. In many patterns you can find a spot to take small regular tucks that will be disguised by the pattern.


There are six tucks in the trim on this side of the hood. once they're sewn and steamed into place, you can hardly tell, even from quite close to the trim.

Here's the hood on my volunteer mannequin. I'm not sure about the lining in the hood: I was just lining all the things with my standard silk lining, which is lightweight, nice to work with, and comfortable to wear. After I got the hood all finished I put it on myself to see how it looked, and noticed that the weight of the liripipe (long tail at the back) was pulling it down off my head. Because the silk lining is so silky and smooth it was just sliding straight off. Another time I think I would line the hood in something with a little more natural friction, linen, or even tropical weight wool, to give it some grip against the head. I told the recipient that if it continually slides down, he can send it back and I'll stitch a little pad of something with more grip to the crown of the head to keep it in place.


This was a time consuming project, I had never sewn a cotehardie or hose before (thankfully the customer had a pair of hose that fit him to be cloned. which made that easy.) so I got to learn some new things, which is always exciting. Really the cotehardie is the progenitor of the suit jacket, the first truly fitted men's garment in a long line thereof. Like other very structured garments, it was a lot of work, but the result is very sharp. It kind of looks like a blob laying on the bed, but it fits the recipient like a glove. The sleeve, although tightly fitted, is constructed for full range of motion.It has gold and black modern brocaded trim in a period style, and pewter buttons cast in a period style.  I'm hoping to get more chances to play with cotehardies in the future, because it was a great deal of fun. I'm actually now looking at drafting a grand assiette sleeve for myself, as taken from the purpoint of Charles de Blois, to use in a gambeson to wear under my armor for heavy combat. I wouldn't have gone down that rabbit hole (Which is a very FUN rabbit hole) without this experience to start me. (which is one of the many reasons I really enjoy doing work for other people, I get to play in periods and shapes outside the norm for me).

Wednesday, March 29, 2017

Viking Fencing gear


Crash just turned six, which is the age you're allowed to start youth combat in the SCA, so I just made him his first set of fencing gear. For rapier fighting, the youth gear requirements are the same as the adult, which means that he has to have his torso covered by puncture resistant material, and the rest of him by abrasion resistant materials. He needs gloves, a hardened leather or metal gorget (metal is better for adults, but kids are only allowed to fight with foils, and have less body mass, although their point control is worse, so I consider leather to be ok for them.) a helmet, and a hood/drape/coif of puncture resistant material over the helmet. All openings must overlap by at least 3 inches.  Currently Crash is super into being a viking, right down to his "viking hair" (which he's spent more than a year growing out from a mohawk.) So I decided to stick with that theme and try to make him a small viking outfit that would be suitable for fencing: a knee length tunic, lined to the elbows with heavier material, and a hedeby style hood sewn to his fencing mask for a drape.

I assembled some fabrics from the stash, my essex 50/50 cotton/linen that I use for a lot of kid clothes (Dharma trading, my go to for linen and silk!) and the same brown twill that I used for Husbeast's practice doublet and helmet drape. Those had to be puncture tested by a marshal to be sure the final garment would pass (nothing would suck as badly as making a garment, and THEN having it fail puncture test, ruining the garment and wasting your work.) Then I used fiber reactive dye and dyed a length yellow for his hood, and another length rust for the tunic. Both accessible and popular colors among vikings. (the yellow photographs poorly. It's sort of an obnoxious daffodil color. Crash is thrilled.)

I took a new set of measurements for this years garb (he's growing like a weed) and ripped the squares for the tunic from the rust cotton/linen. Some fabrics rip better than others, but it's a great way to get things straight across the grain. silk particularly rips nicely, but so does this linen blend, you just have to iron it back flat afterwards.

I used the ripped squares as a pattern to cut out the brown mystery twill, only cutting half the length of the arm. I thought the arm looked a little skinny here, and I should have gone with my gut, and added a gore to make it a little fatter: it fits with plenty of ease, but it's kind of a skinny looking sleeve, and a bit of a wiggle for him to get into, even with the armpit gusset. Next time I'll know better!

I put the tunic together by sandwiching all the seams except the final underarm seam, which I serged. That way almost all the seam allowances are on the interior. It makes a nice flat finish, and keeps the lining from twisting around independently of the garment. It also keeps the exterior fabric from bunching or bagging, which can happen when you have a heavy lining on a lighter outside fabric. Typically in that situation you'd use the heavy fabric as an underlining, then finish off with a bag lining, but for instances where you don't want the extra layer, this is a great solution.

If you're going to construct a tunic this way, you have to finish off the neck first unless you want to add an additional layer of neck facing: in which case, carry on. I put the lining and the garment fabric right sides together, sewed the keyhole neck seam, graded, clipped and turned it, and used a running stitch in heavy linen thread to keep it from rolling. I worked the tip of the slit in buttonhole, and put a tear bar across. Then I added a flap to go behind the slit which overlaps the required 3 inches and closes with velcro.
To sew the sandwiched seams: first line up all 4 layers of the two panels, the lining, right sides together, and the garment fabric right sides together. Where the garment fabric and the lining fabric touch, they will be WRONG SIDES TOGETHER, just like the final result in a traditionally lined garment. this is important.

Next, sew the seam, clip it to reduce bulk, and iron it flat to set the stitches.

Then turn one layer of the lining, and one layer of the exterior over to sandwich the seam, and press everything nicely.

Voila! a beautifully enclosed seam. I've been able to do this for a whole gown for Ladybug, only having to do the last lining seam by hand to get a completely finished interior that acts much like a flatlining, but looks like a bag lining. It's nice when you don't want to flat fell, and need to underline something for some reason. (here so it passes puncture testing.) In this case I didn't need the strength provided by flat felling, and a flat felled seam would have been very stiff, which could have made the tunic hang funny.

 You can see here the nice finished look of this technique.

After I sewed each seam, I worked it over in herringbone stitch, over the seam allowance, with heavy linen thread. This was mostly decorative, although it also holds the seam nice and flat.

I finished the tunic by sewing the two long underarm seams, and then serging them I hemmed it with a strip of matching blue bias tape I had lurking in the stash as a hem tape. with a garment this thick, a hem tape is much nicer and less bulky than a traditional rolled hem. Also traditional rolled hems are more difficult on curved tunic hems because you're trying to ease a larger circumference into a smaller one. I used the last length of the blue linen thread to running stitch the sleeve hems up.

I made the hood the exact same way I made the toddlers skjoldehamn hood, except sized to fit a fencing mask. I ripped the squares and cut out the lining in the same way as for the tunic. Instead of just ironing the edges in and lining up and pinning everything: like I did for my previous skjoldehamn hood, I sewed together all the edges I was going to eventually seam, and then turned the pieces. This made the sewing easy since things stayed lined up.
Treating the seam as the edge of a single layer, I seamed it up the way the extant hood is, with an overcast stitch. This is done in waxed linen.


When this is folded flat and ironed, it makes a beautiful interior finish, and a lovely exterior seam. Like the finish in the tunic, this method of construction ties the layers together at the seam, and keeps them from twisting inside the garment, or bubbling, which in something that is gong to be yanked on and off over his head, is nice! it's also an extremely portable project. I did most of this in the car.

Unfortunately there was a sad ending to the first part of the tale of the hood. I somehow managed to make it just the right size for Crash's HEAD, and NOT for his head in the fencing mask. So, I finished that one off for him to wear (his old hood had to be given to Bang) and made a second that would fit his fencing mask with the leftover yellow. I had to make a little seam to get a long enough piece for the top, but it doesn't really show.

I also realized after hood #1, that there was a problem with the hood as is for a fencing drape: You can't get your hand up the back to fasten the velcro strap that holds the helm in place. As I think back on it, the other hoods I've seen for fencing drapes button down the front, which allows you to get at that strap, which is required by regulation. My options became, make the neck wide enough to allow you to flip it back up and get to the back of the hood, or put some kind of closure down the
front seam so that you can open the hood to fasten the strap. I didn't like either of those options, so I put it together, pinned it onto the hood, and figured out that if the back square goes up a little higher than you might usually want it to, you can flip the back of the hood up over the top of the mask to put it all on. Having breathed a sigh of relief I moved forward and put hood #2 together.

I put some bears on the hood for him, since a bear is the animal he picked for his SCA kid tag. I used an old wool skirt that came in a bag of donated fabrics and had moth holes, which made it ideal to rip apart and use for applique. I edged the hood with a strip of the wool, then cut out some bears and appliqued them down with Perle cotton thread. I cheated and used some fusible net to hold them in place while I stitched them. It will also make them less likely to tear loose from the stitching under direct hits from a fencing foil. For a period finish I could have quilted the appliques down, or not been so silly as to fancy up such a utilitarian object. Although, historically speaking the vikings liked to fancy up utilitarian objects, so I'm in good company.

Then it was on to the Gorget. By regulation, this has to cover the back of the neck, and over the collarbones in the front. It can have an attached "lobster tail" to cover the cervical vertebra as well: which I consider to be prudent. I had some tooling leather left from making Bang's batman mask, which is veg tanned and suitable for water hardening. Crash fits Ladybug's Gorget, so I cut his from the same pattern.

Water hardening is pretty cool, but not an exact science. The leather hardens more the longer you leave it in the hot water. However, the harder it is, the more brittle it becomes, so you want a good balance. When it comes out of the water it's shriveled, and flexible, and can be stretched and formed easily, but needs to be set over a form to dry. I've got Ladybug's gorget wrapped in a plastic bag and am using a strip of wool and a chip clip to hold Crash's wet gorget on to harden. The lobster tail bits are on my other really scientific mold. I haven't quite gotten the balance of hard to supple right yet. I got Ladybugs a little too soft, and Crash's a little too hard: one of the lobster tail plates actually started to crack when I flexed it a little too much putting it together. If he breaks it, I'll just make him a new one. I'm going to try hardening again making myself a gauntlet in the near future. (for more information on water hardening, go here for an excellent article on the topic)

I cut the lining and the straps from the deerskin leftover from Husbeast's gloves. I used the same stuff to line Ladybug's gorget, it's supple and soft. I just put all the pattern pieces together, and traced around them to make approximately the shape of the finished piece. This doesn't have to be super precise as leather is so flexible, and you can trim it up a little after it's all sewn in.

The finished Gorget. I pulled the lining over the top like they did on my husband's metal model, an upgrade from Ladybug's model. It has a leather "hinge" on one side, and a buckle on the other. Everything is sewn with heavy duty waxed carpet thread. I learned with this piece to punch ALL the holes before you water harden the piece: I had to use a drill with a very small bit to make the holes to sew the straps on. It's not super pretty, but it does fit, and do the job it's supposed to do.

Last item of protective gear to make was his fencing gauntlets, and we were all set to fence! Go forth and be chivalrous Crash!

Crash and Ladybug in their gear. 

With helmets and hoods! Ladybug has assumed fencing feet.