Monday, February 23, 2015

Victorian Overbust Corset

I really wanted to get this done for the historical sew monthly January challenge, foundations, but ended up not finishing it in time. I was dissapointed not to make the deadline, but I have finally finished it! I'm really excited about this corset. My husband gave me a Laughing Moon bust gore overbust corset kit last year for christmas and it's been marinating in the pile of projects. I hadn't gotten to it partially because it's sort of an impractical and selfish project, and partially because, with all my sewing experience, corsetry intimidates me. It's a whole field of it's own, with it's own unique intricacies and skillset. Just because you can draft and fit a bodice doesn't mean you can properly fit a corset: corsets not only have to mirror the shape of your body perfectly, they mold your body into new dimensions. Once you've passed the cylindrical shape of stays, which do not take personal shape into that much consideration (hey, we're making you into a cone here.... The only real considerations are the dimensions of the cone.) corsetry becomes a complicated and fascinating art.

I've been fascinated with corsets pretty much forever. When I was 13 or so I made my china doll a full civil war ensemble from the cardstock boned corset up, and the fascination has pretty much stuck. I love the costumes you wear OVER a corset, from the sweeping skirts of the civil war era to the "pouter pigeon" look of the edwardian era, to the nipped waist and sweeping circle skirts of the 50's (Girdles: the best friend of the "new look," and the slightly stretchy relative of the corset.) I love the way that corsets allow you to fit garments, the precise tailoring that is possible in bodices when you don't have to allow ease for things like.... breathing...  I just love corsets too. I find them beautiful and historically fascinating. They've been an intrinsic part of women's lives, and women's clothes for centuries. They've been everything from a practical way to support the breasts and the back, to a restrictive symbol of social status and women's place in the world. And they've been a factor in the views of what was beautiful, both in public and private. It's no coincidence that while the clothed silouttes of the victorian era feature defined waists, nudes of the period show a sensuality far removed from our own: women with full limbs and soft stomachs: the shape of a woman who had worn a corset since childhood. From Catherine de Medici's vanity to Queen Victoria's views on propriety: stays and corsets have been the shape of fashion right through the modern era.

I myself have been wearing a corset off and on for the last few years. Carrying my second son so close to my first I had a fairly severe diastasis recti, the separation of the abdominal muscles, and a girdle was reccomended as part of the postpartum treatment of that condition. I found that the plastic bones in the girdle buckled at the waist and stabbed me. Having worked around boning enough to know one end from another I decided that spiral steel would be more comfortable for me, and got an off the rack corset. The increase in comfort was astronomical, and I found that I enjoy wearing a corset, and like the look it gives me under some of my 40's and 50's style clothes. Unfortunately that corset had some fit problems, mostly because I'm very tall and have a large hip to waist ratio. I complained about that and threatened to draft a corset pattern out of one of my corsetry books, but was never quite brave enough to take the plunge because of my inexperience with corsetry. Enter my dear husband with a corset kit as a christmas gift.

The kit I recieved was from Corsetmaking.com and included all the supplies and some of the tools neccesary for the Laughing moon Silverado bust gore corset. The bust gore corset is recommended for ladies who have a fairly large difference in size between their ribcage and bust. It gives you more flexability there to get a good fit. I am not overly endowed, but I do have a relatively small ribcage, which makes it a better choice for me. Also the Siverado is longer than it's goreless relative the Dore, and since I'm tall, that's a consideration in fit as well. And yes. My wonderful husband did all the research to figure this out himself after only minor consultation with my sister. In addition to the Laughing moon #100 ladies underwear 1840-1900 pattern, the kit included a tailors awl, boning, boning tape, waist tape, lacing, gromets, busk, and measured capped bones. It is avialable with coutil included, although my husband chose it without so I could choose my own. They also offer grommet setting tools and various other tools as reccomended add ons, but I already had those things. I am sorry to say that I cannot recommend this kit though. There were things in the kit that you didn't need if you followed the instructions (boning channel tape) which was just confusing. The real problem was that more than half of the bones were the wrong length, even though I made the corset in the correct size. I still like corsetmaking.com as a supplier, just don't buy their kits. I prefer Farthingales I think on the whole, but they don't sell coutil from their US. store, so shipping is exorbitant.

* Update as of 4/20/15 Corsetmaking.com has sent me a very nice response to the poor (and slightly grumpy) review I left on the kit. They went through and measured the pieces in the pattern and checked against their boning specs. Turns out that the pattern had changed and no one told them. They are fixing the kit and checking their other kits. I still think it may be better to buy boning and tips and do it yourself to account for changes to the pattern during fitting, but think that if you didn't have the equipment to easily cut/tip boning this could be a good alternative. 

The laughing moon pattern is great though. The instructions are copious and clear. The single complaint I have with this pattern is that the instructions are printed on the same GIANT paper as the patterns themselves, with a small note telling you that if you find the instructions "unwieldly" in that format you may cut them along the lines to make them more manageable. So you spend half an hour cutting some 40 pages to size and then ironing them flat. Then you spend the entire construction process ruffling through pile trying to find the page number you need, and having them get knocked over by your cat.... So. I wish they would print the instructions as a sort of booklet for you. Failing that learn from me and put them in a binder after you've cut them out and ironed them flat.....

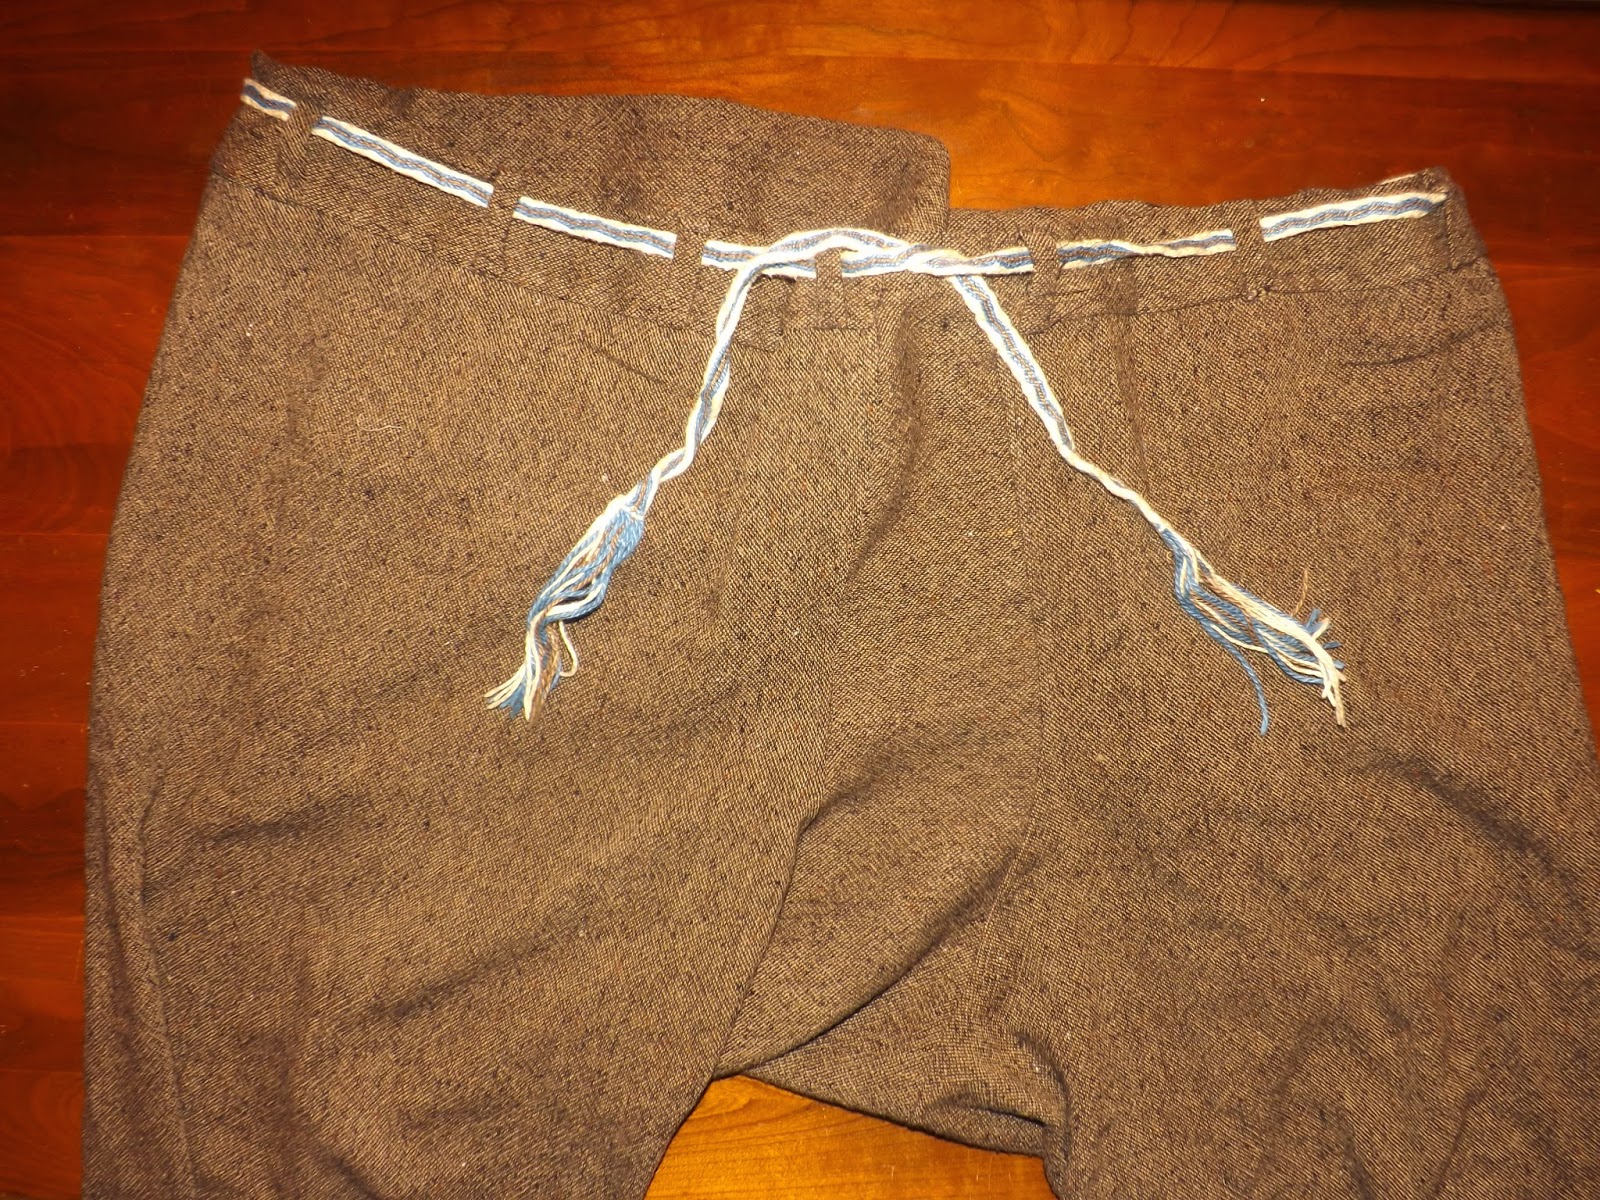
The first thing I did, before I even traced the pattern off, was to make a pair of lacing tapes. All these are is strips of waste fabric folded like bias tape with small buttonholes at regular intervals along their full length. Once made they can be basted into mockups allowing you to properly close them and not have to put buttonholes or something into every. single. mockup. You can also leave them laced together for the whole process, just moving them from mockup to mockup, which means a lot less labor in lacing and unlacing. These are really important for certain very fitted garments, especially garments that have negative ease like corsets, since you cannot just pin the mockup on. because it will not give you a true picture of final fit. In corsetry as well the tapes allow you to see the shape of the lacing gap at the back, which is important in final fit, and tells you where the reduction will be when you lace it tight.

Looking at the measurements on the pattern I needed a size 12 in the bust/waist, and a size 18 in the hips.... OUCH. Yes. I am pear shaped. They also suggested that you start with the larger size bust gores because it's easier to try to take it in than to let it out. Which is sage advice. So I traced of the size 18, with the d cup gores expecting to just have to take in significantly. around the waist/ribcage, carefully cut, and sewed together the mockup. Ideally corset mockups should be sewn from denim of canvas. I didn't have that sitting around, but had rather a lot of this very icky stiffly sized cotton, which worked in a pinch, although I had to be more careful with my fitting. You can see the lacing tapes in action here. They have been basted into the back so that where the edges meet in the back is even with the back of the mockup with the seam allowance folded over. I ended up having to make fairly significant alterations to the whole thing. The bust gores were far too large, even though I currently wear a 32 DD I ended up going with the next size down gores, and even taking those in a bit. I had to let the bottom of the hips out a little, and take the waist in a lot. I ran through two mockups to get the fit right, and had to have my mom come over and help me with the final fit of the back. It's just really hard to make more than very minor changes to the back of a garment by yourself. I took apart the final mockup and used it as my pattern.

The corset is made from one layer of imported cotton coutil, with a lining of silk. I chose to not follow the construction method in the laughing moon pattern, which calls for "sandwich" style channels sewn through outer layer and lining. This was partially because I didn't think the silk lining would hold up to the wear of the bones, and partially because I find that method adds bulk. And bulk in corsetry you want to avoid. Instead I used a period tecnique that is something like a flat felled seam. I got the idea looking at Augustintytar's amazing work. Anyone who has any interest in costuming will enjoy her work. It's absolutely incredible. Anyways, this is a period technique and as long as you don't overlap the seam allowances it makes a very flat seam which doubles as a boning casing. Brilliant. Now. Normally I would just sort of slap a seam like this together and go. But in corsetry any tiny mistake in fitting can lead to discomfort for the wearer, and in the worst case scenario, chafing. So, it pays to be extra careful.  Careful in this case means that I machine basted around all the pices at the seam line, and at the line where I would fold the seam allowance under. These basting lines were for marking purposes only.
Then I trimmed the seam allowances so that they would not overlap inside the seam, and clipped to the first line of stitching. I turned the edge over at the first line of stitching, and ironed it. It's important to be sure to turn it in the correct direction, so that all raw edges will be enclosed in the seam as shown above.
 That done, I very carefully hand basted the seam line together by lining up the interior line of machine basting. Now I could just top stitch on both sides without worrying about the fabric shifting on me.  I will add that this is one project where I almost wished for a thimble, as much as I despise them, because the coutil is so stiff and so dense. Use a very sharp needle, and expect to stab stitch rather than make running stitches.

Here's one piece on and the next ready to go on. You can see how the seam allownce on the peice that will be on the bottom is ironed forward, and the seam allowance on the piece that will go on the top is ironed back.
The only place this technique is not practical is over the bust gores, But since a boning channel does not need to run up each side of the gore, it's not neccesary for both sides to be treated in this manner. So I simply attached the gore to one piece, then fliped the seam allowances back, trimmed, and top stitched them. This allowed me to treat the other side as a continous seam for a boning channel.


The next step is to add the extra boning channels. Boning tape had been supplied in my kit for this purpose (although the instructions for the laughing moon pattern tell you to use the sandwich method.) I used the boning tape for individual channels, and pieces of leftover coutil for the three very closely spaced channels at either side of the bust gores. I felt that three pieces of boning tape sewn down edge to edge would be uneccesarily bulky. This is where I made the unfortunate discovery that although I had made the kit in the size it was ordered in, and although my corset is actually longer than the pattern, the bones were not the right length. Many of them were too long, while the side bones were a bit short. Because they came all pre capped and cut, and I don't have any boning caps hanging around in this size at the moment, there was nothing to do but pry the caps off, trim the bones to length, and put the caps back on. Which was probably more work than cutting and capping all of the boning myself. Thank god I have a pair of bolt cutters for cutting boning, and various tiny pliers.


Next I applied the waist tape, at the actual waistline (as determined by putting it on and bending back and forth to make wrinkles at the natural waist) and tacked it down in the existing lines of topstitching so it won't show from the outside.

First fitting! 
That just left the lining and finishing. Since I was not using the sandwich method, after I put the lining together I serged all the seams off as short as possible. This reduces bulk, and keeps them from fraying with wear in what will be a "floating" lining (not a concern with all fabrics but this silk was really prone to frayage) I did a final check on fit before I did any finishing, and while I could still make alterations without a lot of drama. I laced it up with some trepidation, I was afraid that for all my care with fitting and construction the fully boned corset wouldn't fit well, would look odd, or would otherwise have severe problems. I put it on and tightened it comfortably, so it felt snug but not super tight. I expected that it would be close to my natural waist measurement, since I was just sort of yanking it tight instead of lacing it up gradually over a quarter of an hour. Typically with comfortably tight lacing I get an outside measurement an inch or so less than my natural waist.  Imagine my shock when I found the lacing gap all but closed up, and my waist measurement showing an 6 inch reduction. without ever feeling squeezed at all! The fit was perfect, and the whole thing is so light and flexible. There is no pinching, no discomfort, and no unsightly "muffin top" at the top or bottom edges.

Since I am planning on wearing this frequently, which means that I will probably eventually need to alter it for a larger waist reduction, I chose not to do a standard binding. In order to alter it I will need to get at the inside, and taking the whole binding off will just make this even more painful. So I bound the coutil layer with a bias binding of black cotton, and then turned the lining in a quarter inch and basted it to the bias tape. This gives it a nice bound appearance but all I have to remove is one line of basting to get at the innards.

I flossed the whole corset with my favorite color of electric green, which shows up great on the black and looks shiney. In retrospect this was a terrible idea. Although I can do satin stitch and herringbone in my sleep, it's much different working them over boning, and my flossing is not to the standards I would like. And since it's in high contrast green on black, you can see every tiny mistake in neon clarity. Live and learn? Next time I will mark all of my flossing much better than I did this time. I also plan to make more tone on tone color choices until my flossing skills improve considerably. Finally I ran a narrow black ribbon through the front half of upper corset binding to tie in a bow and give a little draw in to the top of the cups. I would have preferred black beading lace but couldn't find any locally that I liked.


To me this whole experience has been not only an interesting and exciting expansion of my own sewing skills, but has really underlined the difference a custom corset makes. I have a decent quality off the rack uderbust corset. It's twice as heavy, much stiffer, and at the same comfort level I get a lot less reduction, plus, there's muffin topping everywhere if I really cinch it down. And I feel more constriction in my ribs when I wear it, even though it's underbust which many people prefer because it's less constricting around the ribs. I'm feeling much emboldened by my sucess with this corset, and planning on making the next one out of one of my books of orignal patterns instead of from a modern commercial pattern. I'm also considering attempting to improve the fit of my current underbust by adding hip gores. Not sure which one I'll get to first, but looking forward to continuing my corseting adventure!

Sunday, February 8, 2015

Husband's Garb (in a hurry!) Part 2

With Tunic and Shirt ready to go I just had to worry about clothing my long suffering husband's lower limbs. My research has all pointed me away from the modern pants pattern, or the very popular "pajama" style mens pants for early era personas. Certainly these are an easy solution, but kind of lazy, because in a rare stroke of luck, there are actaully extant garments to work from, several of them in fact. Which I was disproportionately excited about, because recreating actual historical garments makes me ridiculously excited. I typically have a small geeky fit in a corner, like some sort of tea and drafting paper pow wow, and emerge muttering about "seat height" and "extant garments" and "thread counts" or "warp weighted looms for heaven's sakes!" I'm pretty sure my husband just smiles and nodds.

I chose to work from the Thorsbjurg trousers, which are an almost complete garment found in a bog. Although they probably date to the migration era (guesses go as early as the 3d century) a find at Hedeby dated to the 10th century has the same kind of crotch construction, and examples in viking art show similarly shaped trousers, so it seems fair enough to extrapolate from the existing garments, with a few changes to more closely match the pictoral evidence (goodbye attached feet, it was nice knowing you....). There is a great overview of the available evidence for styles of men's trousers in the viking era available from Sunnifa Gunnarsdottir.

Ready to draft some pants! 
I used the  drafting instructions found on Shelagn Lewins site. She has a good explanation of the drafting process, and you can print out her measurement chart, which streamlines the process. Her method originally came from Freyja Eriksdottir, with whom I am not familiar. This is straight up drafting from measurements, which I adore doing and am extremely comfortable with. However I do feel that the instructions are clear enough that even someone without experience in pattern drafting could get a good result if they wanted too (and you could learn a new thing; learning new things is fun!)  And the results were great. it fit with almost no alterations. I drafted this out on newsprint, which is the worst thing in the world to draft on. It tears easily, it can leave marks on your fabric, it's hard to read your own marks on. Don't use newsprint. If you can get it use butchers paper, if not get the rolls of lightweight brown wrapping paper. Or save the paper that comes wedged into Amazon.com boxes, iron it flat, and use that. My only excuse is that my supplies of drafting paper are currently less than acessible and I'm too lazy to go digging for them or get something new. I will trace this off clean onto either scrap fabric or white paper before I use it again to keep it from transferring ink onto future fabrics. 

Once you get your patterns drafted you're  going to end up with some strange looking pieces that look almost nothing like pants as you know them. If you're like me you are going to scratch your head and fetch more tea. The construction is decidedly odd, but it works really really well. Many sources say that these trousers are much less likely than a modern trouser to have "reanactor's crotch" when put to active use, and my husband said that they are so light and comfortable that he can hardly tell they're there. Since I doubt Mrs. Viking enjoyed attempting to fix torn out crotch seams any more than I do, I can see why this pattern stayed around for so long. It's just flat out practical. It also makes surprisingly efficient use of fabric. Once I had cut out my trousers I had just a handful of scraps left, and I used a lot of those for belt loops. Effecient use of fabric would have been esential for Mrs. Viking who would have likely first spun the wool for these trousers, and then woven it on an upright loom. Every wasted scrap of fabric would have represented hours of labor lost. It's pretty nice for us modern girls as well, when we wish to clothe our Mr. Viking husbands on a budget. This used only about a yard and a half of 52 inch wide wool. Which isn't much for pants. 

I made up three pairs of these all told, between mock ups and the final, and used a different order of putting things together every time. I like this last way best because it makes it the easiest to fell the seams in the seat area, and you really, really want to fell the seams in the seat area. It makes them flat for comfort, and it makes them strong. and even in thorsbjurg trousers seat seams can use all the help they can get. Especially if the intended recipient is like my husband, who is rough on pants. 
So to construct the pants: After you've cut all your pieces out of a period appropriate fabric (in this case it's a tabby woven wool in a sort of tweedy brown. I may overdye it....) The first step is to attach the long crotch gusset to the crotch line of one pants leg. this is the short sharply curved line. You should line the wide blunt end of the crotch gusset up with the sort of pointy bit seen at top right, and sew UP towards the waist. The crotch gusset will be several inches too long. Don't try to ease it in, just leaving a tab of the crotch gusset dangling. You'll use that bit of crotch gusset later in the waistband. Once it's on, you can fell that seam. I felled all the seams in this garment by hand with an overcast stitch, partially because I dislike visible machine stitching on exterior garments, and partially because I had a momentary lapse and made 3/8th inch seam allowances which are no good for machine felling on thickish wool. The hand felled seams go to the inside of the garment, and are basically invisible from the outside. I did consider just basting the seams to one side then using herringbone stitch over the seam allowances from the outside (a popular technique) but thought my husband might not appreciate having the crotch of his pants thusly beautified.....

Now you can attach the second  leg piece to the other side of the crotch gusset in the same way. Going from the blunt point on the inside of the garment up towards the waistband, then flat felling the seams. I've marked the seams on these photos in red so you can see more clearly how it all goes together. 


Now you attach the WIDE end of the seat panel to the crotch gusset/leg assembly.  (I did this wrong the first time through, it seems counter intutive but it's part of what makes this pattern work so well.) And then you fell that seam. 


Now you have a very strange looking floppy thing that you cannot imagine ever becoming pants. (notice the protruding tip of the crotch gusset at what will become the center front.)
But, fold them in half and line up the long straight edge with the remaing curved seam.... and..... wow that looks kinda like a funny baggy pair of pants. You can flat fell this seam or not as you choose. I chose to overcast stitch it with a nicely contrasting red wool thread (on the inside of the garment) this is a period correct finishing technique.


Now it becomes obvious how to go on. You line up the waistband with the center back, and sew it on, making sure that  over the the ends overlap the protuding center tongue of your crotch gusset by a half inch or so.  I cut the waistband double width with the straight edge on the fold so I could just fold the raw edge in, fold it in half, and whip stitch it down over the seamline on the inside, thus enclosing the whole seam. On the original garment it is just a single layer with a hemmed upper edge. 


Then you have to deal with that funny bit in the front by tucking the ends of the waistband under and stitching the ends of he waistband to the top "tab" of the crotch gusset. You can see in the finished pant that the crotch gusset neatly splits the waistband at the front. I have simply hemmed the top edge of the crotch gusset, although I may at a later date cut a small piece and sew it onto the backside to strengthen this area.

The only thing remaining after this is to add belt loops. The original belt loops were just cut strips of fabric, not hemmed in any way that has survived. I opted to fold long strips in thirds along their length and whip stich down the raw edge, then cut belt loops out of these. I felt it was stronger this way and would hold up to wear better. Add a piece of tablet weaving for a belt, and voila, pants! And although it may seem like a lot of work, honestly it's not. I drafted these and did two mock ups one evening, and then completed the pants in a second evening of work, perhaps 10 hours total labor?
From the front. Don't judge the "belt" this was my first tablet weaving project
 from may moons ago and it's abit.... funny

and the rear. You can see the sort of baggy bottom effect. You can wear it with the
waistband rolled over the belt or not by personal preference. Both seem to be authentic.
as per artistic evidence.


Eternally happy to be photographed.
At Dancing Fox with the boys
 So there you have it, quick and dirty men's viking garb. All this was completed in less than a week, and that includes having to make the shirt twice. I'm looking forward to getting the embellisments done so it looks better! Right now it's fairly uninspiring.  


Thursday, February 5, 2015

Husband's Garb (in a hurry!) Part 1

I've been a member of the SCA since december, something I'd hardly heard about before this fall. How did I miss out on this? A whole society of people obsessed with ancient civilizations who love to discuss their research and bash each other with sticks? It's like little history geek heaven. I attended my first event in december in some slapped together from a house gown, marginally accurate 14th century garb and had a wonderful time. Everyone was so NICE. Now we're thinking of going to a family even this weekend, and husband hasn't a thing to wear (eek!) so I've spent my week busting out some quick viking garb for him.

Why viking? well. I've been obsessed with vikings since I was a kid. Probably my older brother's questionable influence.... Actually I'm fascinated with a lot of the early european cultures because it's such a mystery. Every new find fills in a piece of a really fascinating puzzle. And the viking puzzle is a particularly interesting one: sometimes raiders, sometimes traders, sometimes settlers, they had a complex, warlike culture with advanced legal system, rights for women, and as artisans? unparalelled in their time. Metalworkers, shipbuilders, and in terms of the household arts? I go all dewy eyed and wax lyrical about their feats of weaving. So obviously I leap at the opportunity to make any viking clothes, and only partially because it gives me an excuse to research things, and read grave finds, and, and, and.....

However with the weekend fast approaching I am doing the quick and dirty version. I will continue to add acessories and embellish pieces in the future, but for now I just want to get him CLOTHED.

So what is the "quick and dirty" viking ensemble? A shirt, sometimes called a serk, or smock, in fine wool or linen, with a tunic over the top. Drawstring linen drawers, and wool or linen pants over, with a belt holding it all together at the waist. construction techniques vary, but were advanced for the period (10th century for us) including set in sleeves, and shaping techniques like darts. Vikings preferred layers of closely fitting clothing because their climate was a cold one. They also liked patterned twill weaves, flamboyant colors, and lots of embellishment (I love vikings....). Since I'm working with what I have on hand, I cannot be as dead accurate as I would like. He's ending up with underthings in my all purpose cotton linen blend (like linen on a budget....) a plainweave tunic in green wool, and similarly plainweave trousers in brown. It will probably be devoid of trim until a later date since I don't have any tablet woven braid lurking in the corners, and haven't time for embroidery.

I like to make shirts/undertunics by the measure and cut rectangle method. With variations in details it's an accurate way to make shirts right up to the 1800's when the "french sleeve" or set in sleeve became popular. It's fascinating to me that women made shirts for their husbands in almost exactly the same way for at least 800 years. The viking version of this shirt  includes a tapered sleeve, underarm gusset, keyhole neck with facing or binding (I extend the facing along the whole shoulder for strength and wear, a larger version of "wear bands" found in the shoulders of later shirts.) and either gored or slit sides. I prefer slit sides in the shirt because it reduces bulk/weight and takes less fabric. Examples of both ways have been found. The whole is put together with small flat felled seams, for comfort and strength, another detail found on fragmentary extant garments.  This is how I made shirts for the boys, how I made made ladybug's shift, and how I have made many other garments. So. I blithely measured my husband, cut, and sewed, popped it over his head..... and it was too small. I still don't know what I did. I suspect that carrying on conversations with your two and three year old while you attempt to tear rectangles for your husband's shirt can lead to mistakes in measurement. I had to start over, at great waste of time and fabric and to my intense personal annoyance. Which is proof that even really experienced seamstresses sometimes screw up. Even my mother probably occasionally makes sewing errors. Well.... maybe not....
One of these things is not like the other..... 
From now on if whatever I am working on for my husband doesn't feel like sewing a smallish tent I am going to be VERY suspicious. The other conclusion I drew from the shirt making expirement is that it is very hard to get a flattering fit on a man with really broad shoulders with this method.

The tunic construction I chose is based one of the garments found at Hedeby, with side gores, set in sleeves, and a keyhole neck. Infomation about the cuts of mens tunics and historical evidence pertaining thereto can be found in overview form from Madam Pora. From there you can go down the rabbit hole of original sources.... I do reccomend it, it's a really INTERESTING rabbit hole. 

 Because I do not have a current body block for my husband, partly from lazyness, partly because most of my drafting books are in storage from our move, I drafted from a polo that had holes in it. This can be a great method, but has some flaws. In general it's best to draft from a block. You are going to get better  results with less fitting steps. You also work with what you have! In this case I drafted directly onto the mock up fabric to streamline the whole process. 

The last few patern drafting projects I've done, instead of using a paper pattern, modifying that from the marks on the mock up, then cutting out a new mockup, I've been directly modifying the mock up by ripping it apart and then cutting it down, or adding to it by sewing on scraps. Here I am adding to the sleeve cap on the tunic. I like this method especially for my husband because it saves on mockup fabric. it took about three yards of thirty something wide cotton to mock this tunic up for my husband. If I had made a whole fresh mockup, or even a partially fresh mockup, every time I made changes, I would have used three times that much. When I have the mockup fit to my preference I rip it apart, iron, and label it, and keep it as a pattern. The fabric can hold up better as a pattern than paper in some circumstances. 

Isn't this fabric vile? people frequently give me bags of fabric because they know I make clothes for my kids. Such bags often include interesting items like this. I am not sure why anyone would have bought this fabric ever! However it saves me buying muslin for mockups, so I am most thankful for it. When I got this particular jem out I told my husband I was going to make his tunic out of it. He was unimpressed. Alas this sort of practical joke doesn't really work on him any more because he's listenend to me babble about grave finds and weave structures for long enough to know that isn't a finely woven wool in one of the prescribed colors.....  This is halfway through the fitting process. sleeve is looking better but some fine tuning to go. I don't bother with side gores or making it to full length in mockup. Your major fitting challenges are in the shoulder and sleeve here. When I'm ready to cut the tunic I lay out the pattern, measure down from the shoulder, and just cut the length I want. Then I measure down from the "start gores here" mark on the pattern to the hem, and cut the gores accordingly. 

One of the challenges of a fitted tunic is the eternal problem of how to hav a very tightly fitted sleeve and still be able to bend your arm. The extremely fitted garments of later eras (both mens and womens) resorted to multiple shaped pieces in the sleeve which put together yielded a sort of elbow macaroni shape. This is not accurate for 10th century viking, but you still want some elbow room. I draft in extra length at the back of the sleeve in the elbow area. Then I pin simultaneaously up from the cuff and down from the armpit, trapping the extra bubble of fabric at the elbow thusly
Then, using steam if necessary to relax the fabric into the desired shape (one of the great things about wool!) I ease the fullness into the seam without any puckers. This gives in the finished garment a slightly bent elbowed shape with a little "bubble" of space at the back of the arm, allowing the wearer to comfortably bend their arm. Although I don't have direct historical reference for doing it this way, I consider it  to be well within the range of viking garment shaping as we know it. Once the pinned seam shown here is sewn up and steamed into shape, there is no gathered effect at all. The trick is to add enough extra fullness to give elbow room without adding so much as to make an unsightly baggy bubble shape at the elbow. 

Facings at the neck are achieved in the standard manner, althoug they do have to be made in a front and back piece to account for the sloped shoulder. I prefer to mark my sewing lines, sew, then cut out the shape of the neck. This keeps the neckline from getting skewed in the pinning/sewing process. Then it's graded, clipped, and turned. In keyhole necklines like this, the bottom of the slit that allows it to fit over your head is very prone to fraying or tearing. I use a technique from 17th century mens shirts to prevent some of this, and work a bar of satin stitch across the slit about a quarter inch above it's terminal point. I then bind the center of this bar, where it crosses the slit, with knots as if making a hand worked button loop, and tie off. This bar keeps pressure from being exerted on the fragile tip of the slit every time the shirt or tunic is dragged on and off over the head of its owner. In matching thread on a wool tunic, it's basically invisible. Again, I have no historical reference for this, but I doubt viking women were any more excited about having to repair torn out seams than I am! I don't know what their solution to this was (and if I can find reference for it will adopt it immediately!), but feel that I am well within the spirit of recreation. 

The finished tunic is a fairly unpreposessing item. Especially without any trims or embroideries (it actually looks kind of sad). This is just finished with hand topstitching at neck, hem, and sleeves in matching thread. I will later cover the topstitching with embellishments. I plan on trim at neck and wrist, embroideries over all the seams to strengthen them and bind down the seam allowances, and probably applique/embroidery on the shoulders both front and back. I have my eye on the wolf patterns on the hilt of a 10th century sword for the applique.

Mostly I am just relieved that husband will have something to wear, and rushing on to drafting/making trousers! Hopefully I will get better pictures of the tunic with him in it at the event. For now. On to trousers!