Thursday, February 5, 2015

Husband's Garb (in a hurry!) Part 1

I've been a member of the SCA since december, something I'd hardly heard about before this fall. How did I miss out on this? A whole society of people obsessed with ancient civilizations who love to discuss their research and bash each other with sticks? It's like little history geek heaven. I attended my first event in december in some slapped together from a house gown, marginally accurate 14th century garb and had a wonderful time. Everyone was so NICE. Now we're thinking of going to a family even this weekend, and husband hasn't a thing to wear (eek!) so I've spent my week busting out some quick viking garb for him.

Why viking? well. I've been obsessed with vikings since I was a kid. Probably my older brother's questionable influence.... Actually I'm fascinated with a lot of the early european cultures because it's such a mystery. Every new find fills in a piece of a really fascinating puzzle. And the viking puzzle is a particularly interesting one: sometimes raiders, sometimes traders, sometimes settlers, they had a complex, warlike culture with advanced legal system, rights for women, and as artisans? unparalelled in their time. Metalworkers, shipbuilders, and in terms of the household arts? I go all dewy eyed and wax lyrical about their feats of weaving. So obviously I leap at the opportunity to make any viking clothes, and only partially because it gives me an excuse to research things, and read grave finds, and, and, and.....

However with the weekend fast approaching I am doing the quick and dirty version. I will continue to add acessories and embellish pieces in the future, but for now I just want to get him CLOTHED.

So what is the "quick and dirty" viking ensemble? A shirt, sometimes called a serk, or smock, in fine wool or linen, with a tunic over the top. Drawstring linen drawers, and wool or linen pants over, with a belt holding it all together at the waist. construction techniques vary, but were advanced for the period (10th century for us) including set in sleeves, and shaping techniques like darts. Vikings preferred layers of closely fitting clothing because their climate was a cold one. They also liked patterned twill weaves, flamboyant colors, and lots of embellishment (I love vikings....). Since I'm working with what I have on hand, I cannot be as dead accurate as I would like. He's ending up with underthings in my all purpose cotton linen blend (like linen on a budget....) a plainweave tunic in green wool, and similarly plainweave trousers in brown. It will probably be devoid of trim until a later date since I don't have any tablet woven braid lurking in the corners, and haven't time for embroidery.

I like to make shirts/undertunics by the measure and cut rectangle method. With variations in details it's an accurate way to make shirts right up to the 1800's when the "french sleeve" or set in sleeve became popular. It's fascinating to me that women made shirts for their husbands in almost exactly the same way for at least 800 years. The viking version of this shirt  includes a tapered sleeve, underarm gusset, keyhole neck with facing or binding (I extend the facing along the whole shoulder for strength and wear, a larger version of "wear bands" found in the shoulders of later shirts.) and either gored or slit sides. I prefer slit sides in the shirt because it reduces bulk/weight and takes less fabric. Examples of both ways have been found. The whole is put together with small flat felled seams, for comfort and strength, another detail found on fragmentary extant garments.  This is how I made shirts for the boys, how I made made ladybug's shift, and how I have made many other garments. So. I blithely measured my husband, cut, and sewed, popped it over his head..... and it was too small. I still don't know what I did. I suspect that carrying on conversations with your two and three year old while you attempt to tear rectangles for your husband's shirt can lead to mistakes in measurement. I had to start over, at great waste of time and fabric and to my intense personal annoyance. Which is proof that even really experienced seamstresses sometimes screw up. Even my mother probably occasionally makes sewing errors. Well.... maybe not....
One of these things is not like the other..... 
From now on if whatever I am working on for my husband doesn't feel like sewing a smallish tent I am going to be VERY suspicious. The other conclusion I drew from the shirt making expirement is that it is very hard to get a flattering fit on a man with really broad shoulders with this method.

The tunic construction I chose is based one of the garments found at Hedeby, with side gores, set in sleeves, and a keyhole neck. Infomation about the cuts of mens tunics and historical evidence pertaining thereto can be found in overview form from Madam Pora. From there you can go down the rabbit hole of original sources.... I do reccomend it, it's a really INTERESTING rabbit hole. 

 Because I do not have a current body block for my husband, partly from lazyness, partly because most of my drafting books are in storage from our move, I drafted from a polo that had holes in it. This can be a great method, but has some flaws. In general it's best to draft from a block. You are going to get better  results with less fitting steps. You also work with what you have! In this case I drafted directly onto the mock up fabric to streamline the whole process. 

The last few patern drafting projects I've done, instead of using a paper pattern, modifying that from the marks on the mock up, then cutting out a new mockup, I've been directly modifying the mock up by ripping it apart and then cutting it down, or adding to it by sewing on scraps. Here I am adding to the sleeve cap on the tunic. I like this method especially for my husband because it saves on mockup fabric. it took about three yards of thirty something wide cotton to mock this tunic up for my husband. If I had made a whole fresh mockup, or even a partially fresh mockup, every time I made changes, I would have used three times that much. When I have the mockup fit to my preference I rip it apart, iron, and label it, and keep it as a pattern. The fabric can hold up better as a pattern than paper in some circumstances. 

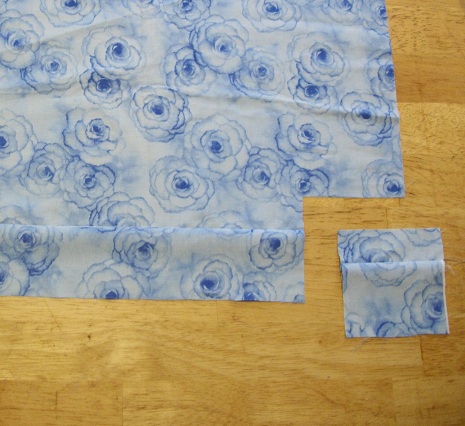
Isn't this fabric vile? people frequently give me bags of fabric because they know I make clothes for my kids. Such bags often include interesting items like this. I am not sure why anyone would have bought this fabric ever! However it saves me buying muslin for mockups, so I am most thankful for it. When I got this particular jem out I told my husband I was going to make his tunic out of it. He was unimpressed. Alas this sort of practical joke doesn't really work on him any more because he's listenend to me babble about grave finds and weave structures for long enough to know that isn't a finely woven wool in one of the prescribed colors.....  This is halfway through the fitting process. sleeve is looking better but some fine tuning to go. I don't bother with side gores or making it to full length in mockup. Your major fitting challenges are in the shoulder and sleeve here. When I'm ready to cut the tunic I lay out the pattern, measure down from the shoulder, and just cut the length I want. Then I measure down from the "start gores here" mark on the pattern to the hem, and cut the gores accordingly. 

One of the challenges of a fitted tunic is the eternal problem of how to hav a very tightly fitted sleeve and still be able to bend your arm. The extremely fitted garments of later eras (both mens and womens) resorted to multiple shaped pieces in the sleeve which put together yielded a sort of elbow macaroni shape. This is not accurate for 10th century viking, but you still want some elbow room. I draft in extra length at the back of the sleeve in the elbow area. Then I pin simultaneaously up from the cuff and down from the armpit, trapping the extra bubble of fabric at the elbow thusly
Then, using steam if necessary to relax the fabric into the desired shape (one of the great things about wool!) I ease the fullness into the seam without any puckers. This gives in the finished garment a slightly bent elbowed shape with a little "bubble" of space at the back of the arm, allowing the wearer to comfortably bend their arm. Although I don't have direct historical reference for doing it this way, I consider it  to be well within the range of viking garment shaping as we know it. Once the pinned seam shown here is sewn up and steamed into shape, there is no gathered effect at all. The trick is to add enough extra fullness to give elbow room without adding so much as to make an unsightly baggy bubble shape at the elbow. 

Facings at the neck are achieved in the standard manner, althoug they do have to be made in a front and back piece to account for the sloped shoulder. I prefer to mark my sewing lines, sew, then cut out the shape of the neck. This keeps the neckline from getting skewed in the pinning/sewing process. Then it's graded, clipped, and turned. In keyhole necklines like this, the bottom of the slit that allows it to fit over your head is very prone to fraying or tearing. I use a technique from 17th century mens shirts to prevent some of this, and work a bar of satin stitch across the slit about a quarter inch above it's terminal point. I then bind the center of this bar, where it crosses the slit, with knots as if making a hand worked button loop, and tie off. This bar keeps pressure from being exerted on the fragile tip of the slit every time the shirt or tunic is dragged on and off over the head of its owner. In matching thread on a wool tunic, it's basically invisible. Again, I have no historical reference for this, but I doubt viking women were any more excited about having to repair torn out seams than I am! I don't know what their solution to this was (and if I can find reference for it will adopt it immediately!), but feel that I am well within the spirit of recreation. 

The finished tunic is a fairly unpreposessing item. Especially without any trims or embroideries (it actually looks kind of sad). This is just finished with hand topstitching at neck, hem, and sleeves in matching thread. I will later cover the topstitching with embellishments. I plan on trim at neck and wrist, embroideries over all the seams to strengthen them and bind down the seam allowances, and probably applique/embroidery on the shoulders both front and back. I have my eye on the wolf patterns on the hilt of a 10th century sword for the applique.

Mostly I am just relieved that husband will have something to wear, and rushing on to drafting/making trousers! Hopefully I will get better pictures of the tunic with him in it at the event. For now. On to trousers! 

Friday, January 30, 2015

Historical Sew Monthly, and the January challenge part 1

This blog has been pretty much defunct over the last two years as we've been overwhelmed with moving and life, but I'm hoping to keep up with it this year as part of the Historical Sew Monthly. I find in the last couple years that I am in a rut with my sewing/spinning/knitting/other fiber things. I am just sort of treading water, keeping up with demands created by growing children who need clothes, occasional commission work, and gifts. The Historical Sew Monthly, with it's challenges, will force me to get out of my sad little repetetive box, and do new things again. I am also hoping that it will help me revitalize my wardrobe, which has gotten severely slim. And I'm just really excited to have sewing that I'm dong for the sake of creating, not just to fill an urgent need (you know, of the kind of all my children have outgrown their pajamas, or all of my daughter's dresses are too short and she has nothing to wear type!).

For those of you not familiar with it, the Historical Sew Monthly is run by the wonderful Dreamstress. Please hop on over to read more about it at The Dreamstress. It's worth a visit anyway, she has cool stuff! The premise of the Historical Sew Monthly is that every month there is a new challenge which you interpret via a garment dated from the beginning of time to 1945. For January the challenge is "foundations." There have been a lot of really incredible contributions to this challenge. The Dreamstress has a list of participating blogs at her site, or you can hop on over to the Historcal Sew Fortnightly group on facebook, which is a really great community for anyone with an interest in historical costuming, no matter what their experience level.

I was actually really excited for January, because last year my husband, wonderful man that he is, gave me a Laughing Moon bust gore corset kit. I was super excited about it at the time, but never found time to make it, something else was always more urgent, and surprisingly, I was a bit intimidated by it. I've done stays, but not a real corset before. So there it's sat. Which makes the january challenge perfect. With that as my goal, I told myself that before I so much as traced off the pattern, I absolutely had to finish up my daughters shifts and pantalettes which were cut out and sort of half done.

This fall when I asked my daughter the "pants or dresses" question I ask at the change of every season, she decided on dresses again. I had already decided that I was going to be inspired by the civil war era for her garments this winter if she decided for dresses, which leads us to the problem of climate. We live in the frozen north, we heat with wood, and our house is typically chilly. You need something on your legs, and you need wool, or layers (or both!). Since I had a lot of cotton yardage for dresses already, I decided on undergarments that would give her leg coverage and layers over her chest: Pantalettes and knee length shifts. Worn as a set under a cotton dress, the extra layers make it so she doesn't even want a sweater or a shawl many days, and have the added advantage of making it easy to go outside and play: she just takes off her dress, and puts her snow stuff on over her pantalettes and shift.

After I spent some time digging through period photos, pictures of extant garments, and my own books, I started with an existing pants pattern in my collection that I liked the fit of the crotch and seat on, and drafted an ankle length pantalette. The knee or calf length was more common around the 1860's, but examples of ankle length can be found, and since she doesn't typically wear stockings, they're warmer. Also they work better with the few regency style dresses that fit her still from last year. I also drafted chemises with pintucks front and back. After I cut these out there were some narrow squares of fabric left, from which I cut straight chemises with no pintucking. I used the pictures in my excellent book of ladies 1875-1890 original patterns as a starting place for the geral shape and length of the chemises, with the stipulation that it was important that they in no way impede her from runing, doing handstands, practicing ballet, or whatever other activity comes into her head.


For fabric I used a cotton linen blend that I bought this fall from Dharma Traders. I bought 15 yards of to use for shifts, shirts, and general underthings, and am not regretting that one bit. I have already used it to make viking undergarments for all my kids this fall as part of their authentic viking haloween (yes, I am a dork. It was also really fun). It's a really great product, I cannot reccomend it highly enough if you're on a budget where 100% linen is not a possibility. There are still some things for which I really prefer linen, but for general duty undergarments and shirts this is a wonderful product and I don't find it too much of a compromise. It looks and acts much more like linen than cotton.

The two pintucked shifts were cut as squares, pintucked, and then cut out with the pattern. The seams in the shifts are 1/4 inch french, except the shoulder seams which are flat felled for comfort. In the case of the pintucked shifts which had a back seam I made it at 1/2 inch, then rolled it to both sides and top stitched. this left the top edges finished for the closure. I used the same method on the straight shifts, except they close under the arm. Although this is not strictly accurate, I like it because it allows my daughter to do up the buttons herself.  All closures are with antique bone or shell buttons and handmade button loops in matching thread.  The necks of the shifts were either finished with cotton bias binding, or hand scalloped. The arm holes are all hand rolled. and then some of them are trimmed wtih cotton lace. I had fun experimenting with some of the trim application metods shown in patern pictures from ladies magazines.  I am not entirely happy with the necklines on these. Next year I may recut some of them as square. the front shows under a few of her dresses. For now I will alter the standard dress pattern I'm using this year for a higher front neck as a stopgap.

I have a large collectin of antique and vintage lace thanks to friends who know that I make clothes for my daughter and give me bags of odds and ends. For the two pintucked shifts I used a pair of pillowcase edgings, odds and ends of yardage for the two straight shifts. I'm saving my large pieces for future projects, like petticoats....

The Pantalettes are all 1/4 inch french seam construction. I did the tucks and insertion before I finished the legs. This makes doing the tucks a lot easier, but it does mean that the legs cannot be let down at a later date wtihout undoing the seams partway, so it's a sort of win/lose scenario. Probably the most authentic method would be to make up the legs and then make the tucks, as this would make the legs easily let down to accomadate growth. They have a waist casing with elastic rather than a drawstring, which is clearly not authentic, but is much easier for a 5 year old girl who likes to be totally self sufficient, and these are a daily wear item. I had fun with the legs and finished all three with different amounts and sizes of tucks and different kinds of trim. My daughter enjoys the variety, and it made the sewing more fun. This pair has a remnant of hand tatted lace whip stitched to the rolled bottom hem.

 And finally the whole collection together. You can see the bottom treatments on the other patalettes and the two straight shifts here. All finds from my stash of antique lace, and all cotton except the beading insertion on the pantlettes, which is newer and nylon. I would  like to add cream ribbon to the beading with small bows on the outside of the legs, and I know I have some somewhere. I just can't find it! When it shows up I will add it. This has been a fun project in a lot of ways, and very practical. I'm glad to have it out of the way, especially with the coldest part of our winters upon us. It also clears the way for starting on my own underpinnings, which I am very excited about. I still hope to get my corset in before the midnight January 31st deadline, but have been delayed by a round of the stomach ick that went though our whole family. I have it fitted and the pattern finalized but all the construction still to go. I am feeling better now and hope that a two day binge will get me in under the deadline!

Monday, August 1, 2011

baby sheets! A how to.

So this weekend we (finally) got the matress for my son's cradle out of the storage unit. Today I made up the sheets for it so he can sleep on the mattress that was intended for the cradle in the first place, instead of folded up blankets and towels covered with a flannel receiving blanket. Making fitting sheets for a cradle or basinette is super easy, in fact, you can pick up a fairly good quality twin sheet set from goodwill for five dollars or so, and get two fitted sheets, a changing table cover (which uses the same method as the fitted sheet) and a set of nice matching curtains out of it, all for something like $10 (with elastic and such. Less if you recycle the elastic from the fitted sheet) and an afternoon's sewing. I had bought some fabric especially for this at the Quiltbug while I was pregnant, and it's been sitting around pretty much for ever on the top of my to do pile....

So start off measuring your mattress. Mine is 36 by 15. then add a quarter inch to all sides for ease. So 36 1/2 x 15 1/2. Measure how deep the mattress is: 2 inches, and add enough extra to fold under, at least another 2 inches, plus 1/4 inch seam allowance. so that adds up to 4 1/4 inches to for the sides. Add that to all sides of your top measurement so your final total is 45 x  24. Cut a square of this size out of your  fabric. with the yardage I had, I was forced to add a small strip to the long end to make 45 inches. Try to avoid it, but if you must piece your fabric, either serge, zig zag, or french seam to avoid fraying during frequent laundering. Also, if you must seam, try to either hide it, or put it somewhere where it won't look so bad. Mine is hidden down the side of the mattress, but what about adding a 1" stripe of contrast fabric a quarter or a third from the end of the mattress? Or put a flat felled seam with contrast stitching a quarter or a third of the way down the mattress. That would allow you to cut in two pieces, and in some cases, save fabric.

 Add up all 4 sides of the top measurement of your mattress (36 1/2 x2 + 15 1/2 x 2 = 104) add two inches, and cut enough strips 2 inches wide from your fabric to meet this measurement. (my fabric is 42 inches, so I need three strips.)

Take your large rectangle, and in each corner, mark a small square the depth of the side (4 1/4) less 3/8, so for mine, 3 7/8, and cut it out.


then pin the corners together wrong sides together:


 Sew at 1/8, and press flat:

 then turn so that the right sides are together, and sew at 1/4. This makes french seamed corners that will survive many washings.


Now take your 2 inch strips, and sew them together to make one long strip. Press that strip in half. starting about in the middle of one of the long sides of your sheet, line the raw edges of the strip up with the edge of the sheet, with the strip along the right side of the fabric. Sew it on folding the edges under at the beginning and end, and trimming off any excess.


Then iron the strip to the wrong side, enclosing all the raw edges, and topstitch it down, finishing your casing. Add elastic, and you're finished!

The cradle looks pretty spiffy with the new sheets!

I've used the same method for making a changing table cover, using a pieced and quilted top, and a drawstring instead of elastic. You could also make basket liners using this method.

If you have leftover fabric, check your library for books on sewing curtains. It's dead easy, although not entirely intuitive. I have an excellent book from better homes and gardens called "sewing for your home" it's older, so the pictures might give you a giggle (think avacado, burnt orange, and shag carpets) but it's a great overview of the subject.

Friday, July 29, 2011

Mish Mash

This has been a crazy week. We just moved our daughter into her first real bed. Which meant that first we spent the weekend sanding, painting, and making a mattress base for the antique bed we found free on the side of the road, then spent part of the week scratching our heads trying to figure out where to wedge the bed into our teeny one bedroom apartment, then moved all the furniture in the house (or so it seemed). Finally we moved both the bed, and the crib into our bedroom, and squeezed our bed into Jade's cubbyhole bedroom. Then I spent several DAYS trying to make sense of the mish mash of things that were discovered behind furniture, under beds, and generally shoved into corners (hey, out of sight out of mind, right?). Then I spent another day catching up with the dishes and housework I had not done while trying to sort out the aforementioned mish mash...

Today I've finally gotten around to sewing, except, unfortunately, what's on the top of the to do list has been the mending. I loathe mending. Even though as a result of a misspent youth that involved making period costumes for all my dolls by hand I'm really quick at hand work, it's just dead boring, and not terribly rewarding. But I have several skirts with torn out hems, or run to holes, and my poor husband has been down to one pair of jeans for weeks because he's torn the belt loops off all his other pairs (how does he DO that?). So today, during naptime, I have dutifully sat down and mended... until I decided to blog....

But, as a ray of proverbial sunshine, my mom delivered a box to me containing the attachments my Great Aunt sent me for my featherweight:


L to R, that's a zig zag attachment, a buttonholer, and a ruffler. I also have a rolled hem foot (one of the only ones I've ever met that actually works) an edge stitcher, and a couple as yet unidentified gizmos that look like they were designed by Rube Goldberg. Of course I discovered what the ruffler did immediately after I finished this dress for my daughter.... 


Oh well, I'm planning on making another, with even MORE ruffles out of this fabric very soon:

Sadly the camera doesn't do the green justice. I think I have enough to make a matching hat, and I might also knit up teensy lace mitts to match... although that might be overkill. And because my daughter has enough church dresses and I'm just doing this for fun anyway, I'll probably put it up on Etsy. 

The attachments for the Featherweight are phenomenal. It makes the jump from just a great machine that only does straight stitch, to wondering why I'm bothering to keep my viking (Oh, right, free motion quilting... but other than that it's an expensive doorstop). If you're so lucky as to have a featherweight, I really suggest you take the time to figure out what all the little rube goldberg gizmos do. If you didn't get any rube goldberg gizmos, you might look around at purchasing some. Especially the buttonholer. I can't say enough good things about how nice the buttonholes it makes are, and how little fuss is required to produce them. 

With that I'm off to use my spandy new attachments to finish up a stack of commission work that's been waiting on my getting out the Viking to do buttonholes and zig zag. 

Thursday, July 14, 2011

Adding to the diaper stack

Cloth diapering has been a huge part of our lives with both of our kids. Partially because of environmental reasons (Did you know that paper diapers take 40 years to biodegrade in a landfill?) and partially because of economic factors (Did you know the average family with one child in diapers goes through 1,300 to 1,500 dollars in diapers annually?). When we had #2 we went to cloth wipes as well because I though it was a bit ridiculous to blow through two packages of wipes in a week.

Obviously you use different diapering solutions for different sizes of child. We've used flat prefold diapers and waterproof covers with great success, except for that awkward stage when you can no longer get the small size prefold around them, but the large size is so bulky it makes their bottom half look like a miniature bowling ball. My daughter reached that stage around 7 months, and we found a fantastic free pattern for a pocket diaper that you stuff with the outgrown prefolds. Now baby #2 is out of his prefolds at 4 months. Because he is Godzilla baby. And I don't have enough for more than a day and a half. So I've been very busy the last couple of days trying to get more made up so I can go back to every other day diaper wash! 


Jade helps me pin the pattern onto the flannel. 

You can check out this pattern and Rita's fantastic instructions here: http://handmadebyrita.blogspot.com/2007/10/classic-rrp-ritas-rump-pocket-pattern.html I can't recommend them highly enough. It's a simple pattern, uses inexpensive materials, and seriously elongates the life of your prefold diapers! Besides, they're really really cute. 


Here's my little buddy modeling the finished product! I normally try to use neutral prints/colors for things like diapers, so that they can be used for either a girl or boy, but I couldn't resist the plaid!

The green are lined with Jersey, the plaid with more flannel. Both solutions work really well, I just happened to have part of a yellow jersey sheet set that got a huge stain on it sitting around. This was a good use for part of it!

Since we're talking about cloth diapers, I thought I'd share my favorite recipe for cloth wipe solution: 

3 cammomile tea bags
1 Tbsp Weleda baby oil with calendula
1 Tbsp Aveno baby body wash

Put the tea bags in a quart jar, and fill with boiling water, allow to steep until cooled. Add the baby oil and body wash, put on the lid and shake it well. Pour over all of your cloth wipes in a big bowl, wring out the wipes so they're just damp, and fold them in a leftover disposable wipe box. Surprisingly enough, they stay perfectly fresh for four or five days, even in the summer heat. You could add a couple drops of tea tree oil for it's disinfecting properties, or a bit of your favorite essential oil for scent if you liked. 


Tuesday, July 5, 2011

The T-shirt Pajama Project

The project of the day is Pajamas. My two year old daughter has no seasonably suitable/appropriately sized pajamas. As usual I had put off doing this (I'll do it right after I finish putting the binding on that quilt, I swear!) until my husband somewhat apologetically came out of her room, where he was attempting to put her to bed, and asked "does our daughter have any PJ's? Because I can't find any." At which point I was forced to admit that no, indeed, she does not have any, so just put something like a t-shirt on her and I'll figure out the pajama problem immediately and at once.

So this morning I looked around at my fabric and said "Pajamas. For summer." Then I looked at our closet. Where I noticed that my husband has a number of t-shirts the armpits of which have completely disintegrated. I thought, ah hah! a source of fabric! It's lightweight, I already have it, and it's a much better use for the t-shirts than throwing them out. Besides, not much is more comfy than a worn in t-shirt.


I started out using a t-shirt that fits her as a template. As you can see there's plenty of fabric to work with. (Sometimes having a husband roughly the size of a woolly mammoth comes in really handy) 


Using the T-shirt as I guide, I cut out the body pieces. I kept the neck edge intact, because I want to use that! 


 Leaving some extra for seam allowance, I cut (only the top layer!) for the shoulders. That finished the front. For the back, I flipped it over, stretched out the shoulders, and used the back of template as a guide.
 I cut the sleeve off one side, the strip leftover will be the underarm gusset. 

Then I stacked the two sleeves together, carefully lining up the hemmed edges, and cut out the sleeves of the Pajamas. This length gives me a sort of 3/4 sleeve look. 


The shorts were the easiest part. I used my handy dandy sense and sensibility pantaloons pattern, shortened the legs and made them a little more narrow in the body (I used the t-shirt's bottom hem for the cuffs). Probably what took me the longest was putting the elastic in, then getting Jade to hold still long enough for me to pin it to the right length without  stabbing her. 


To make the top, I sewed up the shoulders first, then centered the sleeves. Just cutting the sleeve at the same angle as the original T-shirt gives you a lightly shaped shoulder. 


Then I sewed one gusset to each side of the assembled piece, working from the hem to the sleeve cuff. This next bit is the only tricky bit of the whole assembly process. You fold the whole thing in half along the shoulder line, and working from the hem to the sleeve cuff, sew up the second side seam, and the under arm gusset, and the sleeve.  It gets tricky where the sleeve joins the body:


You have to sew past the edge of the sleeve and in the sleeve seam for the amount of your seam allowance (3/8 here). 


Then put the needle down, the presser foot up, turn the work 90 degrees, so you're sewing down the edge of the sleeve, and line everything up. 


the other little tricky bit is right at the end of the sleeve, where the tip of the gusset is. You have to line the top edge of the sleeve up with the gusset, not the other edge of the sleeve, and sew past the tip of the gusset. 


Then you put down the needle, pick up the presser foot, line up the sleeve edges and sew down to the end of the sleeve. Easy! 


Voila! the finished gusset! This gusset design is a bit fussy, but it makes efficient use of the fabric, and it makes a really roomy easy on/off shirt without a lot of fussing with the the sleeve cap, or any armhole shaping. 


The finished Pajama Top! The underarm gusset looks all wodgy when it's lying flat, but it really makes for a nice fit once the shirt is on. It's especially nice for toddlers who want to dress themselves, because it makes a wider sleeve opening, without making a huge baggy sleeve that they're going to drag in absolutely everything. 


Jade Models one of her new pairs of PJ's :) Two naptimes of sewing, and she has three new pairs. 

This is one of those projects that really makes me wish I had a serger. Sure, the raw edges on the seams won't fray since it's a knit, but all those flappy seam allowances bother me. I do, however, draw the line at making french or flat felled seams on knit boxer and tee pajamas like I do on all her other clothes. That's overkill even for me. But I can't help but look at them and think how tidy the insides would look all serged neatly......