Showing posts with label Fencing. Show all posts

Wednesday, January 10, 2018

A Soft Parry Cloak for Husbeast (with cutting diagram)

1629 etching from
"Le Jardin de la Noblesse Française..."
I'm not usually effected by "scope creep" the phenomenon where a project starts out simple, and then gains momentum until it's a jaugernot of complexity, for the simple reason that most of my projects start out at "crazy person" and go from there. But this one definitely hit that pitfall. What started as a "make something for the husbeast two days before christmas" project turned into..... Well, you'll see.

For christmas this year, the husbeast got fencing gear. My contribution to the haul was was a small cloak for use as a soft parry. A soft parry can be anything floppy, a piece of leather, a towel, a floppy hat: but typically a small cavalier style cloak is used. Although the cavalier style cloak is very late in our period, and it's heyday seems to have been in the early 1600's, (along with the wide brimmed hat and floppy topped cavalry boots, it's one of the signatures of what we modernly think of as the "Musketeer" look) period fencing manuals do show people using a similarly sized cloth or cloak in defense.

diGrasse's True Art of Defense 
I was, myself, unsure what a good size for this object would be. Husbeast has a small cloak taken from similar patterns in Patterns Of Fashion, made of wool, trimmed with velvet, and lined in silk. It fits him perfectly, but is manifestly too large to be used effectively as a soft parry. My conclusion was that, because of his size relative to normal humans, anything that would fit him as a cloak would be on the large side for use as a parry. So I consulted my rapier fighting house sister, and she measured her fiancee's cloak for me, which is heavier than she likes, but of a size suitable for a bigger guy. It's a wonderful pattern because it makes a very nicely draping cloak from a yard of 60" wide fabric, if you're willing to have a seam at the center back of the collar, or a yard and a quarter if you want the collar in one piece. It makes a very dashing shoulder cloak for a person of medium size, if not for my linebacker sized husband. Originally I did not plan to use the collar, since he won't wear it, but after I cut it and flapped it around a bit, I found the collar stiffens the neckline and makes gripping the cloak easier, as well as making it easier to fan the cloak out when you need to. I suggest using the collar even if you won't be wearing the cloak. 
Cutting Diagram for 1 yard of 60" wide fabric. Half inch seam allowed at center back of collar. if you don't want a seam in the collar, use a yard and a quarter and cut the collar 13.5" long on the fold. 
I won't get into construction here, as this is a pretty simple project (and I didn't take any pictures) I will note that if you plan to wear the cloak you may wish to slightly curve the collar piece so it will lie flatter, up to you. In that case you would want to cut from a yard and a quarter. It is also preferable to cut the lining at the same time as the cloak, with the two layers pinned together, so as to avoid having them be different sizes. 

I am still trying to make things with only items I have on hand, so I used a brown faux suede material for the outside of the cloak, and a burgundy satin for the lining. The faux suede is sturdy, drapey, and slightly grippy, all useful in a soft parry. I added some appropriate trim I had in stash, wrapped it and stuck it under the tree.

And this is when the scope creep happened. I kept thinking about how the trim was the perfect mount for spangles, and how it would sparkle in the light when he flipped it..... so with christmas safely past, I fished out my spangles and started applying them.


It takes a remarkable amount of time to spangle all of the everything, even on a moderately small cloak. I applied the spangles every other bunch on the trim, and knotted each one down with it's own knot, then ran the thread under the lining to the next spangle. This eliminated tails, but if he snags one and pulls it off, it will only be the one that is pulled off. The spangles are put down with Sulky 12 wt cotton, matching the lining, each sewn down with three equally spaced stitches, as seen in my favorite source book for these things: Elizabethan Stitches.

 Then I decided those spangles looked a little lonely, and wouldn't some gold braid set it off. I have a cone of Krenik braid, but I also have a lot of semi worthless DMC metallic floss. Having just learned how to bobbin braid..... Well I separated the floss into strands, wound it onto bobbins, and braided it, two strands of gold, two strands of copper.
and couched it down onto the cloak with the same 12 wt. cotton thread. I couched it fairly closely to prevent snags. Gold elements are seen couched both with matching silk threads, and with contrasting silk threads in period pieces (according to my same favorite source book.)


There was enough braid to edge both sides of the trim and do a little fancy in the corners, I left the collar plain because with the multiple rows of spangled trim, the effect of adding gold braid was a touch frenetic. 
 The only complaint I have, is working along the bias, it was easy to slightly stretch the fabric as you couched the cord down, you can see a few kinks in the cord where that happened. Not the end of the world but a little frustrating.
 Of course ideally this would have all been done before I put the lining on, but it does have the unintended benefit of stabilizing the edges of the lining, although it's not as tidy as it would have been if I had done it all before I lined it.

 All in all a pretty outcome, and the Husbeast loves it. If you were going to wear it, you would add cords at the neck. since he isn't going to, they'd just be an encumbrance.


Wednesday, March 29, 2017

Viking Fencing gear


Crash just turned six, which is the age you're allowed to start youth combat in the SCA, so I just made him his first set of fencing gear. For rapier fighting, the youth gear requirements are the same as the adult, which means that he has to have his torso covered by puncture resistant material, and the rest of him by abrasion resistant materials. He needs gloves, a hardened leather or metal gorget (metal is better for adults, but kids are only allowed to fight with foils, and have less body mass, although their point control is worse, so I consider leather to be ok for them.) a helmet, and a hood/drape/coif of puncture resistant material over the helmet. All openings must overlap by at least 3 inches.  Currently Crash is super into being a viking, right down to his "viking hair" (which he's spent more than a year growing out from a mohawk.) So I decided to stick with that theme and try to make him a small viking outfit that would be suitable for fencing: a knee length tunic, lined to the elbows with heavier material, and a hedeby style hood sewn to his fencing mask for a drape.

I assembled some fabrics from the stash, my essex 50/50 cotton/linen that I use for a lot of kid clothes (Dharma trading, my go to for linen and silk!) and the same brown twill that I used for Husbeast's practice doublet and helmet drape. Those had to be puncture tested by a marshal to be sure the final garment would pass (nothing would suck as badly as making a garment, and THEN having it fail puncture test, ruining the garment and wasting your work.) Then I used fiber reactive dye and dyed a length yellow for his hood, and another length rust for the tunic. Both accessible and popular colors among vikings. (the yellow photographs poorly. It's sort of an obnoxious daffodil color. Crash is thrilled.)

I took a new set of measurements for this years garb (he's growing like a weed) and ripped the squares for the tunic from the rust cotton/linen. Some fabrics rip better than others, but it's a great way to get things straight across the grain. silk particularly rips nicely, but so does this linen blend, you just have to iron it back flat afterwards.

I used the ripped squares as a pattern to cut out the brown mystery twill, only cutting half the length of the arm. I thought the arm looked a little skinny here, and I should have gone with my gut, and added a gore to make it a little fatter: it fits with plenty of ease, but it's kind of a skinny looking sleeve, and a bit of a wiggle for him to get into, even with the armpit gusset. Next time I'll know better!

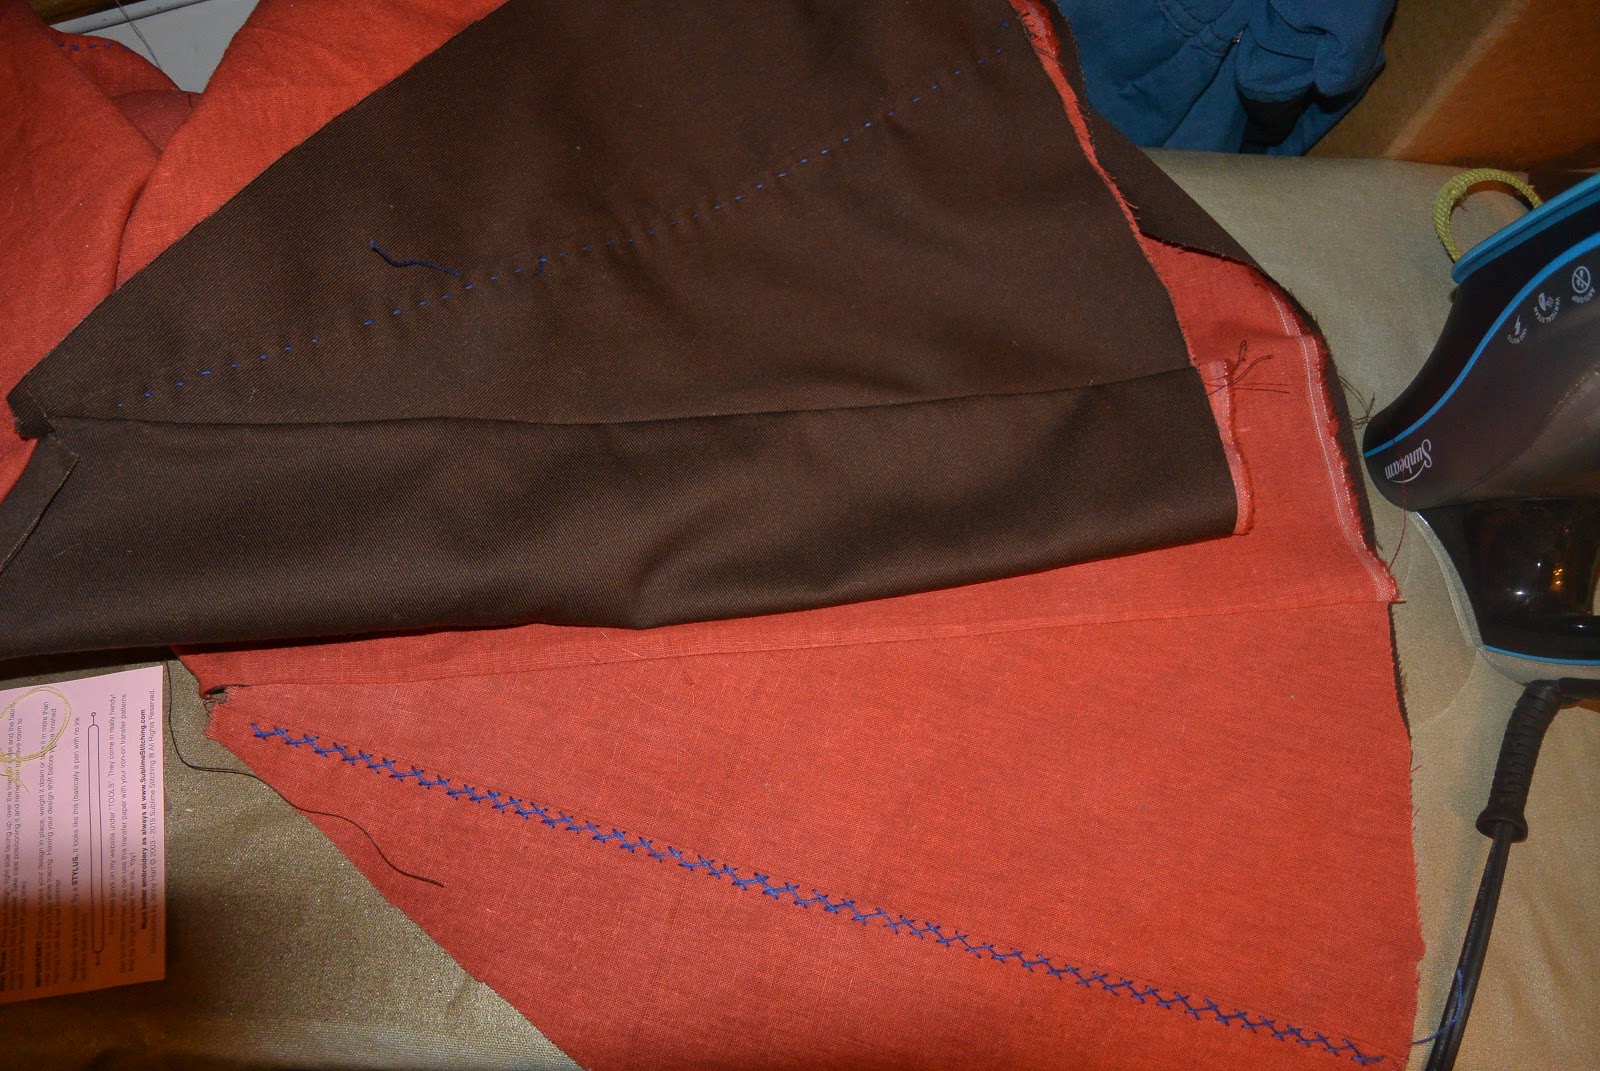
I put the tunic together by sandwiching all the seams except the final underarm seam, which I serged. That way almost all the seam allowances are on the interior. It makes a nice flat finish, and keeps the lining from twisting around independently of the garment. It also keeps the exterior fabric from bunching or bagging, which can happen when you have a heavy lining on a lighter outside fabric. Typically in that situation you'd use the heavy fabric as an underlining, then finish off with a bag lining, but for instances where you don't want the extra layer, this is a great solution.

If you're going to construct a tunic this way, you have to finish off the neck first unless you want to add an additional layer of neck facing: in which case, carry on. I put the lining and the garment fabric right sides together, sewed the keyhole neck seam, graded, clipped and turned it, and used a running stitch in heavy linen thread to keep it from rolling. I worked the tip of the slit in buttonhole, and put a tear bar across. Then I added a flap to go behind the slit which overlaps the required 3 inches and closes with velcro.
To sew the sandwiched seams: first line up all 4 layers of the two panels, the lining, right sides together, and the garment fabric right sides together. Where the garment fabric and the lining fabric touch, they will be WRONG SIDES TOGETHER, just like the final result in a traditionally lined garment. this is important.

Next, sew the seam, clip it to reduce bulk, and iron it flat to set the stitches.

Then turn one layer of the lining, and one layer of the exterior over to sandwich the seam, and press everything nicely.

Voila! a beautifully enclosed seam. I've been able to do this for a whole gown for Ladybug, only having to do the last lining seam by hand to get a completely finished interior that acts much like a flatlining, but looks like a bag lining. It's nice when you don't want to flat fell, and need to underline something for some reason. (here so it passes puncture testing.) In this case I didn't need the strength provided by flat felling, and a flat felled seam would have been very stiff, which could have made the tunic hang funny.

 You can see here the nice finished look of this technique.

After I sewed each seam, I worked it over in herringbone stitch, over the seam allowance, with heavy linen thread. This was mostly decorative, although it also holds the seam nice and flat.

I finished the tunic by sewing the two long underarm seams, and then serging them I hemmed it with a strip of matching blue bias tape I had lurking in the stash as a hem tape. with a garment this thick, a hem tape is much nicer and less bulky than a traditional rolled hem. Also traditional rolled hems are more difficult on curved tunic hems because you're trying to ease a larger circumference into a smaller one. I used the last length of the blue linen thread to running stitch the sleeve hems up.

I made the hood the exact same way I made the toddlers skjoldehamn hood, except sized to fit a fencing mask. I ripped the squares and cut out the lining in the same way as for the tunic. Instead of just ironing the edges in and lining up and pinning everything: like I did for my previous skjoldehamn hood, I sewed together all the edges I was going to eventually seam, and then turned the pieces. This made the sewing easy since things stayed lined up.
Treating the seam as the edge of a single layer, I seamed it up the way the extant hood is, with an overcast stitch. This is done in waxed linen.


When this is folded flat and ironed, it makes a beautiful interior finish, and a lovely exterior seam. Like the finish in the tunic, this method of construction ties the layers together at the seam, and keeps them from twisting inside the garment, or bubbling, which in something that is gong to be yanked on and off over his head, is nice! it's also an extremely portable project. I did most of this in the car.

Unfortunately there was a sad ending to the first part of the tale of the hood. I somehow managed to make it just the right size for Crash's HEAD, and NOT for his head in the fencing mask. So, I finished that one off for him to wear (his old hood had to be given to Bang) and made a second that would fit his fencing mask with the leftover yellow. I had to make a little seam to get a long enough piece for the top, but it doesn't really show.

I also realized after hood #1, that there was a problem with the hood as is for a fencing drape: You can't get your hand up the back to fasten the velcro strap that holds the helm in place. As I think back on it, the other hoods I've seen for fencing drapes button down the front, which allows you to get at that strap, which is required by regulation. My options became, make the neck wide enough to allow you to flip it back up and get to the back of the hood, or put some kind of closure down the
front seam so that you can open the hood to fasten the strap. I didn't like either of those options, so I put it together, pinned it onto the hood, and figured out that if the back square goes up a little higher than you might usually want it to, you can flip the back of the hood up over the top of the mask to put it all on. Having breathed a sigh of relief I moved forward and put hood #2 together.

I put some bears on the hood for him, since a bear is the animal he picked for his SCA kid tag. I used an old wool skirt that came in a bag of donated fabrics and had moth holes, which made it ideal to rip apart and use for applique. I edged the hood with a strip of the wool, then cut out some bears and appliqued them down with Perle cotton thread. I cheated and used some fusible net to hold them in place while I stitched them. It will also make them less likely to tear loose from the stitching under direct hits from a fencing foil. For a period finish I could have quilted the appliques down, or not been so silly as to fancy up such a utilitarian object. Although, historically speaking the vikings liked to fancy up utilitarian objects, so I'm in good company.
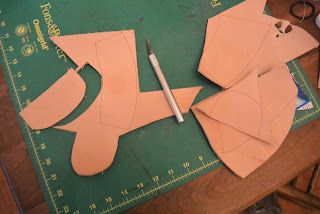
Then it was on to the Gorget. By regulation, this has to cover the back of the neck, and over the collarbones in the front. It can have an attached "lobster tail" to cover the cervical vertebra as well: which I consider to be prudent. I had some tooling leather left from making Bang's batman mask, which is veg tanned and suitable for water hardening. Crash fits Ladybug's Gorget, so I cut his from the same pattern.

Water hardening is pretty cool, but not an exact science. The leather hardens more the longer you leave it in the hot water. However, the harder it is, the more brittle it becomes, so you want a good balance. When it comes out of the water it's shriveled, and flexible, and can be stretched and formed easily, but needs to be set over a form to dry. I've got Ladybug's gorget wrapped in a plastic bag and am using a strip of wool and a chip clip to hold Crash's wet gorget on to harden. The lobster tail bits are on my other really scientific mold. I haven't quite gotten the balance of hard to supple right yet. I got Ladybugs a little too soft, and Crash's a little too hard: one of the lobster tail plates actually started to crack when I flexed it a little too much putting it together. If he breaks it, I'll just make him a new one. I'm going to try hardening again making myself a gauntlet in the near future. (for more information on water hardening, go here for an excellent article on the topic)

I cut the lining and the straps from the deerskin leftover from Husbeast's gloves. I used the same stuff to line Ladybug's gorget, it's supple and soft. I just put all the pattern pieces together, and traced around them to make approximately the shape of the finished piece. This doesn't have to be super precise as leather is so flexible, and you can trim it up a little after it's all sewn in.

The finished Gorget. I pulled the lining over the top like they did on my husband's metal model, an upgrade from Ladybug's model. It has a leather "hinge" on one side, and a buckle on the other. Everything is sewn with heavy duty waxed carpet thread. I learned with this piece to punch ALL the holes before you water harden the piece: I had to use a drill with a very small bit to make the holes to sew the straps on. It's not super pretty, but it does fit, and do the job it's supposed to do.

Last item of protective gear to make was his fencing gauntlets, and we were all set to fence! Go forth and be chivalrous Crash!

Crash and Ladybug in their gear. 

With helmets and hoods! Ladybug has assumed fencing feet. 

Tuesday, March 14, 2017

The start of my glove making journey, with some resources for aspiring glovers.

This is a project from last summer when Husbeast and Ladybug started fencing, and it was just easier and less expensive to learn to make gloves for them than it was to try and find them gloves that actually fit. Children's fencing gauntlets are scarce as hens teeth, and gloves that actually fit the husbeasts shovel shaped hands are a laugh. So I looked up some resources, looked at some period gloves, and said, I can do this. I didn't have time, or even think to write it up at the time, because it was a pretty utilitarian project, but I've kept going and am now starting on fancier gloving projects, so I thought I'd write up the beginning of the whole journey here, as well as gather some of the resources I used in one place so folks don't have to do the amount of googling I did. (scroll to the bottom for the resource list)

I started by practicing on a pair of very basic single piece gauntlets for Ladybug, starting with drafting a pattern and making mockups in felt. Lots of mockups in felt. I discovered that pattern drafting for gloves is not as intuitive as some other kinds of pattern drafting. Then I stretched a piece of gilded kidskin I had hanging about (bought in a scrap bin at a sale 10+ years ago.) traced and cut the gloves. And then found out that leather, even kidskin, is very, very different to work than fabric. On the plus, Ladybug loves them because they're shiny. An important lesson on this pair was how much easier it is if you use cardboard for your final patterns (from a file folder or cereal box), it's so much easier to trace around precisely than even stiff paper. Also, metallic sharpie marker shows up nicely on dark leathers (the back side of this leather is too dark for pencil or marker to show well.)

With one pair under my belt, I looked at as many pictures of italian gloves from the second half of the 16th century as I could find, and proceeded to draft a pattern for a two piece gauntlet for the husbeast, and make mockups. Lots of mockups. Good thing felt is cheap. The italian glove lacks the extended fingertips and exagerated fouchettes (the piece between the fingers) seen on English gloves of the same period, and typically features a cuff that is folded back over the hand. Since that's illegal for fencing, I kept the shape, but borrowed the gauntlet from a slightly later glove (also seen on earlier hawking gloves, so it was known) This pair is made from medium weight deerskin, and has a lovely feel. You can see the fouchettes are slightly pointed, and come onto the back of the hand more than modern gloves, but don't extend past the knuckles like many English examples.


I lined the cuff in linen, as seen on surviving gauntlets, and stitched the leather down over it, stitching partway through the outside of the glove to keep the edge from rolling out. the split side is the period style, but the split makes the glove illegal for fencing, so I added a small gusset of the lining material inside the opening to keep the look but still comply with regulations.


Sewing these gloves taught me the absolute importance of having the right needles. I needed to get them done, so started the task with a regular sharps needle. That required the use of a jury rigged leather palm pad, a thimble, and a pair of pliers to do the stitching. It was slow, and my fingers cramped after less than an hour of stitching. I switched to a glovers needle as soon as they came in the mail, and the difference was astounding. You still need a good quality thimble (I like this one) and it's not fast work, but my fingers didn't cramp. The sharp glovers needle also enabled me to do the stitching around the edge, which I never could have done with a standard needle.

For scale, my hand, spread out as far as possible, on the Husbeast's glove. Women's large gloves are about a half an inch too short in the fingers for me. He can't stop exclaiming over how wonderful it is to have gloves that actually fit him, and has started angling for a pair of work gloves for outside chores.
 This week I made a pair for Crash, who just turned 6 and started fencing. Here's a quick photo run down of the process, for really good detailed instructions I recommend the resources listed at the end of the post!
Pattern, and felt mockp There's a pin in the pinky showing me how much to shorten it.
After tracing and cutting everything but between the fingers, the first step is putting in the thumbs using an overcast stitch (seen on extant gloves in the collection of the  worshipful order of glovers.)
With the thumbs in I switch to the treadle machine for sewing the rest in the interest of speed.
Sew in the points on the back of the hand, then finish off each point with a few overcast stitches. All threads knotted off, dotted with fraycheck, and clipped short. You can see the nice finish the overcast gives on the inside of the thumb. 
I've folded the thumb partway inside out to keep it out of the way while I sew (don't ask how I know to do this....) then folded the glove in half and sewed the remaining seam. At the end I knot the threads and run the tail back up the seam, keeping them from dangling from the cuff of the glove.
One down, one to go! I have the fouchette patterns out so I can be sure to put them with the right fingers. 
Crash is very well pleased and would wear them everywhere if he could! He wore one to nap while I was finishing the second off! 
A good fit, excepting the slight twist on the middle finger of his left hand. I think this was caused by a little easing I did of the finger into the fouchette. I will be more careful about this next time. The seams will flatten down with wear.  
At the beginning of this post I said that I was going to start some more fancy gloving project. That is completely the fault of researching on the internet, because while I was looking up gloves for the Husbeast's fencing gauntlets, I saw these:

Pair of English or Dutch gloves, ca 1620, in the collection of the MET
And the seed of an idea was born..... 

Resources for gloving: 

  • How to make gloves: This is a vintage rather than historical find, but it walks you through the techniques and terms better than any other resource I've found. Good pictures too. 
  • Gloves from pattern to hand: A good walkthrough with lots of great pictures.
  • The Glove website: How to make gloves: Light on pictures, but a series of really useful articles, particularly on patterning. Do read the article linked on the first page "how to make elizabethan gloves. 
  • A Journey Into Italian Gloves: a comprehensive list of what seems like every picture of an 16th century italian glove in a portrait there is. Close up's with high enough resolution to see the stitching. an invaluable resource
  • The Worshipful Order of Glovers: They have one of the largest most beautiful collections of historical gloves in the world I think. And it's all beautifully cataloged. 
  • The Victoria and Albert museum: they also have a large collection of gloves, many with beautiful photographs. Also the MET has several nice pairs, although you've got to do a bit of digging to find them. 


Wednesday, December 14, 2016

A Husbeast's Fencing Doublet, Part 2 (construction at last!)

This is Part 2 of a two part series. Part 1, detailing the design and patterning process, can be found Here

With trial construction safely done, I felt ready to finally cut husband's first Proper Doublet, complete with all the bells and whistles. Inspired by Giovanni moroni's fantastic portraits, and an extant fencing doublet, I had patterned, drafted, and tested to death. There was nothing left but to start in earnest. I had decided at some point along the design process that this would be an ideal garment for him to wear to the fancy elizabethan event we were going to for our anniversary, so I was on a bit of a deadline, and with my own gown yet to make. Still, with six weeks to the event I felt comfortable getting everything done.


I had already started making the buttons, so they were well in hand, but I still needed two strips of
eyelets for the sleeves. I made those out of a fold of the the exterior fabric with the ends sewn in. It was my first time making hand eyelets and at first they went very slowly, but it quickly picked up speed as I got the hang of the process. The first strip of 15 eyelets took me three episodes of star trek, the second, half that. Then  I cut the collar and sleeve wings, and padstiched them to a layer of felt.


For the body of the doublet I used a layer of upholstery fabric, a layer of batting (Dream Angel, is a manmade fiber batting that i keep a roll of on hand. It happens to be fire retardant, in case husband ever decides to stand too close to a bonfire) I sewed the side seams of the doublet preparatory to marking the cording out. This is where I first discovered that this was, in fact the devils upholstery fabric. Ironing the seams open (after clipping the batting back to the seam line) had no apparent impact. They had to be ironed open and then whip stitched down to the batting. Once I'd done this I lined the seams up with the seams of the black Kona Cotton lining (dyed black cotton. very nice) and pinned through the seams to keep everything stable.

And started marking..... and marking, and marking.....

With it all marked I sewed the shoulder seams (which have continuous lines of stitching over them), whip stitched the seam allowances down, and started couching down perle cotton with  cording foot.  Although I knotted off the couching threads with the sewing machine, the long ends of perle cotton had to be run into the body of the doublet with a blunt needle. I soon found that it was more effective to double over stitching lines I'd already made than to start and stop continually.

With most of the cording on the body done, I corded the lines on the collar (which had already been padstitched.) that did not continue onto the doublet, then attached the collar to the doublet to finish the cording on the back neck.
Like in a modern tailored jacket, what you do with the seam allowances makes a big difference in the final result. Because I needed this collar to stand up, even though it's wide enough to flop back (large necked husbeast problems) I carefully whip stitched all the seam allowances (after some grading and clipping) down to the inside of the doublet. The mess is all covered by the collar lining later. This is where I discovered feature #2 of the devil's upholstery fabric. If you clip it (you have to clip it unless you want bunchy seams) little bits of it will then proceed to ravel OUT THROUGH THE SEAMS. Yes. Unheard of in my entire sewing life to date. The solution? as soon as I made any clips into the fabric they had to be thoroughly and immediately fraychecked.

With the collar firmly attached I could finish the last of the cording on the body of the doublet, and work all the ends in.
And move onto cording all of the tabs. They're two layers of evil upholstery fabric with a layer of batting between. After they were corded they had to all be bound with the silk dupioni bias tape, and then the bias tape hand stitched to the back. 10 minutes per tab.... 16 tabs.....

This is where I discovered another wrinkle. What looked like an enormous amount of bias tape when I made it up wasn't going to be enough to bind the tabs, the front and around the collar, much less the sleeves and armholes. I had to adapt the plan, because there wasn't any more dupioni. I scrounged enough scraps to make it up to the collar. So that meant I had to just find alternate methods for the wings, armhole, and collar.

I had already cut the collar lining, so I did have that to work with. I installed it schooched up about half an inch, and sewed the bottom edge down to keep it in place.
This gave me enough extra to fold the lining down over the outside of the jacket.
and then very carefully fold the edge under, ease it in, and sew it into place. Thankfully silk dupioni is pretty amenable to being eased, or this would have been rather a nightmare.  With that done I sewed a piece of black bias (cut from the same fabric as the lining) down over the exposed bits of collar on the inside. That had to be done all by hand so no stitching would show on the outside.
Then it was time to deal with the wings. I had sewed and turned them rather than binding them. Of course they wouldn't stay put OR flat but rolled and puffed like crazy (devils upholstery fabric strikes again) so i used some of the perle cotton and ran a line of herringbone stitch through the lining and into the padstitched felt underneath around the seam allowance on the inside. Then I pinned them down, along with the eyelet strips for the sleeves and sewed them down.


With them tacked into place, I sewed a strip of black bias tape around the entire armhole, and (you guessed it) turned the seam allowances to the inside, graded what of it I could to reduce bulk (the felt and batting, and the jacket lining were safe choices) and whipped it down to the inside of the jacket. If you don't do this your wings will have a distressing tendency to not stay that the angle you intended for them, and may even tend to stick UP from the shoulders rather than out.
 Then I turned the bias binding to the inside, and sewed it down all around. Here you can see the finished lacing strips hiding under the wings.


With the wings on it was time to turn to the tabs. They had to be sewn on, the seam allowance turned
up to the body and stitched down, then a wide folded piece of bias tape sewn over that.  If you don't stitch the seam allowance to the body the tabs won't stick down, but instead more out, tending to look like a demented tutu. The wide folded bias tape is left free at the bottom edge, and grommets fitted in it for the points of the trunkhose. Ideally these wouldn't be grommets but more hand bound eyelets worked over metal rings. But by this point in construction I was hugely past my estimated labor time of 50 hours (5x what it took me for the practice doublet), and not even counting the making of the eyelet strips or the buttons I had more than doubled my original time estimate. I was beginning to cut corners out of desperation. I can go back later and work thread over the grommets to make them look better if I decide I care about it that much.

With the tabs on I bound the remaining front edge between the collar and tabs, and began affixing buttons. These are knotted on with the two "tails" left from construction, and then the knot fray checked, and the ends buried in the doublet.

then all that was left of the doublet proper was to work all button loops, alternating sides, all down the front of the doublet.

Then back to square one for the sleeves! The original doublet was missing the sleeves, but there's another padded, corded doublet in Patterns of Fashion that Arnold notes as a close cousin of the one I recreated, and it has sleeves. I drafted these to husband's measurements, mocked them up, pinned them to the lacing strips, and altered them.

Once altered the pattern was so funny looking I almost did a second mockup just to double check. but I decided to trust the process. I mean, none of his other patterns look like things that belong to normal humans, why should his sleeves?


I cut them out from the upholstry fabric of doom. seamed them,
sewed the seam allowances down carefully so as not to have stitches showing on the outside, and then fully lined them from the top, and finished the bottom with a scrap of the silk satin left from cutting his trunkhose out. I added a pair of buttons and button loops to each sleeve, and was finished. Ideally I would have put coordinating lacing eyelets on the top of each sleeve, but by this point I was beginning to feel desperate about getting it done, so I used a large blunt needle to sew the lacing ribbon straight through the sleeve. I'll later enlarge those holes with a bodkin and make proper eyelets.

Then I had to finish off the last details of the doublet, working any leftover threads in, and making up the tiny tassels that decorate the points of the back neck cording on the original. Using a hack I saw some time ago (actually for making miniature bows, but tassels are the same principle)  I made the tiny tassels around the tines of a dessert fork, That way you can tie off the neck between the fork tines, and just slide the whole thing off the end They turned out beautifully fluffy, and perfectly even, although I may have to use a little stitch to make them lie down flat, since they don't seem to want to do that.

And it was finally, finally, done. This thing was a true labor of love. I figure 200+ hours into the doublet once you start counting time spent making  buttons. A lot of that was extra time spent dealing with the devil's upholstery fabric, or flailing because I ran out of bias tape. Still, just the basic labor in creating this kind of extremely tailored garment is nothing to be sneezed at. I will take what I learned from this one to the next one (Which will NOT be corded and quilted) and hopefully improve my time. I have to say though, seeing husband in his suit, it was worth every minute I spent. This makes two suits done, of the four he needs, plus a proposed black velvet and blue silk court outfit.........
Doublet back

for some reason it will only let me load this photo sideways, but here's the doublet front! 
The husbeast, handsome dog that he is.