Saturday, August 22, 2015

Toddlers Skjoldehamn hood, Out of your comfort zone

Earlier this year I had the opportunity to participate in a SCA demonstration at the local Ren Faire. Since there were a bunch of spinners allready coming I decided to dust off my weaving skills, warp up my mom's rigid heddle loom in plaid for yardage, and sit and weave. The plan was to use the resultant plaid yardage for hoods for the kids, or maybe a kaftan for Jade. I figured I could do the sewing part of it for the "out of your comfort zone" challenge since sewing with handwoven scares the crap out of me and is something I've mostly avoided. Alas I had a major warping problem with the loom, and then life intervened but I did finally finish the first of the hoods this week (just in time to to take it to show and tell at another SCA demo!)

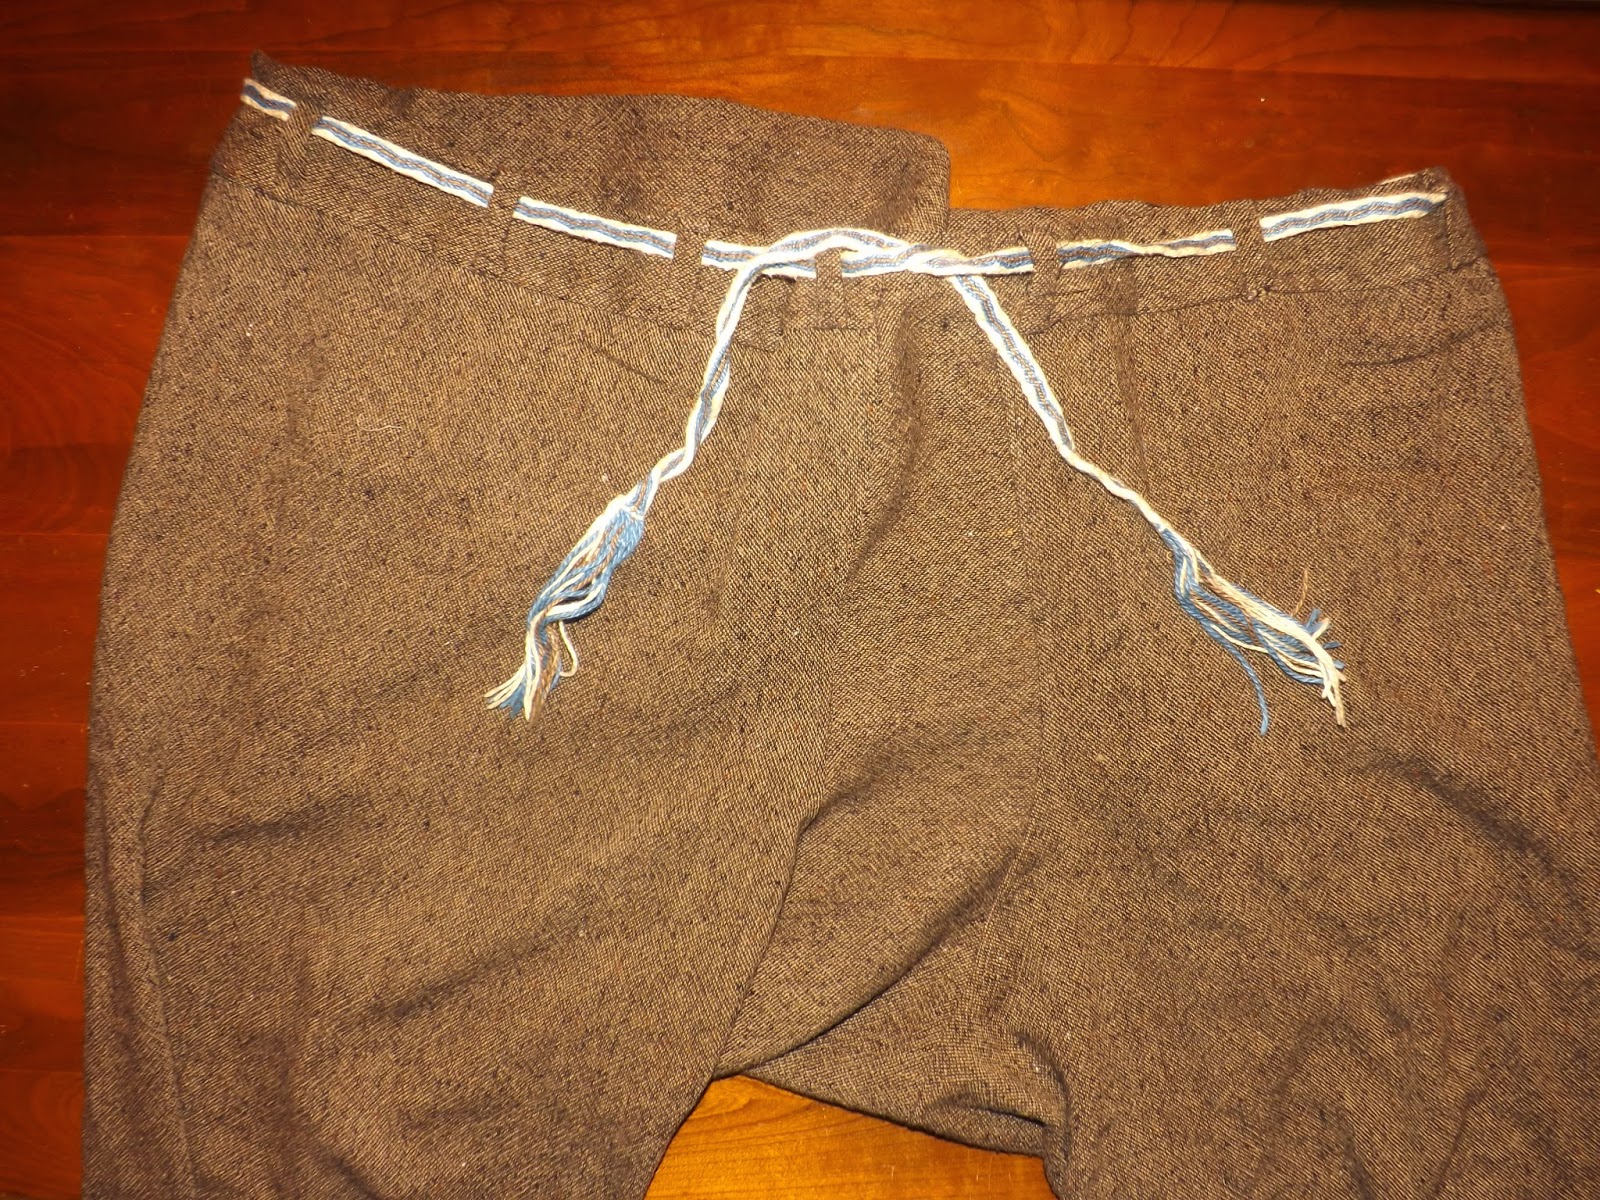
Rigid heddle looms are great for portability, but unless you want to fuss with pickup work, they just do plainweave, and they only have one reed (you may be able to purchase more reeds of different sizes, I am not sure.) so you're kinda stuck with what you've got. I had been given several cones of weaving yarn, and I wanted to use those since it was a demo piece and I might be letting other people test drive it. With the combination of available reed and available yarn, the fabric ended up a little bit more open in weave than what I'd hoped for, and there were a number of small issues with the evenness of the weave in the earlier portions (before mom and I decided it was a lost cause, rolled the whole remaining warp off, and re-dressed the loom. Life lesson learned: Do not dress a loom in haste because you will repent it at leisure.) Looking at the finished product with my mom, we decided that although it wasn't 100% wool, it would probably full up some and that fulling would solve both the openness of the weave and make the few areas where the tensioning was a bit dicey less visible. So into the wash it went. It fulled up surpisingly well, and got a lovely fluffy nap. it's so nice fulled that I'm strongly considering warping up the big loom for diamond twill with the two remaining cones and making some yardage for myself. As a plus the few small problem areas where I really struggled with the tension basically dissapeared and I won't have to cut around any sections.
Fulled yardage drying in the sunshine

Before and after fulling
With my yardage done I started looking into construction methods for the Skjoldehamn hood, which is a great extant garment from the viking Era. The whole find is fascinating for viking era garment folks, because, since it is a bog body, the clothes are unusually well preserved. There's been a lot of misidentification of the era of the corpse (originally they thought it was a much later era because in the 1930's they thought no one wore hoods before the 14th century evidently?) And argument over the sex and ethnicity of the body (including the somewhat standard identification of sex by grave goods without reference to bone structure) The most current hypothesis is that it's most probably a viking woman from between the 8th and 11th century, with a later date more probable. This is a find where I am really hoping that increases in technology will allow us to have more information in the future. 

The original hood
The hood was originally made of 3 pieces of buff wool fabric woven in a 2/2 twill. One piece folded legthwise made the hood, seamed at the back and top, and slit all but a couple cm up the fold to make room for the front gore and to form the face opening. Square, or almost square, gores were inserted front and back to make shoulder room, resulting in the distinctive front and back points on this hood. The square hood top was stitched to lie closer to he head, resulting in a distinctive "cockscomb" appearance. Cords by the ears were likely used to tie the hood back from the face, or close it more tightly around the face to conserve heat.
Cutting out handwoven is TERRIFYING. 

I decided that I wanted to come as close to the original construction techniques as possible, at least with the first hood, to see how the original would have worked as it came together. I did have some hurdles. First my fabric, woven on a narrow loom, was not wide enough to construct the hood with a lengthwise fold. Second, even fulled, my handwoven was not thick enough to make a great cold weather garment, so I was going to use some lightweight wool (possibly a wool blend, I didn't light any on fire to know for sure) I had in the stash as a lining.  


With those factors in mind I measured my older sons head, and the distance from his crown down to where I thought the hood should end on his shoulders. I also measured how far down I thought the opening should be in the front, and used a loop of measuring tape to be sure that an opening of that size would fit over his head for him to put the hood up and down. With that done I got out my precious handwoven and prepared with much trepidation to cut. Because the fabric was relatively narrow, I cut one long piece for the hood with a fold where the top hood seam had been in the original. Then I cut two square gores, matching the plaid with the hood. Then I laid these pieces out on the lining and used them as a cutting template. Working with handwoven really drives home why patterns using squares and rectangles were popular. Even the small pile of scraps leftover from cutting this out made me sad! 

The original hood was put together by folding back the seam allowances and then whip stitching over the seam. Because I was using a lining, I modified this to a technique I had seen on the wonderful inspiring blog Before the Automobile where the edges of the the outer fabric and lining are folded in towards each other, the pieces are lined up, and sewn with a tight whip stitch through all four layers. This ends a nice neat finish on both the inside and outside. Because it treats the two layers as a single layer, it is essentially the same construction technique as the orignal in finished effect. The original hood was seamed with matching woolen thread. I sewed mine with the same thread that I used for the white portion of the plaid. 
Front gore and small front seam beneath hood.
Rear hood seam and back gore


The finished effect of this method is an almost invisible outside seam, and a very tidy whipstitch effect on the inside. It also goes quite quickly, and keeps the lining from shifting or bubbling in the finished hood. The only tricky bit was lining up the plaids on the one side of the gore and at the back of the hood. Because I wove the plaid by eye, and because of some of the tensioning issues that I had, there was a little easing involved. It wouldn't have the big deal without the lining, but it was tricky to ease both layers evenly at the same time. Doable, but tricky. Thankfully it was also one of those things that is much more easily accomplished in hand sewing than in machine work.

All that remained was finishing the hood opening, the edge, and sewing the "cockscomb" Figuring out exactly how to do this was a bit confusing, because all of the scholarly works on the orignal garment are in a language I don't read, so I was depending on secondary sources, amoung whom there is some dissagreement  as to the details of the finish work. I went with what I felt was the most accurate of the works I could find, which cited the most of the scholarly works, and which I felt like matched most closely to what I could see in the photos available of the orignal piece. Alas this was the finishing solution which I found the least asthetically pleasing as well, but you can't be picksy choosy when it comes to how people decided to finsih their garments a thousand years ago I guess? I may try the second (innacurate I'm convinced) finishing option on the second hood for my second son.

The original hood was hemmed around the edge with whip stitch made paralell to the grain of the fabric, and no evidence that the fabric was folded over before stitching. I repeated this, although I kept my stitches closer than what I could faintly see in the original hood to keep the lining from fraying. The original was hemmed with matching thread, so I used the white weaving thread again to make the hems.


The only minor problem I ran into was at the front and back tips, where the stitches wanted to slide off to the sides. I reinforced this with a little darned area at the inside which is out of sight but keeps the threads from slipping.


The original hood opening was finished by turning in and whip stitching with a contrasting color of thread, or actually several contrasting colors of thread. I turned the exterior fabric over the lining, and whip stitched it down with red wool. While I was doing that I also (unauthentically but practicaly) tacked across the bottom of the face opening with the same red wool to reinforce the opening (where a child hauling it on and off will invitably get it stuck and tug to get it loose).

The "cockscomb" effect that makes this hood so unique looking was obtained by using basting stiches in matching thread. I put the hood on my son and pinned it close to his head, but loose enough that he can still push back the hood, and then stitched along the line of the pins with the same white wool. A little steaming and pressing later, and it was ready for Crash to wear. He is very excited about it and was sad that I won't let him wear it in the middle of the summer and give himself heat stroke.


I'm calling this one a sucess even if it's REALLY late for the challenge I started it for. Crash loves his hood and I enjoyed the reconstruction process. I very rarely sew anything completely by hand, and it was a really enjoyable experience. The finished product I feel like really has the look of the orignal hood (although it's missing the ties by the ears, I may add them later) in spite of the slight differences in design and construction. 

I would like to give credit where it's due, and note that this was the secondary source I chose to take most of my information from. http://www.medieval-baltic.us/skjold.html 

Sunday, May 31, 2015

Viking Women's Garb: Smokkr

With my Serk finished and ready to wear, I needed to finish the second layer of my viking women's garb: the Smokkr or apron dress. The apron dress has been interpreted in many different ways over the years. It has been portrayed as a pair of flaps front and back, a wrap style garment, either crossing over the breasts, or held shut in the center with another brooch, or as a fitted or semi fitted tube. Without a complete extant garment, and with most artistic representations ether very stylized or possibly representing ceremonial garments, we cannot say for sure exactly what the apron dress looked like. Certainly we cannot say how many variations there were, or what they all looked like. I feel confidant that we can eliminate the flaps front and back interpretation based on the finds at Haithabu of garments with distinct pieced sides, and just from a sheer stance of impracticality: that's the kind of thing you'd catch on fire leaning over to cook. But all of the other interpretations may hold some weight. Personally I think that the evidence most closely supports the fitted tube interpretation, and center brooches were most likely used to hold a caftan shut, but we cannot say with any degree of certainty that this was the only way center brooches were used, or that the fitted tube was the only style of Smokkr made.

Because I believe that the most likely, and best supported by existing evidence both pictoral and archeological, interpretation of the Smokkr is the closed tube, all of my Smokkrs will be based on this interpretation. This smokkr is however based more closely on the find at Kostrup which had a finely pleated/smocked front panel. This piece is a fairly large extant find: the material remaining seems to be much of the chest and part of the side of the garment, along with both shoulder straps and a piece of tablet woven trim. I am again deeply indebted to Hilda Thunem, who's extensive article gathered the original evidence in a language I could  read. I am following her reconstruction of the garment, tailored to my own measurments. Her article is here for those who have an interest. It is beyond excellent. Kostrup find

The choice of the pleated front Smokkr was a practical one for me. While I personally prefer the look of the more fitted closed tube style dress, the pleated front gathers a little extra fabric at the front of the gown and gives room for an expanding belly. This should fit me all the way through my pregnancy, and after.

I am using a black twill wool that has been slightly fulled and lightly brushed on the outside for this garment. Fabric choice was mostly driven by the fact that I had it already in my box of woolens. I did agonize ofer a while over the color. What evidence we have for viking dye preferances indicates a love for bright colors and patterns. Besides that true black is ridiculously hard to get from natural dyes. It's possible. Just annoying, time consuming, and difficult. In addition from my own experimentation I find it unlikely that the black achieved from natural dyes would have been the same as the black we can get from chemical dye. I did seriously consider attempting to lighten the black and then overdye it, but after consulting with other enthusisasts decided that my chances of ruining the fabric were too great. It was too close to the event to mail order fabric, and I had already shot my wad buying my tortoise brooches, so I decided just to go with what I have and live with the slight historic inaccuracy.

The smokkr is cut as a straight front and back panel, a side piece with one angled edge, and then a single gore placed between the side and back.
The curves on the back piece ae achieved by shaping the back panel with the garment mostly put together and on the intended recipient. Haithabu gives us plenty of examples of curved seams to shape garments. The result is a garment that is fairly nicely fitted in the back, with a slight pleasant fullness in the front. 

the most time consuming part of this garment is making the pleats at the front. There are a number of ways to stabelize these pleats, I followed the example of Hilde Thunem in her article about it, gathered the pleats with rows of basting and secured with smocking stitches across the inside of the garment. this provides a flexible and not bulky set of permenant pleats. The pleating could also have been made permenant by steaming, and I may yet try that eventually, but think it might not hold up well to laundering. 

Add caption
First I did a several samples of pleating to decide how long my pleating stitches needed to be, and how much I needed to draw them in. That gave me a final measurement for the front piece of my serk. After all the pieces were cut, I marked the outer edges of the portion to be pleated with pins, and made marks every eight of an inch with soap. a chalk marker would have been better because it would have made finer more accurate lines, but of course I couldn't find mine.

 And this is another reason why a chalk marker would have been preferable. The top edge has to be turned under before you pleat it. On wool this requires steam. Steam removes soap marks...... Oops.....
 Once I had re marked the top edge, I simply stitched on the marks, leaving long tails to pull it up with. As you can see, by the time I'd gotten to the bottom I'd figured out that it might be a good idea to mark my stitching lines horizonatally as well. It's harder to stitch straight than you'd think once you get away from the edge.
 Then you just pull up the stitches to the final measurement, You can see here that as you start pulling them up they do not want to go evenly in nice neat pleats. This was probably partially a factor of the relative thickness of my wool. It was neccesary to pull the pleats up as tightly as possilble, steam heavily, and pull on the top and bottom of the pleated section. this made the pleats sort of "pop" into place, and the steam set them in that position. Then I was able to let the pleats out a bit and spread them evenly to meet the proper finished measurement.

The finished pleats were held in place by rows of smocking stitches on the inside of the garment. Then the whole thing was steamed into shape to set it, and the basting stitches removed.  The whole process of getting the front pleated took me between 4 and 6 hours. However since it was all done by hand it was the kind of thing I could take outside while I watched the kids play, or do while I watched a movie.

With the pleating finished I was able to put the rest of the garment together. This does not have flat felled seams. The seams are pressed to one side instead of open, and embroidery will be run over the seam allowance later. I discovered a problem after I had put everything together but one side seam, and decided I should wrap it around me for an idiot test before I put it together for the final fitting of the back panel. It was too small. A mistake in measuring the front panel had put me off by several inches. I cut a new, wider back panel with sloped sides, not straight, to compensate for this error. This made the smokkr too big, which was what I wanted. I had my mom fit the back for me and take in the excess as tucks, which gives me some extra fabric to work with so it will still fit me after I start breastfeeding and my chest measurement goes up. While mom was pinning I had her pin the shoulder straps (which are long loops of self filled tube.) and set the hem between the knee and mid calf.

I did get it done in time for War of the Roses, although I was just finishing it off before bed the night before. And although it's not finished finished (no embroideries, no trim) it did look nice I think. And my tortoise brooches came in time too, so I was all set! A simple head scarf of lightweight linen to cover up my kind of crazy hair (it's pink at the ends right now) completed the outfit.
Finished pleating and brooches. You can see how the straps are made of a long
loop of self filled casing sewn together in the center.

pictures taken at event. it's too bright to see the pleats at the front.
The little thing hanging from my left brooch is my site token for the event. 
After wearing it at the event the only upgrade I plan to add (other than embellishment) is to possibly drop the hem an inch or two, and also to open one of the side seams a bit to make a slit that will allow me to get at the pocket in my serk. Hiking up the smokkr is cumbersome, but the pocket works GREAT. Especially so I can carry my cell phone, which I need to have so my husband can get me if he needs me.

Wednesday, May 27, 2015

Viking Women's Garb: Serk

I've been absent for a couple of months both from the blog and in general from sewing. We are expecting the arrival of baby #4 sometime after thanksgiving, and i have spent the last ten weeks or so prostrate with morning sickness. The clouds do seem to finally be breaking, and although I'm not exactly back to my normal self, I am capable of doing more than just barely keeping up with the little folks and praying for my husband to come home. I've missed two historical sew monthly challenges, one of which I may do later because I was really excited about it (Make do and mend for the War and Peace challenge). On the up side the current challenge is "practicality" and the everyday clothes worn by viking women absolutely fit that definition. And viking women's clothes (10th century) is what  I am currently running out at breakneck speed to be ready for The Wars of the Roses XXXVI, for which I volunteered in february before the onset of pregnancy and it's attendant sickness. Needless to say I'm a teensy bit pressed for time, and will not be doing anything in the way of embellishments on this garb. Luckily, embellishments can be added as time goes on. I expect to spend many pleasant evenings in future trimming and embroidering these garments.

*Note. Please forgive lousy photos in this post. My SD card for my camera has died and so I am relying on my cell phone camera which is kind of lousy.*

Viking women's garb consisted of an underdress, or Serk, made in linen or wool, with a "apron dress" or smokkr over the top, which is a more or less fitted tube of fabric suspended by loops over the shoulders which are fastened with a pair of large brooches. Sometimes the serk appears to have been layered, with a linen undergarment and wool overgarment. The front of the the Smokkr could be flat, or in some cases pleated. Strings of beads were strung between the brooches (typically the large oval "tortoise" brooches) at the shoulders, and a number of small household items such as a knife, keys, needle case, comb, or ear spoon, could be suspended by chains from either one of the tortoise brooches or from another brooch pinned at the ribcage. Over this ensemble a caftan, sort of long coat with an open neckline might be worn, That will be an upcoming project for the fall most likely.

Of course, this is all extrapolation from fairly fragmentary grave finds. Most fabric in a grave deteriorates entirely unless protected by proximity to a metal object, so many of the grave finds are just layers of fabric, and fabric loops, inside the backs of brooches, or pieces of fabric where a knife or bowl was laid in the grave. Some pieces are significantly larger than this but we have no complete or even mostly complete extant garments. Wht we do know is extrapolated from the fragments we have, and from pictoral evidence, which is all very stylistic. It's an educated guess, a putting together of many disparate pieces to try and get a squint at the whole. 

This is my first actual set of SCA garb. I'm starting whith what will be more or less home base for me, as my persona will be 10th century viking (at least that's where I'm starting and how i'm dressing my family.....) I'm sure I will branch out, because: All the pretty clothes! But this is where I'm starting and where I expect to spend most of my time. It's practical, it's comfortable, it comes with layers to adjust for temperature. You are not smothered or squeezed by extraneaous bits of headress or corsetry, and the jewelry is amazing. There is no down side to viking garb that I can find. We can't even prove that the women universally covered their heads, at least not before they became christianized. (I have crazy hair. I will be covering my head probably.) 

So, to start at the beginning, working from the bottom layer out with the serk (we do think that viking women wore some kind of undergarments. Perhaps even trousers beneath their skirts in winter. But I'm going to stick with my good modern undies for the moment.) Serks came in several manifestations and differing styles of cuts, much like mens tunics did. we believe they were worn long, but how long would likely have depended somewhat on personal preferance and social status (trailing garments not practical for working in). Some had pleated necklines, but these seem to be mostly an eastern viking fashion, centered on the wonderful finds from Birka. I'm personally scottish isles vikings, and the finds from the western reaches of the viking sprawl have been mostly un pleated, and that is what I am going with. As always in researching this I am deeply indebted to the work of Hilde Thumen who has gathered a lot of the original language sources and compiled and translated the pertinant facts. Her articles are fascinating, informative, and backed uup by the original sources that are not acesible to me since I don't read the languages they were writen in. Her article here gives you a great start at understanding a good deal of the evidence we have Viking Women: Underdress 

Because many viking garments were made with shaped pieces and set in sleeves I have chosen to make a serk with widely gored sides, a keyhole neckline, and pieced and set in sleeves. I believe this is congruent with the avialable evidence. I also chose to use 3/4 sleeves. We have little evidence as to the length of sleeves, although we do know at least some of them were long enough that bracelets were worn over the ends of them. We also can reasonably say, I think, that short sleeves were not a thing that was much done, since they don't appear in pictoral evidence. There is some saga evidence that women of lower class may have worn shorter sleeved garments at least while laboring. I am letting practicallity in this case be my guide. This serk is mostly for summer wear, and I find 3/4 sleeves more comfortable in summer.

 I was originally going to use colored linen, and dye it myself, but queasiness prevents me from currently standing over dye pots, so that will be a project for a later date. I am actually somewhat cheating here, because I found a 60/40 linen/rayon blend, in a color achievable with natural dyes, for 40% off. I caved and bought enough to make myself a serk, and hopefully enough for summer tunics for the husband and kids. I don't feel too badly because it really looks and acts a good deal like linen. Like the cotton linen blend I use for white undergarments, it's not quite as crisp, but it's a decent facsimile. 

The major setback in this project was discovering that my base bodice pattern, which would have given me shoulder slope, an armscythe, and a sleeve cap to fit it, has gone walkabout some time in the beginning stages of organizing my new work area. So I decided to just sort of cut by eye, sewed, and fit this on my body. Which really, REALLY, is not the reccomended method. I can mostly get away with it when I'm sewing for myself or one of the kids, because I'm familiar with the way those patterns should look and fit. And in a garment that is not heavily fitted it can work out ok (I have no pattern for tank tops for my daughter, for instance.) The down side is that it almost always takes twice as long, five times as many fittings, and the results are almost never quite as polished. This has on the whole worked out well, but it would have been quicker and easier with a pattern to adapt from. Next time I will have found my pattern and if I haven't I will draft a new pattern and not lose that one. 

I started by tearing the rectangles for the front and back of the garment, and facing the slit of the keyhole neckline. Original evidence suggests that there were varying lengths of slits in keyhole necklines, some the typical short slit just to get your head through, and some going almost down to the navel; held shut at the throat with a small pin. At first this seems ridiculous, why would you need a slit that long? But if you have a child who is nursing it becomes the essence of practicality: undo one should brooch, push down the smokkr, and with the long opening in the front you can just push the serk out of the way to feed your child. With another baby on the way, for me ability to breastfeed is an important consideration. I am choosing to use the long slit.  

With the keyhole slit faced, I pinned the two squares together on my shoulders to establish the line of the shoulder seam. then I cut with a half inch seam allowance, and sewed the shoulders together with a flat felled seams. The felling portion (the second seam) in all of the flat felled seams in this garment have been sewn with a machine basting stitch. I will eventually embroider the seams with colored linen thread, and then just pull out the current basting. Then i measured how much I needed under the arms to make a roomy garment with room for the expansion in my chest measurement caused by breastfeeding. The gores in this garment go right up to the armpits, which is something you see suggested in several period reconstructions. Normally this is not my preferred construciton as it creates more bulk aroudn the waist. An eye to my expanding waistline though makes this a very useful garment shaping. I cut two gores for under each arm, and sewed the bias side of the gore to the straight side of the front panel with a flat felled seam. This means that the seam will not sag and grow. You should always attempt not to sew two bias edges together in a long seam that will be pulled down by the weight of the garment. With the gores in I marked the armpit and shoulder point with pins, and cut an armscythe by eye. 

Note ever present helper
With the body done except the neckline, I added a single gusset to the side of each sleeve. When I held it up for an idiot check against my arm, I decided that it wasn't wide enough at the the sleeve back, and added a longer triangular piece to make width where i needed it. Then I cut the top to a likely shape, basted it into the body of the serk, and tried it on. it was close, but not quite right. I pinned the areas where it needed adjustment, took it out, re-cut it, cut the second one to match, and then pinned and sewed the sleeves in using flat felled seams. I'm pretty sure I've mentioned before that from extant evidence flat felled seams seem to have been popular in viking undergarments, so this is a practical and historical way to finsih your seams. The flatness and abscence of interior seam allowances is particularly nice in a garment you wear against your skin, and they're very sturdy. It's an ok sleeve. certainly servicable. I would have preferred a little more fullness in the sleeve cap, but
it's not a terrible defect.


With both sleeves in, so that the set of the shoulders was finalized, I put the serk on and pinned the neckline. Then I made a 1/4 inch rolled hem and sewed it down by hand on the inside. Typicaly in this type of garment I use a facing. But without a pattern and with a sloped shoulder a facing would have been harder to cut accurately. Also I thought the rolled hem might be cooler for summer wear.I was going to just leave this to be trimmed and embroidered later, but I very carefully turned up and hemmed the sleeve..... to the outside.... Once i discovered that it was either rip it out and do over, or put trim over it. I decided that as I had a lovely piece of handwoven thai silk I would just use strips of that to trim the sleeves, and a narrow strip to trim the neck. the sleeves were a quick project, but the neck took way longer than I expected. Historical evidence shows that while garments were trimmed with strips of silk, it was cut on the straight of the grain (which makes sense in terms of efficiently using a fabric). Getting that all smoothly fitted around the neck, even a narrow strip, was fiddly and time consuming.


That was the end of the basic construction, all that remained was the hem. Although grave evidence is scant, pictoral evidence shows women in long dresses, some trailing. Trailing dresses not being practical for everyday work, the assumption is that these were special occasion robes worn by great ladies, and that the more common gown was around ankle length. this is a comfortable practical length for working and walking. I have hemmed many gowns by myself, by measuring equally down from the waist and marking. It is easier however with a second set of experienced hands. I had my mom, who is very gracious and helpful in these situations, come over and pin the hem for me. Then turned it up and stitched it down by hand. The hem will recieve no decoration. From the evidence I can find the hems of viking women's serks were rarely (if ever) decorated, which is sensible. hems get a lot of wear, not to mention dirt. it's not the place to spend time on trimming and decorating if you're going to be using the garment for more than swanning around in. Of course few hems survive. so this is dodgy research at best. You could probably make a case for decorating the hem, but to me it is impractical for a working dress.

I did add one very practical for me and very historically innacurate detail. I basted a large muslin pocket onto the outside of the dress at hip level. This will be acessable either by hiking up the outer gown or via an open side seam in the over gown. If it works out well I will replace it with something more invisible (probably a welt opening made with leftover scraps.) This gives me a place to stash my cell phone, ID, Cash, and keys while I'm at events without ruining the silouette of my garb or having to carry a shoulder bag/basket everywhere I go.

One layer down, on to the overdress! And again, I apologize for the lousy photos in this post. Hopefully I will have a functioning camera again for my next post! 

Thursday, March 12, 2015

February Challenge: "Blue"


The February challenge for the historical sew monthly is "Blue" and I happened to stumble across a piece of blue plaid sale fabric in my wanderings late in January. I immediately knew what I was going to do with it too. I had recently been watching the BBC miniseries "North and South" which I may love as much as Pride and Prejudice, and I've been hankering after some of Margaret Hale's dresses. Specifically a particular blue skirt with white blouse combo.

Now sadly this ensemble is a total historic fabrication for the era of the movie. Elizabeth Gaskell wrote and set North and South in the 1850's. This sort of blouse and skirt combo didn't become a thing until the 1860's. Furthermore this kind of smooth topped gored skirt is much more of an edwardian fashion than a thing of the 1850's. Skirts in the 1850's and 60's tended to be gathered or pleated into a waistband to assist in creating the bell shape that was popular at the time. All those inconsistancies noted. I love love love this outfit, and wanted to use it as a jumping off point for a historically accurate ensemble. I may still make the right hand blouse though, because it's so pretty.

Since the pairing of a blouse with a skirt is a later construct, I fished around and came up with this stunning photo from the 1860's. And the resemblance to the Margaret Hale costume is really remarkable: although the skirt has more volume and is pleated (the movie skirt had to have been heavily gored, because it had a fair amount of volume around the hem, and she was definitely wearing petticoats) we see a full sleeved light colored blouse, and an accent belt with a decorative buckle. This lovely photo became the basis for my own ensemble.

I would like to mention that I had a lot of advice and help from the wonderful people on the historical sew fortnightly facebook group as I was trying to figure this out. Civil War is not an era that I have a lot of familiarity with the details of, and most of my costuming books are still in storage, so I was sort of flailing around on the internet. Several people who know a lot about this era really stepped in and helped me out with advice and pointing me in the direction of good sources.

So, having dithered around finishing my corset (which I needed to have to get the waist measurment for the skirt) until I only had a week left, I took my several yards of blue plaid in hand and went forth.  Right from the start this was less of an exercise in creating a historcally accurate garment, and more of a process of fudging modern materials to create a historically accurate look. This started with the purchase of reasonably priced fabric that had far too soft a hand for this kind of skirt. Well, unless I planned on wearing a hoopskirt under it, and I do not. This will become a article of clothing I wear around the house in winter, and believe me when I tell you, hoopskirts are not a practical item of dress in a house the size of mine! So that means the fabric itself has to have a bit of bounce.  Thankfully one of the beauties of underlining is that it allows you to fudge the weight/hand of your fabric. Ideally I would have underlined the entire thing with silk organza, which would have given it marvelous volume and made it a joy to work with. Unfortunately I do not have that much silk organa lying around, and it would get pricey underlining that much skirt with it ( I routinely use it in collars, cuffs, waistbands, and anywhere else I used to use the icky commercial underfacings, so I always have some on hand just not you know, six yards). After a lot of dithering in the fabric store, I finally settled on using netting as an underlining, the heavy kind used for modern crinolines, as it's cheap and bouncy. It is NOT a joy to work with, but with a lot of pins and basting, it's doable.


I very carefully measured the panels so they started and ended at the same point in the repeat, and cut along the lines of the plaid. Then I underlined all the panels with net, and basted all four sides to keep the net in place. All the preparations finished, I lined up the panels.... And discovered that somehow I had missed the fact that it was a directional plaid, and had not cut all the panels running in the same direction. So I had three panels, one of which would never line up properly. Thank goodness I had measured for the skirt by stepping on a couple inches of the tape measure and measuring up, so I had almost three inches of hem. I flipped the offending panel and realized that I was only going to lose about an inch off each end when I lined everything up and trimmed things to be the same length. Problem solved, although not without much moaning and groaning and drinking of tea. This is why I so rarely work with plaids. They're a pain in the bum and and even when you think you're being careful, they find a way to trip you up.

My sewing buddy practicing his stitches with a
scrap of fabric.
Since the net underlining is very scratchy, I decided to make a second lining out of an old bedsheet with a nice crisp hand. This lining is joined at the waist to the skirt, but not at the hem, and is hemmed up above my ankles to keep me from tripping over it. It's sort of like a attached petticoat, except that it's pleated into the waistband with the plaid, which gives it a bit more body coming out of the pleats and contributes to the desired "bell" shape without adding another 20lbs in petticoats. Once I had the lining seamed and hemmed, I basted it together with the skirt at the waist.

With the skirt together I measured and calculated for the pleats. Since this challenge is "blue" I wanted to highlight the blue stripes. So I counted how many blue stripes there were, and divided the waist measurement by that number. That told me how many inches (in this case 0.5 inches) of each blue stripe should show. I then test pleated a piece of the waist in several different ways to decide


exactly how i wanted to pleat it. Then I pinned it all and attached it to the waistband, and added long modesty placket (I set the waist of this skirt to two inches less than my current corseted waist, so it should fit for a while.) and finsihed the inside of the waistband by hand. A buttonhole and a button finshed the waist. I didn't worry too much about the waistband being less than beauteaous because it will be covered by either a belt or a bodice (if I have enough leftovers to make one) at all times
.

Pinning in the hem facing.
I was considering finishing the hem with a facing in the first place, but because i used up a lot of my hem allowance with my directional plaid debacle, it became necessary. This didn't hurt my feelings much, because I like hem facings: they keep your skirt clean, and they add a little extra stiffness to the hem: almost like modern horsehair braid. In this case I wanted something very springy but not too heavy to use for a wide facing, again to continue fudging this fabric into a period shape. I dug around in my stash and came up with a piece of very icky light tan polyester, almost exactly the color of the light stripes in my plaid, lightweight, and very springy. There was enough of it to make quite a wide hem facing. A good two hours of hemming later, and I was done.
Skirt flipped back to show lining.
a couple petticoats would widen the bottom.
it really spreads when you sit!


There are a few interesting things about wearing this skirt. I can really see why women greeted the cage crinoline with relief. Just the two layers of this skirt are HEAVY. It's fine for winter (keeps my legs warm) but I can't imagine wearing this thing in the summer with even more petticoats underneath it. Even if I were going for the lower volume effect seen in some photos of the period (especially in wrappers and day dresses) I would need at least two more petticoats. Whereas if I were to wear this with a cage crinoline I would get air flow around my legs (for summer) it would be easier to walk (not so many layers tangling around my legs) and significantly lighter. So while I look at wearing a hoop even some of the time with mild horror (and an eye to narrow halls, doors and stairs!) I can see why, to the lady of the time, it would have been a vast improvement.

Monday, February 23, 2015

Victorian Overbust Corset

I really wanted to get this done for the historical sew monthly January challenge, foundations, but ended up not finishing it in time. I was dissapointed not to make the deadline, but I have finally finished it! I'm really excited about this corset. My husband gave me a Laughing Moon bust gore overbust corset kit last year for christmas and it's been marinating in the pile of projects. I hadn't gotten to it partially because it's sort of an impractical and selfish project, and partially because, with all my sewing experience, corsetry intimidates me. It's a whole field of it's own, with it's own unique intricacies and skillset. Just because you can draft and fit a bodice doesn't mean you can properly fit a corset: corsets not only have to mirror the shape of your body perfectly, they mold your body into new dimensions. Once you've passed the cylindrical shape of stays, which do not take personal shape into that much consideration (hey, we're making you into a cone here.... The only real considerations are the dimensions of the cone.) corsetry becomes a complicated and fascinating art.

I've been fascinated with corsets pretty much forever. When I was 13 or so I made my china doll a full civil war ensemble from the cardstock boned corset up, and the fascination has pretty much stuck. I love the costumes you wear OVER a corset, from the sweeping skirts of the civil war era to the "pouter pigeon" look of the edwardian era, to the nipped waist and sweeping circle skirts of the 50's (Girdles: the best friend of the "new look," and the slightly stretchy relative of the corset.) I love the way that corsets allow you to fit garments, the precise tailoring that is possible in bodices when you don't have to allow ease for things like.... breathing...  I just love corsets too. I find them beautiful and historically fascinating. They've been an intrinsic part of women's lives, and women's clothes for centuries. They've been everything from a practical way to support the breasts and the back, to a restrictive symbol of social status and women's place in the world. And they've been a factor in the views of what was beautiful, both in public and private. It's no coincidence that while the clothed silouttes of the victorian era feature defined waists, nudes of the period show a sensuality far removed from our own: women with full limbs and soft stomachs: the shape of a woman who had worn a corset since childhood. From Catherine de Medici's vanity to Queen Victoria's views on propriety: stays and corsets have been the shape of fashion right through the modern era.

I myself have been wearing a corset off and on for the last few years. Carrying my second son so close to my first I had a fairly severe diastasis recti, the separation of the abdominal muscles, and a girdle was reccomended as part of the postpartum treatment of that condition. I found that the plastic bones in the girdle buckled at the waist and stabbed me. Having worked around boning enough to know one end from another I decided that spiral steel would be more comfortable for me, and got an off the rack corset. The increase in comfort was astronomical, and I found that I enjoy wearing a corset, and like the look it gives me under some of my 40's and 50's style clothes. Unfortunately that corset had some fit problems, mostly because I'm very tall and have a large hip to waist ratio. I complained about that and threatened to draft a corset pattern out of one of my corsetry books, but was never quite brave enough to take the plunge because of my inexperience with corsetry. Enter my dear husband with a corset kit as a christmas gift.

The kit I recieved was from Corsetmaking.com and included all the supplies and some of the tools neccesary for the Laughing moon Silverado bust gore corset. The bust gore corset is recommended for ladies who have a fairly large difference in size between their ribcage and bust. It gives you more flexability there to get a good fit. I am not overly endowed, but I do have a relatively small ribcage, which makes it a better choice for me. Also the Siverado is longer than it's goreless relative the Dore, and since I'm tall, that's a consideration in fit as well. And yes. My wonderful husband did all the research to figure this out himself after only minor consultation with my sister. In addition to the Laughing moon #100 ladies underwear 1840-1900 pattern, the kit included a tailors awl, boning, boning tape, waist tape, lacing, gromets, busk, and measured capped bones. It is avialable with coutil included, although my husband chose it without so I could choose my own. They also offer grommet setting tools and various other tools as reccomended add ons, but I already had those things. I am sorry to say that I cannot recommend this kit though. There were things in the kit that you didn't need if you followed the instructions (boning channel tape) which was just confusing. The real problem was that more than half of the bones were the wrong length, even though I made the corset in the correct size. I still like corsetmaking.com as a supplier, just don't buy their kits. I prefer Farthingales I think on the whole, but they don't sell coutil from their US. store, so shipping is exorbitant.

* Update as of 4/20/15 Corsetmaking.com has sent me a very nice response to the poor (and slightly grumpy) review I left on the kit. They went through and measured the pieces in the pattern and checked against their boning specs. Turns out that the pattern had changed and no one told them. They are fixing the kit and checking their other kits. I still think it may be better to buy boning and tips and do it yourself to account for changes to the pattern during fitting, but think that if you didn't have the equipment to easily cut/tip boning this could be a good alternative. 

The laughing moon pattern is great though. The instructions are copious and clear. The single complaint I have with this pattern is that the instructions are printed on the same GIANT paper as the patterns themselves, with a small note telling you that if you find the instructions "unwieldly" in that format you may cut them along the lines to make them more manageable. So you spend half an hour cutting some 40 pages to size and then ironing them flat. Then you spend the entire construction process ruffling through pile trying to find the page number you need, and having them get knocked over by your cat.... So. I wish they would print the instructions as a sort of booklet for you. Failing that learn from me and put them in a binder after you've cut them out and ironed them flat.....

The first thing I did, before I even traced the pattern off, was to make a pair of lacing tapes. All these are is strips of waste fabric folded like bias tape with small buttonholes at regular intervals along their full length. Once made they can be basted into mockups allowing you to properly close them and not have to put buttonholes or something into every. single. mockup. You can also leave them laced together for the whole process, just moving them from mockup to mockup, which means a lot less labor in lacing and unlacing. These are really important for certain very fitted garments, especially garments that have negative ease like corsets, since you cannot just pin the mockup on. because it will not give you a true picture of final fit. In corsetry as well the tapes allow you to see the shape of the lacing gap at the back, which is important in final fit, and tells you where the reduction will be when you lace it tight.

Looking at the measurements on the pattern I needed a size 12 in the bust/waist, and a size 18 in the hips.... OUCH. Yes. I am pear shaped. They also suggested that you start with the larger size bust gores because it's easier to try to take it in than to let it out. Which is sage advice. So I traced of the size 18, with the d cup gores expecting to just have to take in significantly. around the waist/ribcage, carefully cut, and sewed together the mockup. Ideally corset mockups should be sewn from denim of canvas. I didn't have that sitting around, but had rather a lot of this very icky stiffly sized cotton, which worked in a pinch, although I had to be more careful with my fitting. You can see the lacing tapes in action here. They have been basted into the back so that where the edges meet in the back is even with the back of the mockup with the seam allowance folded over. I ended up having to make fairly significant alterations to the whole thing. The bust gores were far too large, even though I currently wear a 32 DD I ended up going with the next size down gores, and even taking those in a bit. I had to let the bottom of the hips out a little, and take the waist in a lot. I ran through two mockups to get the fit right, and had to have my mom come over and help me with the final fit of the back. It's just really hard to make more than very minor changes to the back of a garment by yourself. I took apart the final mockup and used it as my pattern.

The corset is made from one layer of imported cotton coutil, with a lining of silk. I chose to not follow the construction method in the laughing moon pattern, which calls for "sandwich" style channels sewn through outer layer and lining. This was partially because I didn't think the silk lining would hold up to the wear of the bones, and partially because I find that method adds bulk. And bulk in corsetry you want to avoid. Instead I used a period tecnique that is something like a flat felled seam. I got the idea looking at Augustintytar's amazing work. Anyone who has any interest in costuming will enjoy her work. It's absolutely incredible. Anyways, this is a period technique and as long as you don't overlap the seam allowances it makes a very flat seam which doubles as a boning casing. Brilliant. Now. Normally I would just sort of slap a seam like this together and go. But in corsetry any tiny mistake in fitting can lead to discomfort for the wearer, and in the worst case scenario, chafing. So, it pays to be extra careful.  Careful in this case means that I machine basted around all the pices at the seam line, and at the line where I would fold the seam allowance under. These basting lines were for marking purposes only.
Then I trimmed the seam allowances so that they would not overlap inside the seam, and clipped to the first line of stitching. I turned the edge over at the first line of stitching, and ironed it. It's important to be sure to turn it in the correct direction, so that all raw edges will be enclosed in the seam as shown above.
 That done, I very carefully hand basted the seam line together by lining up the interior line of machine basting. Now I could just top stitch on both sides without worrying about the fabric shifting on me.  I will add that this is one project where I almost wished for a thimble, as much as I despise them, because the coutil is so stiff and so dense. Use a very sharp needle, and expect to stab stitch rather than make running stitches.

Here's one piece on and the next ready to go on. You can see how the seam allownce on the peice that will be on the bottom is ironed forward, and the seam allowance on the piece that will go on the top is ironed back.
The only place this technique is not practical is over the bust gores, But since a boning channel does not need to run up each side of the gore, it's not neccesary for both sides to be treated in this manner. So I simply attached the gore to one piece, then fliped the seam allowances back, trimmed, and top stitched them. This allowed me to treat the other side as a continous seam for a boning channel.


The next step is to add the extra boning channels. Boning tape had been supplied in my kit for this purpose (although the instructions for the laughing moon pattern tell you to use the sandwich method.) I used the boning tape for individual channels, and pieces of leftover coutil for the three very closely spaced channels at either side of the bust gores. I felt that three pieces of boning tape sewn down edge to edge would be uneccesarily bulky. This is where I made the unfortunate discovery that although I had made the kit in the size it was ordered in, and although my corset is actually longer than the pattern, the bones were not the right length. Many of them were too long, while the side bones were a bit short. Because they came all pre capped and cut, and I don't have any boning caps hanging around in this size at the moment, there was nothing to do but pry the caps off, trim the bones to length, and put the caps back on. Which was probably more work than cutting and capping all of the boning myself. Thank god I have a pair of bolt cutters for cutting boning, and various tiny pliers.


Next I applied the waist tape, at the actual waistline (as determined by putting it on and bending back and forth to make wrinkles at the natural waist) and tacked it down in the existing lines of topstitching so it won't show from the outside.

First fitting! 
That just left the lining and finishing. Since I was not using the sandwich method, after I put the lining together I serged all the seams off as short as possible. This reduces bulk, and keeps them from fraying with wear in what will be a "floating" lining (not a concern with all fabrics but this silk was really prone to frayage) I did a final check on fit before I did any finishing, and while I could still make alterations without a lot of drama. I laced it up with some trepidation, I was afraid that for all my care with fitting and construction the fully boned corset wouldn't fit well, would look odd, or would otherwise have severe problems. I put it on and tightened it comfortably, so it felt snug but not super tight. I expected that it would be close to my natural waist measurement, since I was just sort of yanking it tight instead of lacing it up gradually over a quarter of an hour. Typically with comfortably tight lacing I get an outside measurement an inch or so less than my natural waist.  Imagine my shock when I found the lacing gap all but closed up, and my waist measurement showing an 6 inch reduction. without ever feeling squeezed at all! The fit was perfect, and the whole thing is so light and flexible. There is no pinching, no discomfort, and no unsightly "muffin top" at the top or bottom edges.

Since I am planning on wearing this frequently, which means that I will probably eventually need to alter it for a larger waist reduction, I chose not to do a standard binding. In order to alter it I will need to get at the inside, and taking the whole binding off will just make this even more painful. So I bound the coutil layer with a bias binding of black cotton, and then turned the lining in a quarter inch and basted it to the bias tape. This gives it a nice bound appearance but all I have to remove is one line of basting to get at the innards.

I flossed the whole corset with my favorite color of electric green, which shows up great on the black and looks shiney. In retrospect this was a terrible idea. Although I can do satin stitch and herringbone in my sleep, it's much different working them over boning, and my flossing is not to the standards I would like. And since it's in high contrast green on black, you can see every tiny mistake in neon clarity. Live and learn? Next time I will mark all of my flossing much better than I did this time. I also plan to make more tone on tone color choices until my flossing skills improve considerably. Finally I ran a narrow black ribbon through the front half of upper corset binding to tie in a bow and give a little draw in to the top of the cups. I would have preferred black beading lace but couldn't find any locally that I liked.


To me this whole experience has been not only an interesting and exciting expansion of my own sewing skills, but has really underlined the difference a custom corset makes. I have a decent quality off the rack uderbust corset. It's twice as heavy, much stiffer, and at the same comfort level I get a lot less reduction, plus, there's muffin topping everywhere if I really cinch it down. And I feel more constriction in my ribs when I wear it, even though it's underbust which many people prefer because it's less constricting around the ribs. I'm feeling much emboldened by my sucess with this corset, and planning on making the next one out of one of my books of orignal patterns instead of from a modern commercial pattern. I'm also considering attempting to improve the fit of my current underbust by adding hip gores. Not sure which one I'll get to first, but looking forward to continuing my corseting adventure!

Sunday, February 8, 2015

Husband's Garb (in a hurry!) Part 2

With Tunic and Shirt ready to go I just had to worry about clothing my long suffering husband's lower limbs. My research has all pointed me away from the modern pants pattern, or the very popular "pajama" style mens pants for early era personas. Certainly these are an easy solution, but kind of lazy, because in a rare stroke of luck, there are actaully extant garments to work from, several of them in fact. Which I was disproportionately excited about, because recreating actual historical garments makes me ridiculously excited. I typically have a small geeky fit in a corner, like some sort of tea and drafting paper pow wow, and emerge muttering about "seat height" and "extant garments" and "thread counts" or "warp weighted looms for heaven's sakes!" I'm pretty sure my husband just smiles and nodds.

I chose to work from the Thorsbjurg trousers, which are an almost complete garment found in a bog. Although they probably date to the migration era (guesses go as early as the 3d century) a find at Hedeby dated to the 10th century has the same kind of crotch construction, and examples in viking art show similarly shaped trousers, so it seems fair enough to extrapolate from the existing garments, with a few changes to more closely match the pictoral evidence (goodbye attached feet, it was nice knowing you....). There is a great overview of the available evidence for styles of men's trousers in the viking era available from Sunnifa Gunnarsdottir.

Ready to draft some pants! 
I used the  drafting instructions found on Shelagn Lewins site. She has a good explanation of the drafting process, and you can print out her measurement chart, which streamlines the process. Her method originally came from Freyja Eriksdottir, with whom I am not familiar. This is straight up drafting from measurements, which I adore doing and am extremely comfortable with. However I do feel that the instructions are clear enough that even someone without experience in pattern drafting could get a good result if they wanted too (and you could learn a new thing; learning new things is fun!)  And the results were great. it fit with almost no alterations. I drafted this out on newsprint, which is the worst thing in the world to draft on. It tears easily, it can leave marks on your fabric, it's hard to read your own marks on. Don't use newsprint. If you can get it use butchers paper, if not get the rolls of lightweight brown wrapping paper. Or save the paper that comes wedged into Amazon.com boxes, iron it flat, and use that. My only excuse is that my supplies of drafting paper are currently less than acessible and I'm too lazy to go digging for them or get something new. I will trace this off clean onto either scrap fabric or white paper before I use it again to keep it from transferring ink onto future fabrics. 

Once you get your patterns drafted you're  going to end up with some strange looking pieces that look almost nothing like pants as you know them. If you're like me you are going to scratch your head and fetch more tea. The construction is decidedly odd, but it works really really well. Many sources say that these trousers are much less likely than a modern trouser to have "reanactor's crotch" when put to active use, and my husband said that they are so light and comfortable that he can hardly tell they're there. Since I doubt Mrs. Viking enjoyed attempting to fix torn out crotch seams any more than I do, I can see why this pattern stayed around for so long. It's just flat out practical. It also makes surprisingly efficient use of fabric. Once I had cut out my trousers I had just a handful of scraps left, and I used a lot of those for belt loops. Effecient use of fabric would have been esential for Mrs. Viking who would have likely first spun the wool for these trousers, and then woven it on an upright loom. Every wasted scrap of fabric would have represented hours of labor lost. It's pretty nice for us modern girls as well, when we wish to clothe our Mr. Viking husbands on a budget. This used only about a yard and a half of 52 inch wide wool. Which isn't much for pants. 

I made up three pairs of these all told, between mock ups and the final, and used a different order of putting things together every time. I like this last way best because it makes it the easiest to fell the seams in the seat area, and you really, really want to fell the seams in the seat area. It makes them flat for comfort, and it makes them strong. and even in thorsbjurg trousers seat seams can use all the help they can get. Especially if the intended recipient is like my husband, who is rough on pants. 
So to construct the pants: After you've cut all your pieces out of a period appropriate fabric (in this case it's a tabby woven wool in a sort of tweedy brown. I may overdye it....) The first step is to attach the long crotch gusset to the crotch line of one pants leg. this is the short sharply curved line. You should line the wide blunt end of the crotch gusset up with the sort of pointy bit seen at top right, and sew UP towards the waist. The crotch gusset will be several inches too long. Don't try to ease it in, just leaving a tab of the crotch gusset dangling. You'll use that bit of crotch gusset later in the waistband. Once it's on, you can fell that seam. I felled all the seams in this garment by hand with an overcast stitch, partially because I dislike visible machine stitching on exterior garments, and partially because I had a momentary lapse and made 3/8th inch seam allowances which are no good for machine felling on thickish wool. The hand felled seams go to the inside of the garment, and are basically invisible from the outside. I did consider just basting the seams to one side then using herringbone stitch over the seam allowances from the outside (a popular technique) but thought my husband might not appreciate having the crotch of his pants thusly beautified.....

Now you can attach the second  leg piece to the other side of the crotch gusset in the same way. Going from the blunt point on the inside of the garment up towards the waistband, then flat felling the seams. I've marked the seams on these photos in red so you can see more clearly how it all goes together. 


Now you attach the WIDE end of the seat panel to the crotch gusset/leg assembly.  (I did this wrong the first time through, it seems counter intutive but it's part of what makes this pattern work so well.) And then you fell that seam. 


Now you have a very strange looking floppy thing that you cannot imagine ever becoming pants. (notice the protruding tip of the crotch gusset at what will become the center front.)
But, fold them in half and line up the long straight edge with the remaing curved seam.... and..... wow that looks kinda like a funny baggy pair of pants. You can flat fell this seam or not as you choose. I chose to overcast stitch it with a nicely contrasting red wool thread (on the inside of the garment) this is a period correct finishing technique.


Now it becomes obvious how to go on. You line up the waistband with the center back, and sew it on, making sure that  over the the ends overlap the protuding center tongue of your crotch gusset by a half inch or so.  I cut the waistband double width with the straight edge on the fold so I could just fold the raw edge in, fold it in half, and whip stitch it down over the seamline on the inside, thus enclosing the whole seam. On the original garment it is just a single layer with a hemmed upper edge. 


Then you have to deal with that funny bit in the front by tucking the ends of the waistband under and stitching the ends of he waistband to the top "tab" of the crotch gusset. You can see in the finished pant that the crotch gusset neatly splits the waistband at the front. I have simply hemmed the top edge of the crotch gusset, although I may at a later date cut a small piece and sew it onto the backside to strengthen this area.

The only thing remaining after this is to add belt loops. The original belt loops were just cut strips of fabric, not hemmed in any way that has survived. I opted to fold long strips in thirds along their length and whip stich down the raw edge, then cut belt loops out of these. I felt it was stronger this way and would hold up to wear better. Add a piece of tablet weaving for a belt, and voila, pants! And although it may seem like a lot of work, honestly it's not. I drafted these and did two mock ups one evening, and then completed the pants in a second evening of work, perhaps 10 hours total labor?
From the front. Don't judge the "belt" this was my first tablet weaving project
 from may moons ago and it's abit.... funny

and the rear. You can see the sort of baggy bottom effect. You can wear it with the
waistband rolled over the belt or not by personal preference. Both seem to be authentic.
as per artistic evidence.


Eternally happy to be photographed.
At Dancing Fox with the boys
 So there you have it, quick and dirty men's viking garb. All this was completed in less than a week, and that includes having to make the shirt twice. I'm looking forward to getting the embellisments done so it looks better! Right now it's fairly uninspiring.