Sunday, January 31, 2016

January Challenge: "Procrastination" Infant Chemises

The hardest thing about the january challenge was firstly, picking WHICH procrastinated project to do, and second, finding time to do it around all the other backed up sewing that is not historical in nature. I ended up deciding to do these infant chemises partially because I new they wouldn't take forever, and partially because the handwork is something I can do while lieing down with a head cold over the weekend.

I always wanted to make pretty infant things for a baby. When Ladybug was born I was so overwhelmed by being a new parent I did almost no sewing. Then the two boys came and somehow it just never happened. Then Kitten was on the way, and I was determined to make her at least a few pretty things. I started researching last fall, and promptly got sucked down a rabbit hole. I eventually came across Cassels Household Guide which gave illustrated instructions for sewing a babies layette. I was immediately hooked. How fascinating to try and follow period instructions to sew the garments! Then I was so sick at the end of my pregnancy that I did almost literally nothing.

Now with Christmas past and Kitten two months old, I am finally getting ahead of the mundane things like knitting mittens and hats and mending pants, enough to do sewing that's not entirely immediately neccesary.

Cassels household guide comes in the origninal version, dated 1869, and in a revised updated version, which I couldn't find a date for, although it is referenced as circa 1880. The updated version has slightly different, and less specific instructions for sewing an infants chemise, so I decided to go with the earlier version, which was more specific about construction.

 This is the starting point. You take a piece of fine cotton 28 inches wide, measure out from the center 6 1/2 inches in both dirctions, mark, and fold on the marks. Then you carefully measure and mark two slanted lines, and cut them, and cut down the folds for the armholes. the triangular bits are run and felled across the top for the sleeves, and then the "flaps" and sleeves are very finely hemmed, running a small gusset or buttonhole stitching where the flaps meet the sleeve, and then the bottom is hemmed...... Anyone else confused about the "flaps?"

 Thank goodness I was able to find this extant piece from the wisconson historical society, which was dated for the correct period and made in the same way. It appears that the flaps were just left to hang forward and back while the chemise wraps around the child.
 I made up the first one out of cotton batiste. The household guide calls for cotton lawn. This is very close, and I already had it on hand. I carefully turned a small hem all around the neckline, and whipstitched it down, buttonhole stitching between the flaps and the sleeves. I also had to run a hem at the edges of the closure, since i couldn't cut the garment selvedge to selvedge like the original was, as my fabric is more than 28 inches wide. When I tried it on kitten, it worked amazingly well, except I was unhappy with how bulky the small turned hems seemed.

 A little online sluething turned up a better way to hand roll a very tiny hem. You iron down about an eight of an inch, then run a fine ladder stitch over it, and draw it tight. The result is a very beautiful delicate edging with almost invisible stitching. Beautiful, and no more work than turning and whipstitching. I did the whole second chemise like this.
 Finished Chemises, from the front. The bottom one is the first I made, I covered my awkward hem with narrow cotton lace trim from my stash of vintage trims. Very similar to the trim on the extant garment. I made the second chemise with sleeves, sleeves were included both in the extant garment, and in the instructions in the revised household guide. They are contrived with a self gusset, and then french seamed in very finely. The second chemise is trimmed around the neck with a very simple tatted lace edging. Also from my vintage stash. Everything on these little shirts was sewn by hand. The household guide advises that although many people feel that sewing for babies should be done by hand exclusively, modern sewing machines make so fine a stitch that the results are equally nice. Honestly though, for these little chemises, all the work is in the hemming, and even with a rolled hem foot that would be almost impossible on the machine.

the little garments finished from the back. There is no fastening, but since they are intended to be worn under a flannel, which ties about the body, they need none, since the flannel should hold them in place. It's a clever design. soft against the babies skin, and keeping the flannel clear of body oils where it's worn snugly, but so short as to be clear of the diaper area, and therefore unlikely to need changing partway through the day!

I am curious about the construction with the hanging flaps though. It seems that it would have been equally easy to cut them off and just hem the neckline square. I've been trying to think of some practical reason for leaving them, but for the moment have come up with nothing.

I will likely make a few more little chemises, either in this pattern or copying another historical garment. The household guide reccomends that an infant have at least six, and that seems like a very reasonable number even to this modern mama.
gratitous baby photo. It's hard to get an accurately representative
picture of this wiggly little thing!

Saturday, January 30, 2016

Infant nightgowns, with pattern

It is perhaps a trifle old fashioned to sew garments for an infant in this day and age of cheap walmart onsies. Old fashioned and possibly a bit eccentric to some, but sometimes it's just practical. There are of course ethical concerns over cheap clothing, and sometimes' there are budgetary constrictions (much of this solveable by shopping at the thrift store, my favorite place!) Also there is the problem when the stores don't carry what you want, because no one has designed it for mass production. Sure, you can get baby nightgowns. They look like this:
I want to love them. I do, but I can't because it's the worlds most terrible design. They're hard to get on, a dreadful combination of elasticated bottom, too narrow body, and narrow sleeves set at right angles to the body that results in much weeping at bedtime. The sleeves are ridiculously long, and the body too short. My two month old's feet poke out, when they're not getting tangled in the elasticated bottom leading to probelm number three: Their feet get stuck in the bottom and pull the overlarge envelope style neck down over their shoulders.  Then they pull their arms out the neck and the nightgown has become a skirt. Bah. Humbug. And the elasticated bottom (who's idea was that anyway?) makes it hard to really get the bottom of the gown out of the way when you're changing diapers. With the last three kids I just gave up at about a month old and went to footie PJ's. But I really prefer gowns. it's so much easier at 3AM when I have to change a diaper in the dark not to be wrestling with their garments. So I designed a better one.This is a practical garment with a real neck and button closure, deep raglan sleeves, and a wide body. It's easy to get on, comfortable for baby, and practical for diaper changes in the wee smas of the morning. It doesn't uses much fabric, and is quick to make up. I made the prototye in an afternoon, and the rest took less than four hours each, including trimming and a good deal of hand sewing (I can hand sew around the grumpy infant in my lap, machine sew, not so much.)

The design of this gown was inspired both by some historical examples, and by the "bishop" style gown used for smocking. This is also very similar to the way that I make Ladybug's summer nightgowns. Typically I just measure, cut, and sew together for this kind of thing, but since i was going to make a few all the same time, I decided to make an actual real pattern to expedite the process. You can download and print the pattern HERE. I made these as nightgowns, but made longer in batiste or handkerchief linen, and decorated with insertion and tucks it would be a very nice christening gown.

Three gowns from two yards of flanelette and one recieving
Blanket. Pretty unpreposessing laid flat, but cute on the baby!
One gown can be made from 30 inches of 42" wide flanel or flanelette. This is one application where I actually prefer flanelette to true double sided flannel, it is less bulky gathered into the neckline. If you desire to make a gown with a ruffle, a yard should suffice. You can also make one from a flannel recieving blanket, and a scrap of matching flannel (about 10" x 20") for the sleeves, plus a six inch strip for a ruffle if desired. You will also need about a foot of half inch single fold bias binding (I happened to have bunch of this lying around, but you can easily make your own.) a small button, and any trims that you wish to use. Eyelet is pretty. An old pillowcase end trim is perfect to mount on a ruffle. Two yards of fabric and a recieving blanket will make you three gowns, one plain, one ruffled, and one from the recieving blanket with contrasting sleeves and ruffle.

Begin by cutting across the width of your fabric to make a square 30 inches wide by 42 inches (or the width of your fabric) long. Fold this square in half the long way, and cut ten inches off one end for the sleeves. If you are making a gown with a ruffle, also cut a strip the desired width of the ruffle across the width of the fabric. (I liked a ruffle of about 6 inches.) Use the template to cut the sleeves. If you wish to make a ruffled gown, cut sixteen inches from the bottom of this peice instead of the ten pictured. The excess may be used as the sleeves for another gown, if for instance you wished to make one from a recieving blanket.

If you are using a recieving blanket, like this one that was too pretty to make into diapers once outrgrown, fold it in half and cut the curved portions off the ends. Cut your sleeves out of a piece of flannel about 10x20, and cut a strip for a ruffle if desired.
 You may either gather your ruffle and add it to the end of the body before you sew up the body, sewing up the back as one seam, or you may make the rest of the gown and then add the ruffle. This is up to personal construction preference. Either way, sew the body of the gown up with a 1/2 inch seam to within about 4 inches of the end, and backtack. Roll the seam allowances back at either side of the slit, and whip stitch them down, starting about a half inch from the top edge so you don't clip the end of your seam off later when adding the neck binding. Then trim and fell the back seam.

 With this done, mark the center front with a pin, and line it up with the center back slit. Use the template to cut the corners for the sleeves. (you can see my felled seam here. It's a bit tricky right at the bottom of the slit, but works out fine. I felled the back seams by hand. It just seemed easier at the time, and I could do it with a baby in my lap)
 Sew the sleeves up with 1/4 inch french seams.
Pin the sleeve into the dress with wrong sides together. Do not panic if the top edges do not line up! this is going to be a french seam, when you sew the second part of the seam, it will line up fine. Sew it at 1/8th inch, turn to the inside, and sew a 1/4 french seam. Do be careful sewing that first seam up. This is bias to bias (which we generally attempt to avoid) so it's easy to accidentally stretch out as you sew, which will make the finished arm look very strange.


Once the sleeves are in, cut the front neckline down to a slight curve, and the back neckline to an even slighter curve. I trimmed the front neck down about an inch at the center front, and the back only maybe a quarter.  Then run a line of basting all around the neck.


next, cut a piece of binding 12 inches long, and fold the ends under a half inch. Fold it in quarters and iron it to mark.


Place the halfway mark at the center front of the gown, and position the two quarter marks at the center of the sleeves. Gather the neck to fit.


sew the neckband down (I found it easiest to do this by hand with a firm backstitch) then flip the binding down to the inside and whipstitch it into place.

Then make a small button loop with complimentary thread, and affix a small flat button. This pearl button is one from the giant stash of buttons we found in the seat of a sewing chair my mom got at an auction.

Lastly turn a very small hem under on each sleeve.

If you haven't added the bottom ruffle now is the time to do it. Gather it to fit, sew it with a half inch seam, trim the ruffled portion of the seam allowance, and turn down and fell the body portion of the seam allowance to the ruffle I did this by hand with a whipstitch. If you are not doing a ruffled gown, hem the bottom to whatever depth seems practical to you. I prefer the gowns to be at least eight inches longer than her feet, so that they stay down over her feet, keeping them warm.
And here's Kitten in one of her new gowns. You can see I've rolled up the sleeves. She has growing room in this nightgown. It should fit until she's standing up in her crib and needs shorter nightclothes. This one is trimmed with an antique knitted pillowcase trim on the ruffle.

Saturday, January 16, 2016

Adding hip ties to a Mystic City corset

I decided that I was not going to make myself a new corset for the period immediately postpartum, because it would just be ridiculous trying to put the hours of work in with a new baby. I didn't want to use my old crappy tubular off the rack model though. Making my first corset for myself last year really opened my eyes to the amazing difference a good fit makes, especially if you're further from average in terms of dimensions. The problem is that I'm pretty severely pear shaped, small ribcage, wide hips, small natural waist, and with that I'm tall. With my pre pregnancy measurements I looked around and decided that the MCC 68 was giong to be the best fit for me, both in terms of measurements and because it has a tall back, and just about the longest front you will get off the rack. Alas it does not have hip ties, and the hip measurement is a hair on the small side. I dithered for a while, but when Mystic City had a sample sale, and the almost identical MCC3 was available for a great discount, I couldn't resist. I bought it and figured I would alter it later by adding hip ties to open it up. I can't claim to have invented this process. I learned how to do it from the excellent video tutorial from Lucy's corsetry. This blog though will walk through the steps to do it on a Mystic City corset which has its own unique construction. It may be interesting to anyone thinking of doing the same thing to their own, but if you are I highly recommend you watch Lucy's video as well.

Here's my corset before I did the ties. You can see that I can't reduce the waist any further without bowing and possibly distorting the bones. it's also a more cupped hip shape than I need. You can see it's full up high (where I actually have a little extra room, and beginning to cut into my hips lower down.

 The first thing I did was remove the modesty panel and lacing. I marked where the bunny ears were with some nail polish on the inside of the grommets. I may move the bunny ears up one grommet though, as you can see in the back picture it looks like they're just below my natural waist and the waist tape. You can also see here how I've bent the back bones. Believe it or not I could use to bend them a bit more.


 Then I removed the bottom binding past the first set of hip boning, this is where I need the room the most, and so where I will put in the hip ties. I decided to start the hip ties about where the hip starts to curve in dramatically, since I don't need room in the high hip, just the low hip. I marked the top of the hip tie with chalk, and removed the side bones. I marked the side bones with which side and whether it was the front or back bone. These bones seem to be identical, but it's still good practice to put the bones back where they came from.


 As you can see, this corset is constructed with felled seams. The seam allowances all point one direction instead of being pressed open. Thus the pieces are handled with the lining and the exterior fabric together. It's a good construction method but makes this whole process a bit trickier. You can see as I unpick the seem how on one side the seam allowances for the lining and exterior are folded in, then the other panel with the seam allowances facing forward is slotted between the layers. Then the whole thing is top stitched together, and the boning channels are sewn. I believe there's actually a special
 attachment in the factory that they use to do this accurately. When I've done similar things it's required a lot of basting..... Anyhow, I took the seams out about an inch past the top of my desired opening to give me room to work, and picked out all the leftover thread ends.


 Here's the only tricky part. Now you have to clip the seam allowance on the side that was slotted in and has the seam allowances facing forward. This will allow me to turn those seam allowances in for the part that is going to be open, while leaving the rest of the seam enclosed in the body of the corset. I clipped at the top of my desired opening just exactly to the seam line. No more. No less.
 This allowed me to turn the seam allowances in, press them, top stitch very close to the edge up just past where I had clipped, then re sew the other edge of the boning channel, sewing over the remaining stitching that I had not ripped out in the main body of the corset. It's important to overlap where you stopped seam ripping by at least an inch or so: this keeps the seam from continuing to unravel on its own.


 Now the tricky part. I slotted the seam back together to the place where I had clipped it. Then I pinned the top (the horizontal pin) to keep it from sliding apart. Then I pinned the the lining and the exterior together to keep the panels from sliding while I sewed. Now I top sttiched along very close to the edge, and up over my pin, overlapping the orignal seam. I then backtacked for extra strength.


 Now I could sew the exterior stitching line for the boning chanel, again, overlapping the original seam. The last thing I did, which is probably overkill, was to tack back and forth at the very top of the slit to keep pressure off the join. It's only three stitches back and forth to keep from interfereing with the boning channels but it's a bit of insurance.


After that it was just a matter of marking and setting the grommets outside the boning chanels. I marked both sides with pins, then set the grommets using a hand grommet setter, and a tailors awl. I would really like to get one of the fancy bench mount grommet setters that more easily mount larger two piece grommets, but until then, these smaller single piece grommets hold well on low stress applications (like hip ties)  I set ten grommets on each slit, five on each side. I got stuck here for about a week and a half while I debated ribbbon colors, didn't get out to the store to buy new ribbons, and tried to decide whether I should add some lace applique over the hips while I had the binding off.

       I eventually decided against the lace. More because I wanted my corset done and back than because I didn't want it! I also decided to use the flat cord laces that came as an alternate with my corset  for a while. They're easier to undo and redo and I want to try several different ways of lacing up the back until I come up with something easier to do up myself. The high back of this corset was making me have to just about dislocate my shoulder getting the top tight, and I was having trouble finding which ribbons to pull. The solution was having my husband lace me up, but that's not always practical. Here it's laced "straight" with bunny ears, as per Lucy's Corsetry video tutorial.

I laced the hip ties with 3/8 inch black double sided satin ribbon that I happened to have. It matches the laces for now. When I figure out what lacing pattern I want to use I will go back to the colored satin laces (they're so pretty) and will match the hip tie ribbons to whatever color I choose (likely kawasaki racing green....).  I put the original binding back on, which was a little tricky since it had to cover a bit more ground. I fudged folding it under at the tips of the slit a little, and had to tidy it up with a few hand stitches, but overall it went better than could be expected. The binding is some sort of synthetic grosgrain, which is amazingly flexible, and is simply topstiched on.


Here you can see the finished product. About four hours of work all told, start to finish (most of that in setting grometts and seam ripping), and a week and a half of dithering over colors and lace. The fit is hugely improved. It no longer digs into my lower hips, and the lacing gap is nice and straight. I was also able to close it a little further comfortably even though I haven't worn anything in almost two weeks! I did take the lacing protector panel out. The heavy boning in it was nice when I had a bigger gap, but with the moderate gap I have now it didn't seem neccesary. I will say that these flat shoestring style laces cut into my back a bit without it. I may put it back in until I get my final laces and then try again without. It may also partially be this "straight" lacing style, because all the crosses are at the inside, I seem to be able to feel them against my back more than other types of lacing, which is a downside to it. On the positive it's very easy to Iace myself up this way. I may try chevron lacing next, that would lie flatter inside the corset.

Wednesday, January 6, 2016

When life gives you winter babies, knit sweaters!

I've been out of touch with my blog for most of the second half of 2015. We just got so crazy trying to finish things up around the house before the arrival of our new little girl (Doors, On bedrooms! A happy thought indeed!) And I was dragging about pregnant and sick. I did VERY little except barely keep up with the house and school. Then our new little bundle of baby arrived november 30th and life has been a crazy whirl ever since. I haven't done much in the way of costuming since then, but have finished off some christmas projects, and knit a bunch of baby items. I thought I would just post a quick summary of the things I've been busy with before we return to our regularly scheduled programming!

I didn't sew or knit much for Kitten before she was born because I didn't know how big she would be. I had two nice wool infant sweaters, one I had knit for Crash, and one mom knit way back when Ladybug was born. I swapped the buttons on those for girly colors and figured they would do. When she arrived at 8 lbs. 12 ozs and 22 inches it was obvious that those sweaters weren't going to last her long. She was also in desperate need of a little cap to wear when she went out into the main house, which can be a cold place, since we heat with wood. I spent my first two weeks lying on our bed with my new baby, nursing, napping, watching netflix and knitting.

The first thing I did was take the beginnings of a cowl which I had knit a few inches of the lace for, then lost the pattern/forgotten about for two years, and finish knitting it with a bottom up raglan pattern to make a cute little swing cardigan. I was orignially going to unravel this and start over with the yarn (handspun alpaca should not be wasted) but the lace I had knit was so pretty I couldn't bear to part with it. So I found a raglan cardigan pattern knit at similar gauge, decreased a few stitches evenly in the first row of stockinette to match the number of stitches in the cardigan body, and finished it off as a sweater. It turned out remarkably cute. Couldn't repeat it if I tried, but it's adorable!


I had a little of the alpaca leftover so I knit her a little lace bonnet Nice for days when the house is chilly, and for car trips. This is from a vintage pattern: Gift woolies for a new prince which was originally printed in the australian women's weekly. It was knit on size tiny needles and took almost forever (including user error that made me rip the lace back once) but it's a lovely little bonnet. Very functional and pretty.

After that I got  back to sweater knitting. My mom had given me a skein and a half of some wool blend yarn she hated working with (thanks mom....) which is about enough to make a baby sweater. I decided to make up the really lovely maile sweater. I had originally wanted to knit this for my besties little boy because it's hawiian and she's hawiian (the pattern on the shoulders is supposed to look like a Maile leaf lei). When I proudly showed her the pattern, she snickeringly told me the Maile leis are worn at weddings because they symbolize fertility. Not the most appropriate theme for a newborn sweater perhaps. I meant to make it anyway as a laugh, but didn't get to it. So now I've finally been able to knit it. Its an absolutely beautiful sweater, and she and I giggle every single time we look at it.

At this point i realized that it was almost christmas and I'd better get busy if anyone was going to HAVE christmas. Ladybug and I made about a gazillion dryer balls, the boys helped me make hot choclate mixes, and we were generally busy. I was super proud of Ladybug because not only did she help with the dryer balls, she picked fabric and trim from my stash and made lavender and rose petal sachets for everyone as her own personal gift. All by herself too, cutting, sewing, ironing, filling, and bow tying. She even wrapped them herself and made the most beautiful little cards for them. 
Dryer balls, handmade tote bag, and Ladybug's sachets.

meanwhile I madly knit and sewed any time the kids weren't looking. I did get everyone's traditional christmas PJ's made up, and got the boys boot socks knit. I still have to finish mittens for everyone and knit Ladybug's boot socks for the year. I need to spin some yarn up for her bootsocks, but I'll do that before I start any more knitting projects. I love this boot sock pattern it's plain vanilla but a great pattern. And last year I finally found a vintage mitten pattern that really works well. It's easy to knit, and makes a good dense mitten that fits well, stays on, and keeps the snow out. Last year's mittens really held up to playing in the snow. I expect this years will too! 
Christmas Jammies! The boys get nightshirts because they constantly complain that
Ladybug gets nightgowns and they don't. 

I was really sad about the number of thngs I didn't have time, or hands, for. Christmas baking was virtually nonexistant, and I didn't get any quilts done or the girl's christmas dresses made, which I was particularly sad about. I have the most lovely victorian baby gown pattern and was going to make a regency dress for Ladybug, and the baby gown up for kitten with matching trim and fabrics. It would have been amazing. However there is always next year, when I will start working on things in november and will NOT have a newborn who needs to be held every waking moment! 

The only thing I've gotten done since christmas is madly knit up a pair of soakers for Kitten, who was developing chafed areas where the elastic on her diaper covers was, which was not responding to either powder or lotion. So I knit up these two soakers and put them into the diaper cover rotation, particularly overnight and at naps when the elastic on her covers tends to get damper than usual. They're both cute, easy to knit, and functional.

I've got a few more small projects lurking around the dining room table needing to be finished, but after that I'm really looking forward to starting this year's Historical Sew Monthly. I hope to get a lot more entries made this year than last.  I also really hope to be more consistent about writing up the things I do and posting them. So much interesting stuff left to be done!!! 


Tablet weaving traditional viking trims

SCA demos are a wonderful thing. They cause you to dig through your que of projects and decide which ones might be portable enough to trundle along with you and interesting to the general public. We recently had a demo at a local library, and not only did it encourage me to finish up my Skjoldehamn hood in a timely fashion, it encouraged me to start weaving trim for various things. I haven't tablet woven since I was a teenager, when I did it as part of a 4H project. My memory of that experience is somewhat hazy, other than that we used a backstrap style loom, and it wasn't very portable. The finished product from that was a belt that held up my Revolutionary war skirt for several years, and is now holding up my husband's Thorsbjurg trousers. Needless to say I'm far from an expert!

If you do any kind of early period work though, tablet weaving is indispensable. In various styles it is the single most common decorative touch to clothes, more common from what I can see even than embriodery. It also puts in showings as belts, fasteners, and later hose garters. Strap weaving in all its forms was an indispensable part of early fiber arts, but particularly tablet weaving. Our own idea today of what tablet weaving can accomplish is hilariously limited by period terms. Certainly repeating geometrics can be found, but there are a wealth of fabulous period finds, from geometric (normally not repeating, or if repeat several patterns) to solid colored bands decorated with soumak, a kind of woven in surface decoration rather like embroidering you wove, to full on brocaded patterns with animals and plants done with silks and metallics. Bands seem to be often stylistically simalar, but rarely be the same, as if weavers rarely reapeated patterns, instead seeming to view each new project as an opportunity to devise new combinations and patterns. This seems to be particularly true of the warped in geometric patterns.

There is a whole world of period tablet weaving to explore, and most of it is accomplished in very different techniques than modern tablet weaving. In fact it's not really "true" weaving at all, where warp threads go over and under, catching weft threads, but instead is warp twining, where groups of warp threads continously twist around themselves, and weft threads are caught between the twists. In that way it reminds me more of sprang than of actual weaving in structure. Finished it is far denser and stronger than a standard "over under" weave.

Most of the extant patterns are quite complex, and beyond my (very) novice skill level, but on of the bands found at the osberg ship burial (a veritable treasure trove of textiles and equipment, including a tablet weaving loom, and a half finished band still attached to warp and cards.) is a relatively simple repeating pattern of squares. I am indebted to Shelagh's website for both basic tablet weaving information so I understood exactly what was supposed to be happening, historical referances, and clear patterning instructions for reproducing the band.

The narrow Osberg band. 
The orginal osberg band was worked in two colors, but since i am planning on using much of this to trim the skoldenhamn hoods I recently made the boys, I made the borders in a third color so that the trim would stand out from the blue and white of the hoods. I used the same blue and white as in the hood, and added a red to form the borders. These are all colors popular and available in period, however, since I'm currently a great believer in using what is on hand (thereby relieving the crowding in my storage areas), only the white thread in this is wool. The rest is cotton, or cotton blend. Technically the whole thing should be done in linen or wool, or to be absolutely correct to the source, silk, but I haven't got cones of those sitting about. I would like to use handspun for a future project, but I'd also like to get the hoods done, and use up the cones of weaving thread I've got lurking in my studio.

The other complication of tablet weaving is how you tension it. Obviously you can use a backstrap loom and tie off to a immoveable object, but that leaves you somewhat imobile for the duration. Or you can work on an inkle loom, but that severely limits the length of warp you can use. Looking to period equipment, a loom was found at the osberg ship burial which is very similar to looms seen in later artwork: two uprights connected by a low bar. You tied off the warp to one upright, and the finished band to the other, and worked between the uprights, advancing the warp by untying and retying.
reproduction Osberg loom and lady tablet weaving from the book of hours, 1400-1410
 The obvious problem with this solution is that while it doesn't tie you in place like a backstrap, it's simply not very portable. It also takes up a lot of room in your home, which I frankly don't have since I already have a lot of equpiment (including a full size loom) shoved into a tiny studio and overflowing into other parts of the house. An internet search provided me with plans for a sort of modern box loom, where the warp and fabric are tensioned by being clamped between wooden blocks held by bolts. My husband (bless him) made this for me in less than an hour, and the whole thing cost about $10. It's portable, you can put it down to go referee children, and it doesn't take up much real estate. it may not be period (and it's always interesting to try period tools!) but it's much better for me!
My loom (Not the osberg band warp though)
I don't have a warping board of my own, so I measured this warp by the time honored "two chairs upended on a table" technique. Which works great when you don't need a super specific length. I just wanted a long warp, because if you're going to weave trim, you might as well weave a bunch. This ended up being something around 18 feet probably, considering it was a standard banquet table. I threaded the warp onto the tablets, tied the tablets up in a bundle (to keep them from getting tangled) and chained the rest of the warp. By "chaining" the warp (making it into a chrochet chain essentially, although you don't use a hook) you much decrease it's length, making it less bulky. More importantly, chaining keeps it from tangling, and since tablet weaving is not wound onto a back beam, this is important. With the warp all ready, I put it through the loom blocks, securing the starting end with a knot. Then I adjusted the tablets so they had the threads in the correct color order, and the threads going through the card in the direction as shown on the pattern diagram (in card weaving the threads can go through the cards L to R, or R to L, and this changes the pattern produced). I finished this the night before the SCA demo that I was warping for.

The next day when I started weaving I immediately realized that something had gone wrong, because the pattern was not looking even remotely like the osberg band! Review of the pattern graph revealed that I had threaded one card with the wrong colors, 3 white and 1 blue rather than 3 blue 1 white, and this was producing a totally different pattern. Since I didn't have the warp threads with me at the demo I decided to keep weaving in the "oops" pattern for the demo, and fix when I got home. I finished enough of the oopsie pattern to make a belt for one of the boys, then took out the two wrongly threaded white threads and replaced them with blue. The extra threads can't be chained with the rest of the warp, but are butterflied up to keep them from tangling. They could also be wound onto small pieces of cardboard to keep them tidy. I wove a few inches onto waste acrylic yarn, which can be removed later to give me enough warp to tie off the ends.


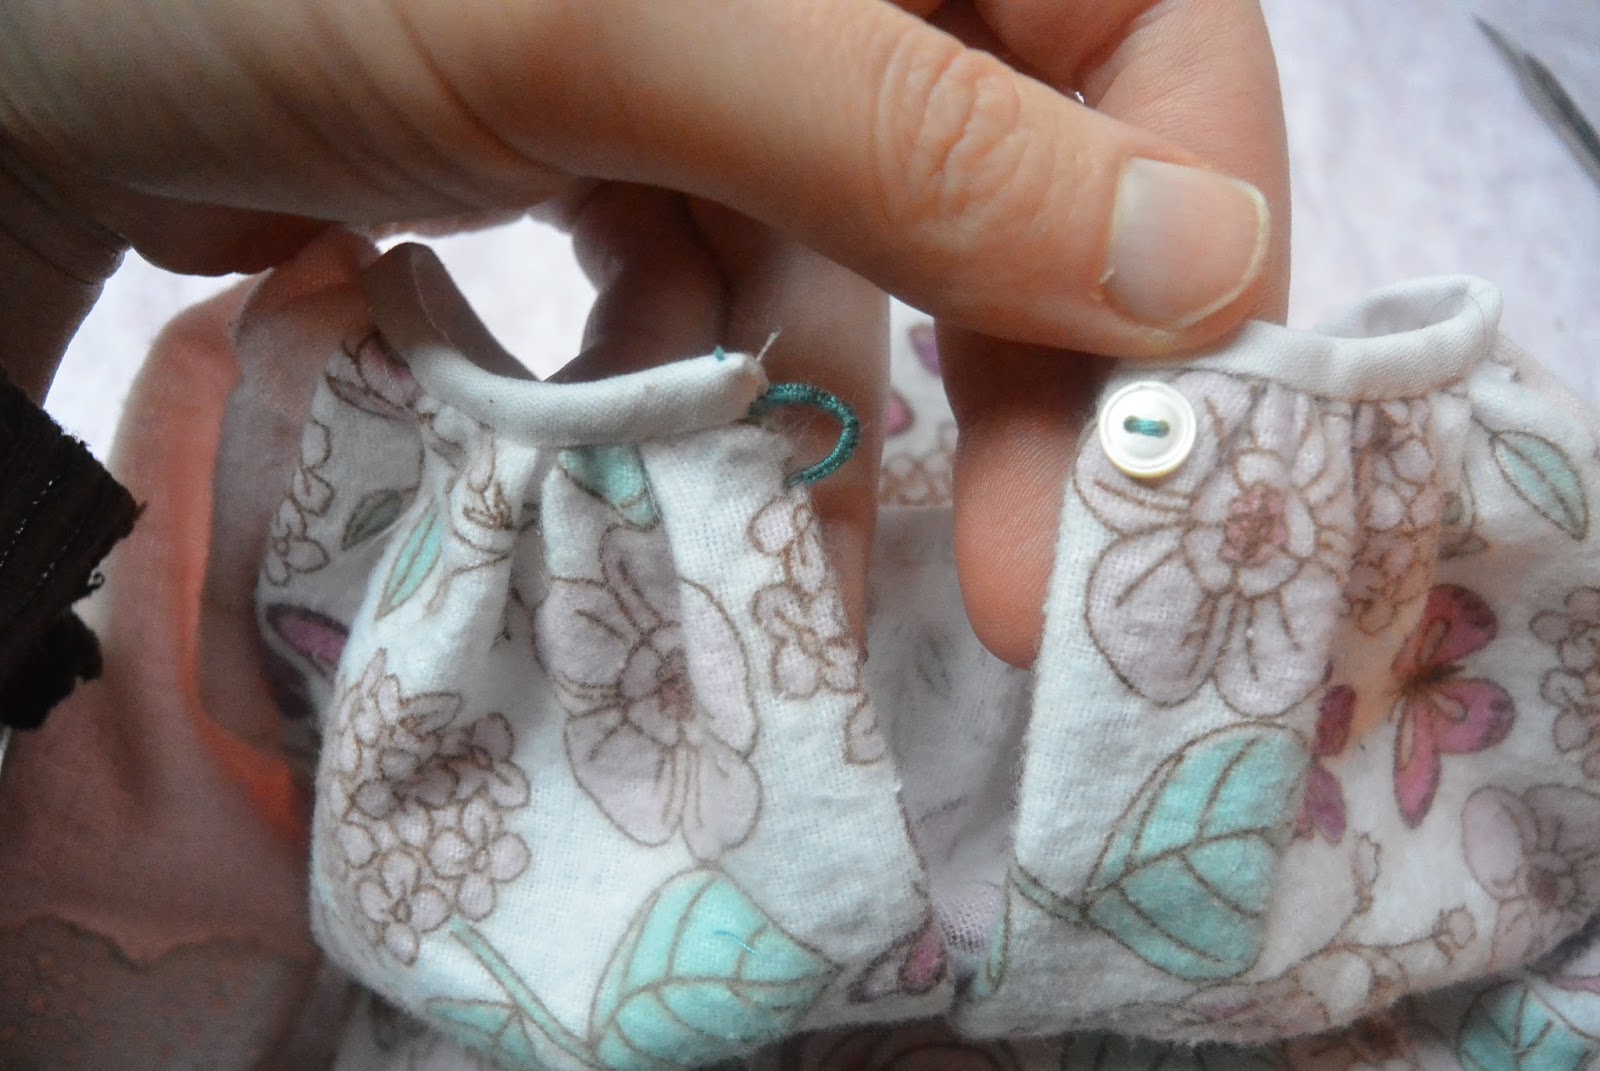
The only consistant problem I had after fixing my warping oops, was that I kept having weft knobs at the edge of the work. Everything that would keep normal weaving from doing this didn't work, so I shelved the loom until I could get help, since I didn't want to weave a whole lot more sub standard trim. I figured that it was some silly little detail I just didn't know about, and when I went to a recent SCA arts and sciences event took my loom with me. Thankfully one of the very experienced fiber artists there was able to help me figure it out. Turns out in card weaving rather than pulling the weft tight to the edge and then beating, you leave a loop at the end, beat, and then pull tight. This small tweak made my problem go away immdiately, and made my selvedges straighter. Sometimes you just need someone with experience to help you out!
see the weft bumps at the top edge? So untidy looking!
 Hours of weaving later.... I have finished trim! Ironing it made it consistantly flat, especially where I had reversed the cards. There are a number of options for finishing the ends if you want to leave a tassel (as for a belt) if you are not going to leave a tassel I suggest running a close machine stitch across the end of the band to keep it from fraying.
This is also the "oopsie" pattern.... 

You can knot the ends of the ties, but I don't like doing this as it makes the whole end of the band spread.
I much prefer to leave a long tail of weft thread, and then knot it across every group of four threads   (each card) makeing what looks like a strong backstitch across the end of the band. Then the excess weft thread gets woven back into the selvedge and clipped. 

All together a sucessful first return to tablet weaving. I have another band started, and even shared what I had learned at a recent arts and sciences meeting (hopefully getting more people hooked on it!) Hopefully I will be able to post the finished objects in an upcoming blog! (still have one more hood to finish up!)