Crash just turned six, which is the age you're allowed to start youth combat in the SCA, so I just made him his first set of fencing gear. For rapier fighting, the youth gear requirements are the same as the adult, which means that he has to have his torso covered by puncture resistant material, and the rest of him by abrasion resistant materials. He needs gloves, a hardened leather or metal gorget (metal is better for adults, but kids are only allowed to fight with foils, and have less body mass, although their point control is worse, so I consider leather to be ok for them.) a helmet, and a hood/drape/coif of puncture resistant material over the helmet. All openings must overlap by at least 3 inches. Currently Crash is super into being a viking, right down to his "viking hair" (which he's spent more than a year growing out from a mohawk.) So I decided to stick with that theme and try to make him a small viking outfit that would be suitable for fencing: a knee length tunic, lined to the elbows with heavier material, and a hedeby style hood sewn to his fencing mask for a drape.


I used the ripped squares as a pattern to cut out the brown mystery twill, only cutting half the length of the arm. I thought the arm looked a little skinny here, and I should have gone with my gut, and added a gore to make it a little fatter: it fits with plenty of ease, but it's kind of a skinny looking sleeve, and a bit of a wiggle for him to get into, even with the armpit gusset. Next time I'll know better!
I put the tunic together by sandwiching all the seams except the final underarm seam, which I serged. That way almost all the seam allowances are on the interior. It makes a nice flat finish, and keeps the lining from twisting around independently of the garment. It also keeps the exterior fabric from bunching or bagging, which can happen when you have a heavy lining on a lighter outside fabric. Typically in that situation you'd use the heavy fabric as an underlining, then finish off with a bag lining, but for instances where you don't want the extra layer, this is a great solution.
 If you're going to construct a tunic this way, you have to finish off the neck first unless you want to add an additional layer of neck facing: in which case, carry on. I put the lining and the garment fabric right sides together, sewed the keyhole neck seam, graded, clipped and turned it, and used a running stitch in heavy linen thread to keep it from rolling. I worked the tip of the slit in buttonhole, and put a tear bar across. Then I added a flap to go behind the slit which overlaps the required 3 inches and closes with velcro.
Next, sew the seam, clip it to reduce bulk, and iron it flat to set the stitches.
Then turn one layer of the lining, and one layer of the exterior over to sandwich the seam, and press everything nicely.
Voila! a beautifully enclosed seam. I've been able to do this for a whole gown for Ladybug, only having to do the last lining seam by hand to get a completely finished interior that acts much like a flatlining, but looks like a bag lining. It's nice when you don't want to flat fell, and need to underline something for some reason. (here so it passes puncture testing.) In this case I didn't need the strength provided by flat felling, and a flat felled seam would have been very stiff, which could have made the tunic hang funny.
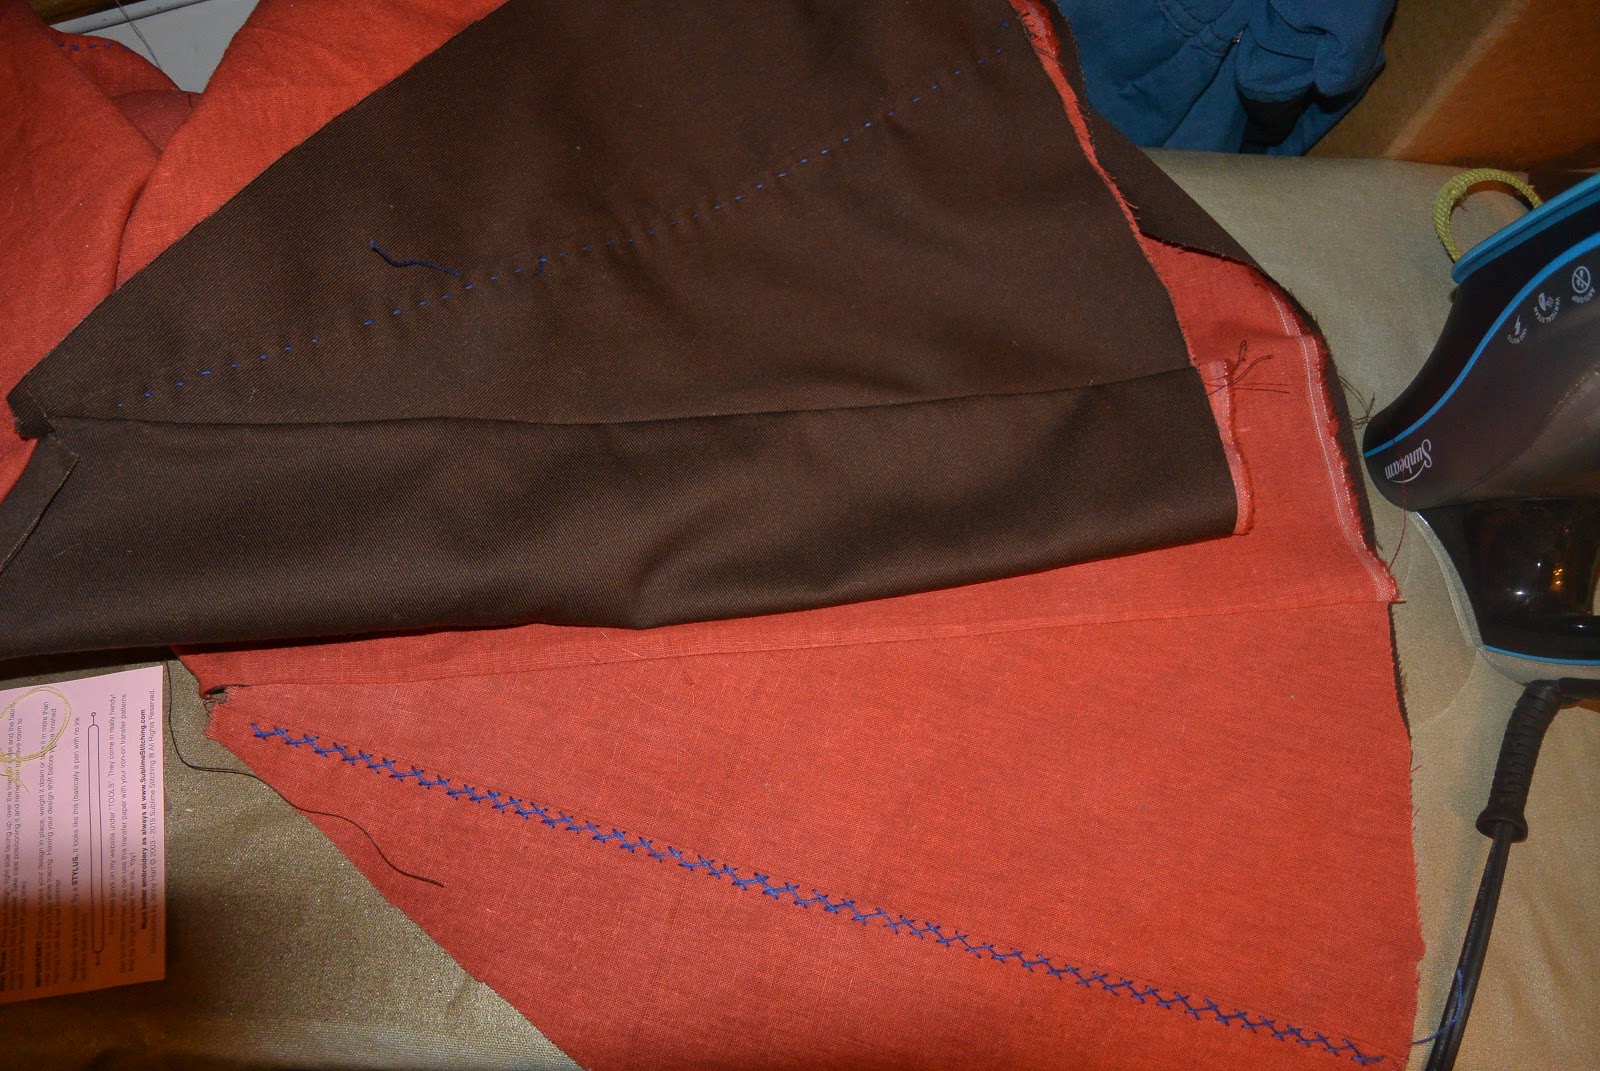

After I sewed each seam, I worked it over in herringbone stitch, over the seam allowance, with heavy linen thread. This was mostly decorative, although it also holds the seam nice and flat.
I finished the tunic by sewing the two long underarm seams, and then serging them I hemmed it with a strip of matching blue bias tape I had lurking in the stash as a hem tape. with a garment this thick, a hem tape is much nicer and less bulky than a traditional rolled hem. Also traditional rolled hems are more difficult on curved tunic hems because you're trying to ease a larger circumference into a smaller one. I used the last length of the blue linen thread to running stitch the sleeve hems up.
 I made the hood the exact same way I made the toddlers skjoldehamn hood, except sized to fit a fencing mask. I ripped the squares and cut out the lining in the same way as for the tunic. Instead of just ironing the edges in and lining up and pinning everything: like I did for my previous skjoldehamn hood, I sewed together all the edges I was going to eventually seam, and then turned the pieces. This made the sewing easy since things stayed lined up.
 When this is folded flat and ironed, it makes a beautiful interior finish, and a lovely exterior seam. Like the finish in the tunic, this method of construction ties the layers together at the seam, and keeps them from twisting inside the garment, or bubbling, which in something that is gong to be yanked on and off over his head, is nice! it's also an extremely portable project. I did most of this in the car.
Unfortunately there was a sad ending to the first part of the tale of the hood. I somehow managed to make it just the right size for Crash's HEAD, and NOT for his head in the fencing mask. So, I finished that one off for him to wear (his old hood had to be given to Bang) and made a second that would fit his fencing mask with the leftover yellow. I had to make a little seam to get a long enough piece for the top, but it doesn't really show.
 I also realized after hood #1, that there was a problem with the hood as is for a fencing drape: You can't get your hand up the back to fasten the velcro strap that holds the helm in place. As I think back on it, the other hoods I've seen for fencing drapes button down the front, which allows you to get at that strap, which is required by regulation. My options became, make the neck wide enough to allow you to flip it back up and get to the back of the hood, or put some kind of closure down the
 front seam so that you can open the hood to fasten the strap. I didn't like either of those options, so I put it together, pinned it onto the hood, and figured out that if the back square goes up a little higher than you might usually want it to, you can flip the back of the hood up over the top of the mask to put it all on. Having breathed a sigh of relief I moved forward and put hood #2 together.
 I put some bears on the hood for him, since a bear is the animal he picked for his SCA kid tag. I used an old wool skirt that came in a bag of donated fabrics and had moth holes, which made it ideal to rip apart and use for applique. I edged the hood with a strip of the wool, then cut out some bears and appliqued them down with Perle cotton thread. I cheated and used some fusible net to hold them in place while I stitched them. It will also make them less likely to tear loose from the stitching under direct hits from a fencing foil. For a period finish I could have quilted the appliques down, or not been so silly as to fancy up such a utilitarian object. Although, historically speaking the vikings liked to fancy up utilitarian objects, so I'm in good company.


I cut the lining and the straps from the deerskin leftover from Husbeast's gloves. I used the same stuff to line Ladybug's gorget, it's supple and soft. I just put all the pattern pieces together, and traced around them to make approximately the shape of the finished piece. This doesn't have to be super precise as leather is so flexible, and you can trim it up a little after it's all sewn in.
 The finished Gorget. I pulled the lining over the top like they did on my husband's metal model, an upgrade from Ladybug's model. It has a leather "hinge" on one side, and a buckle on the other. Everything is sewn with heavy duty waxed carpet thread. I learned with this piece to punch ALL the holes before you water harden the piece: I had to use a drill with a very small bit to make the holes to sew the straps on. It's not super pretty, but it does fit, and do the job it's supposed to do.
 |
| Crash and Ladybug in their gear. |
 |
| With helmets and hoods! Ladybug has assumed fencing feet. |
No comments:
Post a Comment